Do you want to show what different habitats look like? Use this tutorial to learn the basics of diorama construction.
Dioramas are miniature or full scale models that show some kind of environment and the creatures that live there. These creatures could be humans and the environment a modern city but the most popular dioramas in museums display different animals in their natural habitat. These dioramas are built to show visitors the ecology of different places: what kinds of animals and plants live there, what do the animals eat, what is the weather like, how do the animals survive in this environment? The best dioramas like these two at the American Museum in New York and the Bell Museum in Minneapolis are built by skilled craftspeople and are so convincing that it is easy to forget that you are not actually looking at the real thing.


What you’ll need:
Materials
- A cardboard box
- Paper
- Paint (and/or colored pencils and markers)
- Gesso
- Clay
- Tape
- Thin wire
- A sponge
- Rocks, twigs, gravel, sand
- Flocking
- Wood glue or Elmer’s Glue
- Models of animals (you can buy these at museums or make your own out of clay)
Tools
- Hot glue gun (Hot glue guns are dangerous. Always use with adult supervision and remember to unplug the glue gun when you are finished)
- Scissors
- Paintbrush
How to do it:
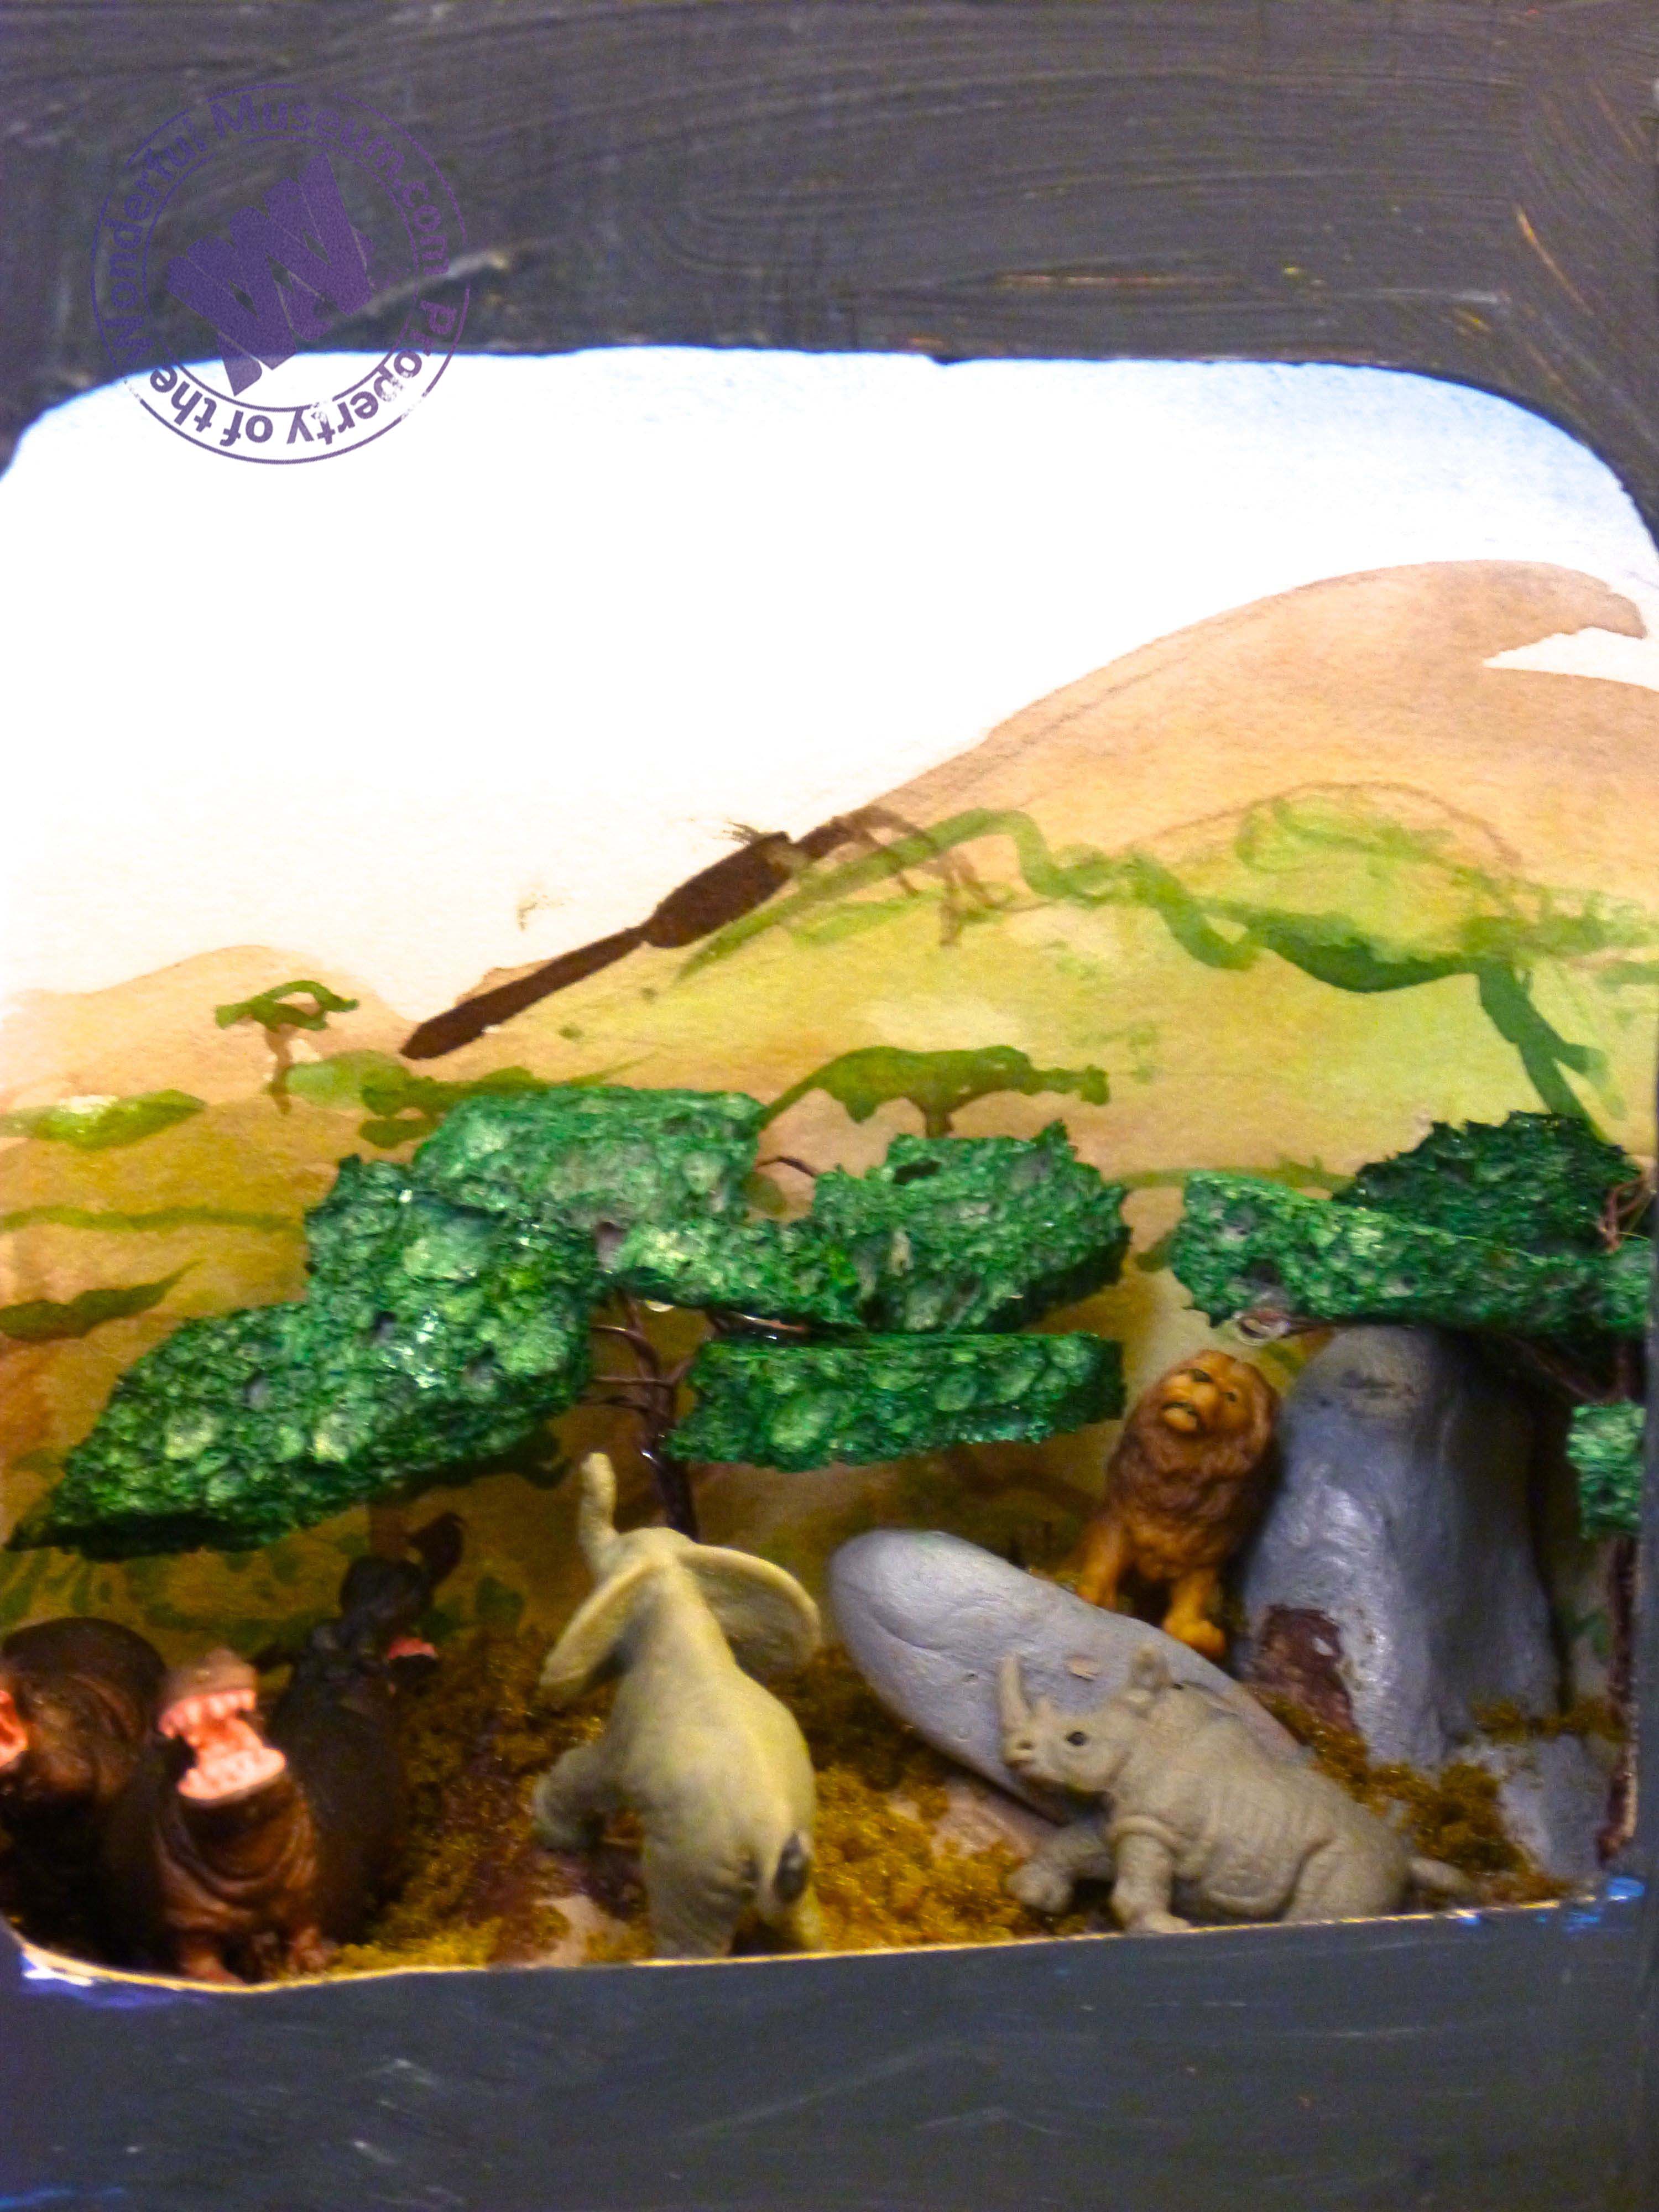
The first step when building any diorama is to decide what habitat you are going to build. For this example, I am going to build a well known grassland biome in East Africa called the savanna. Once you decide on your habitat, start researching everything you can about it. What kinds of plants and animals live there? What color is the soil? Is is rainy or dry, hot or cold? Museums, your local public library, and the internet are all good resources. Save pictures you find of your habitat so you can use them for reference later. Luckily, I was the Head Scientist on a Wonderful Museum expedition to East Africa several years ago so I have lots of pictures and field notes from the savanna. This picture shows three giraffes (and some other animals, see if you can find them!) running across the grassland. Sketch out some ideas for what you want your diorama to look like. You could create a scene from a real place or make up a more general scene as long as the habitat is still realistic.

Once you know what scene you are going to create, find a sturdy cardboard box to build your diorama in. This box can be as big or as small as you want. Just remember that if the box is too big, it will be hard to carry around and take too long to build. A box that is too small will be too hard work with because everything will be so tiny. I’ve chosen to make my diorama pretty small so that I can fit several biome dioramas next to each other in my museum. A pasta box is a good size for what I am looking for.
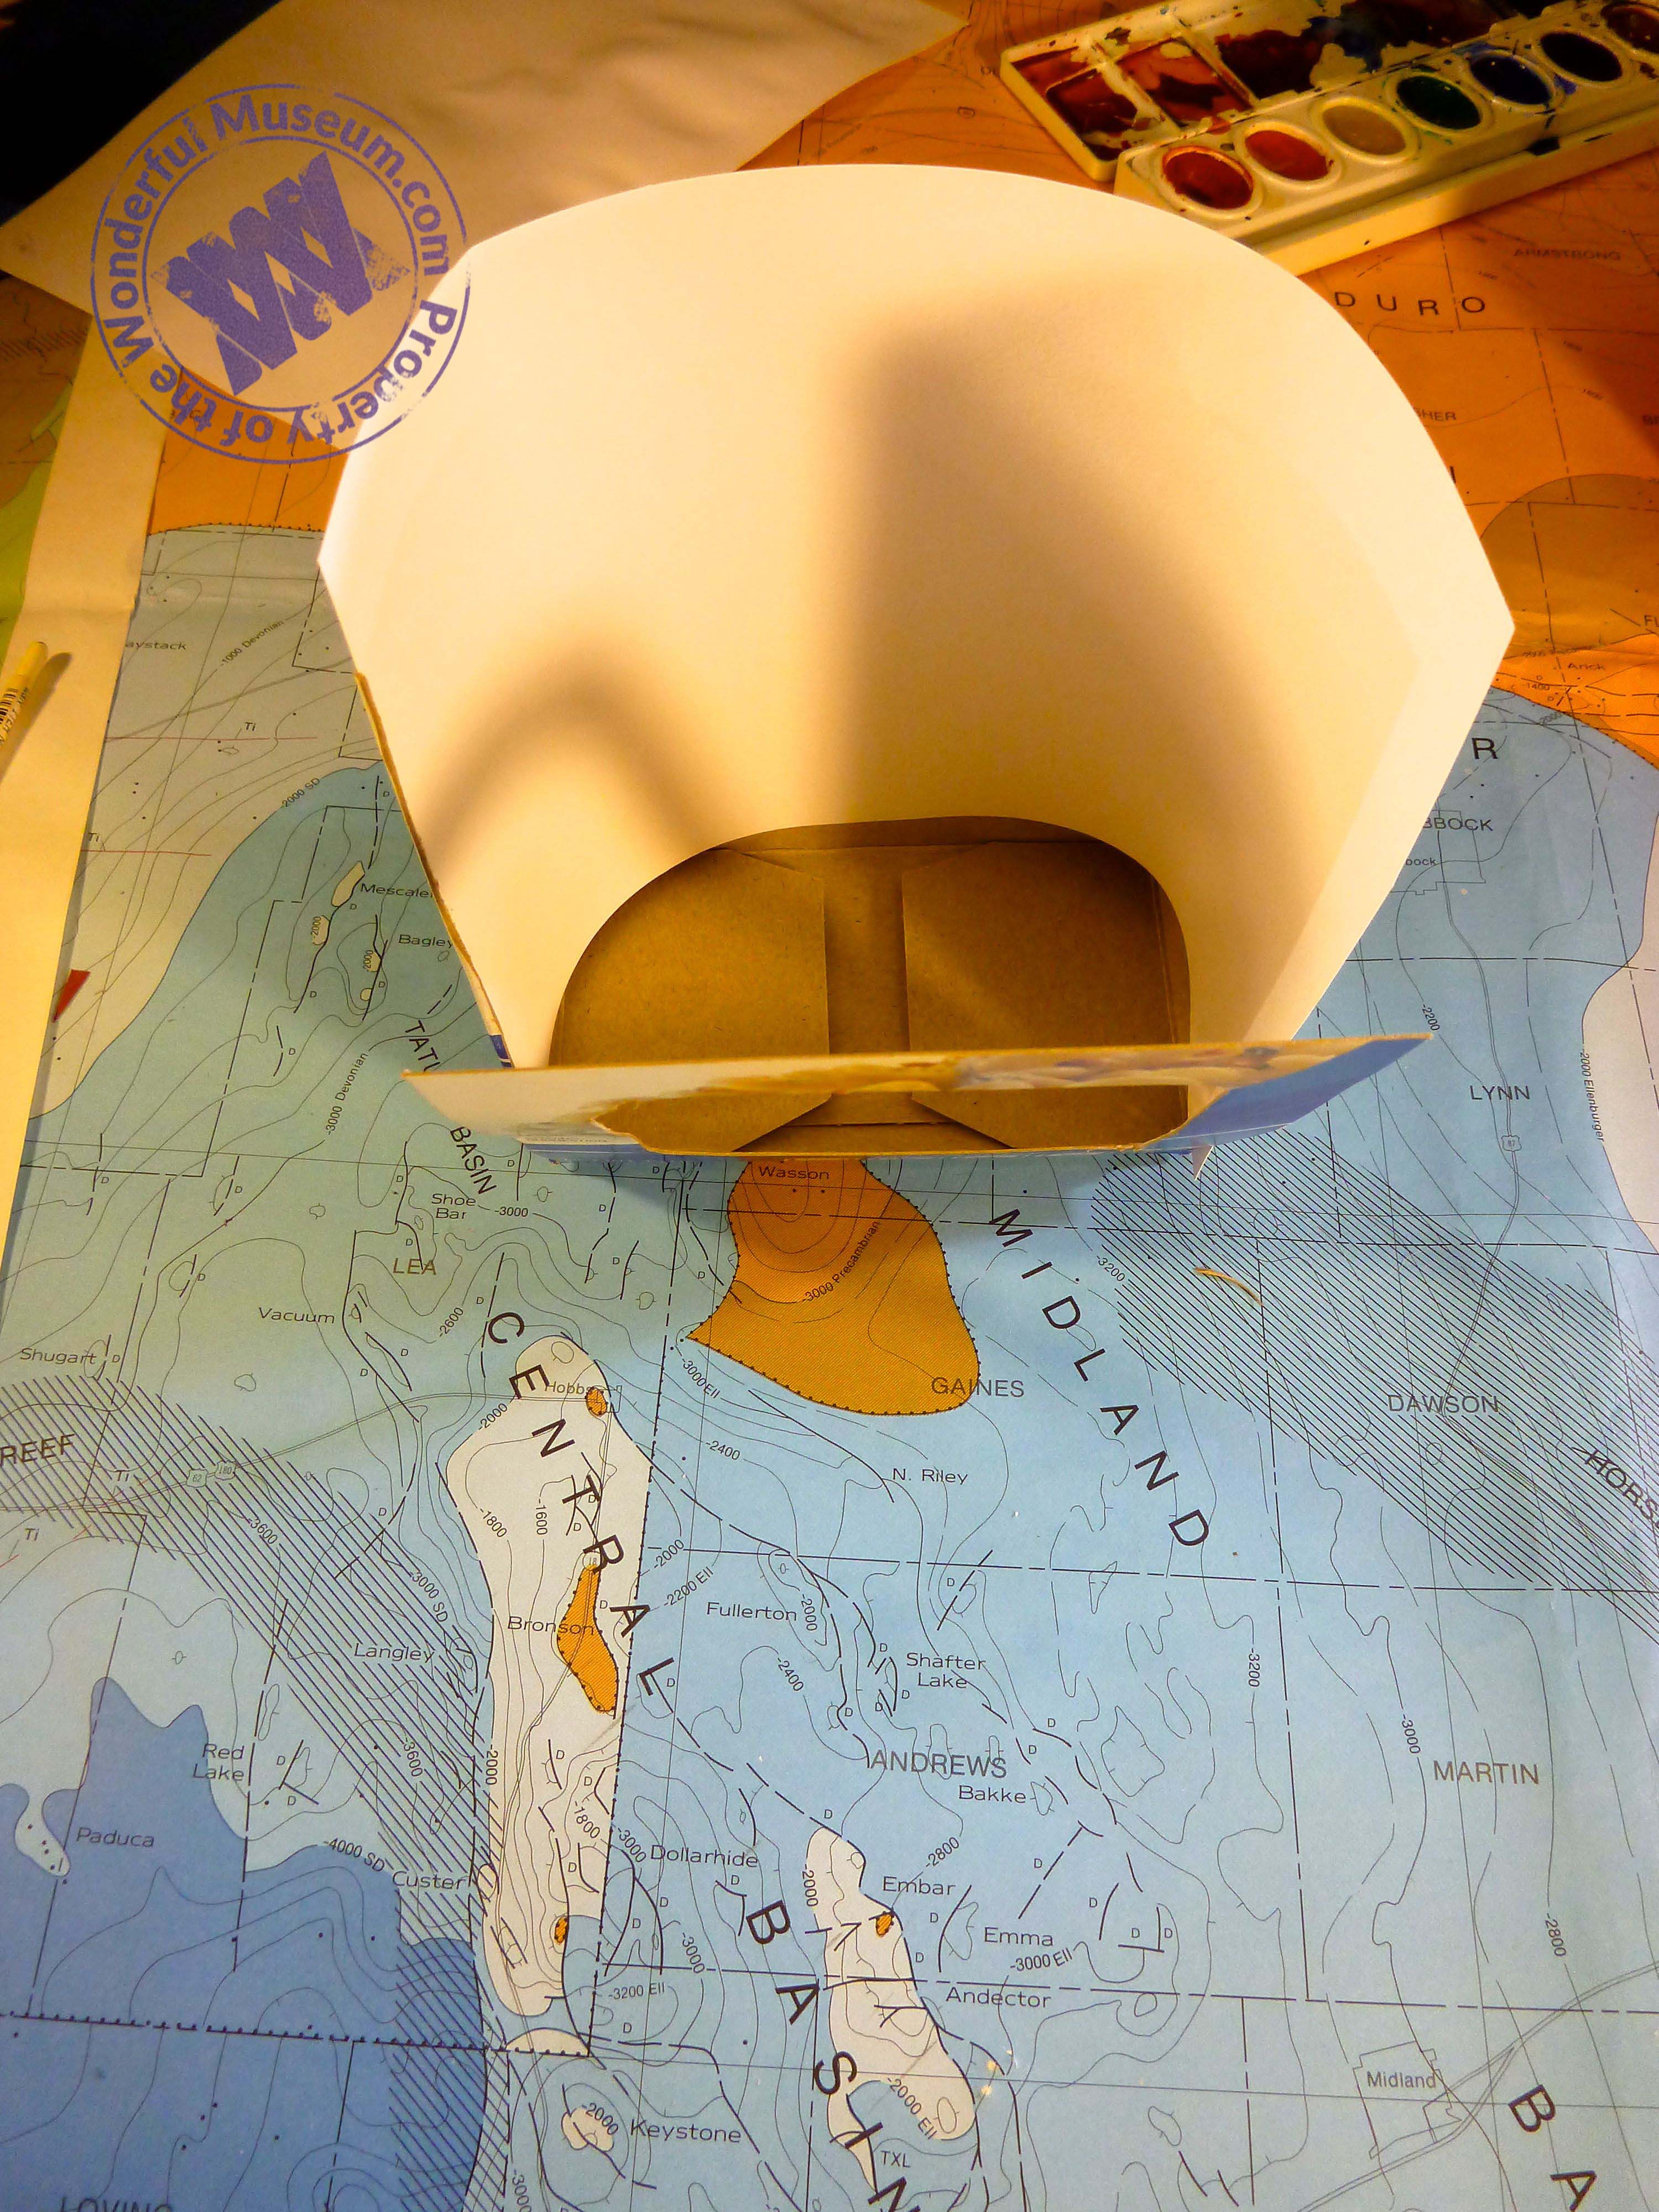
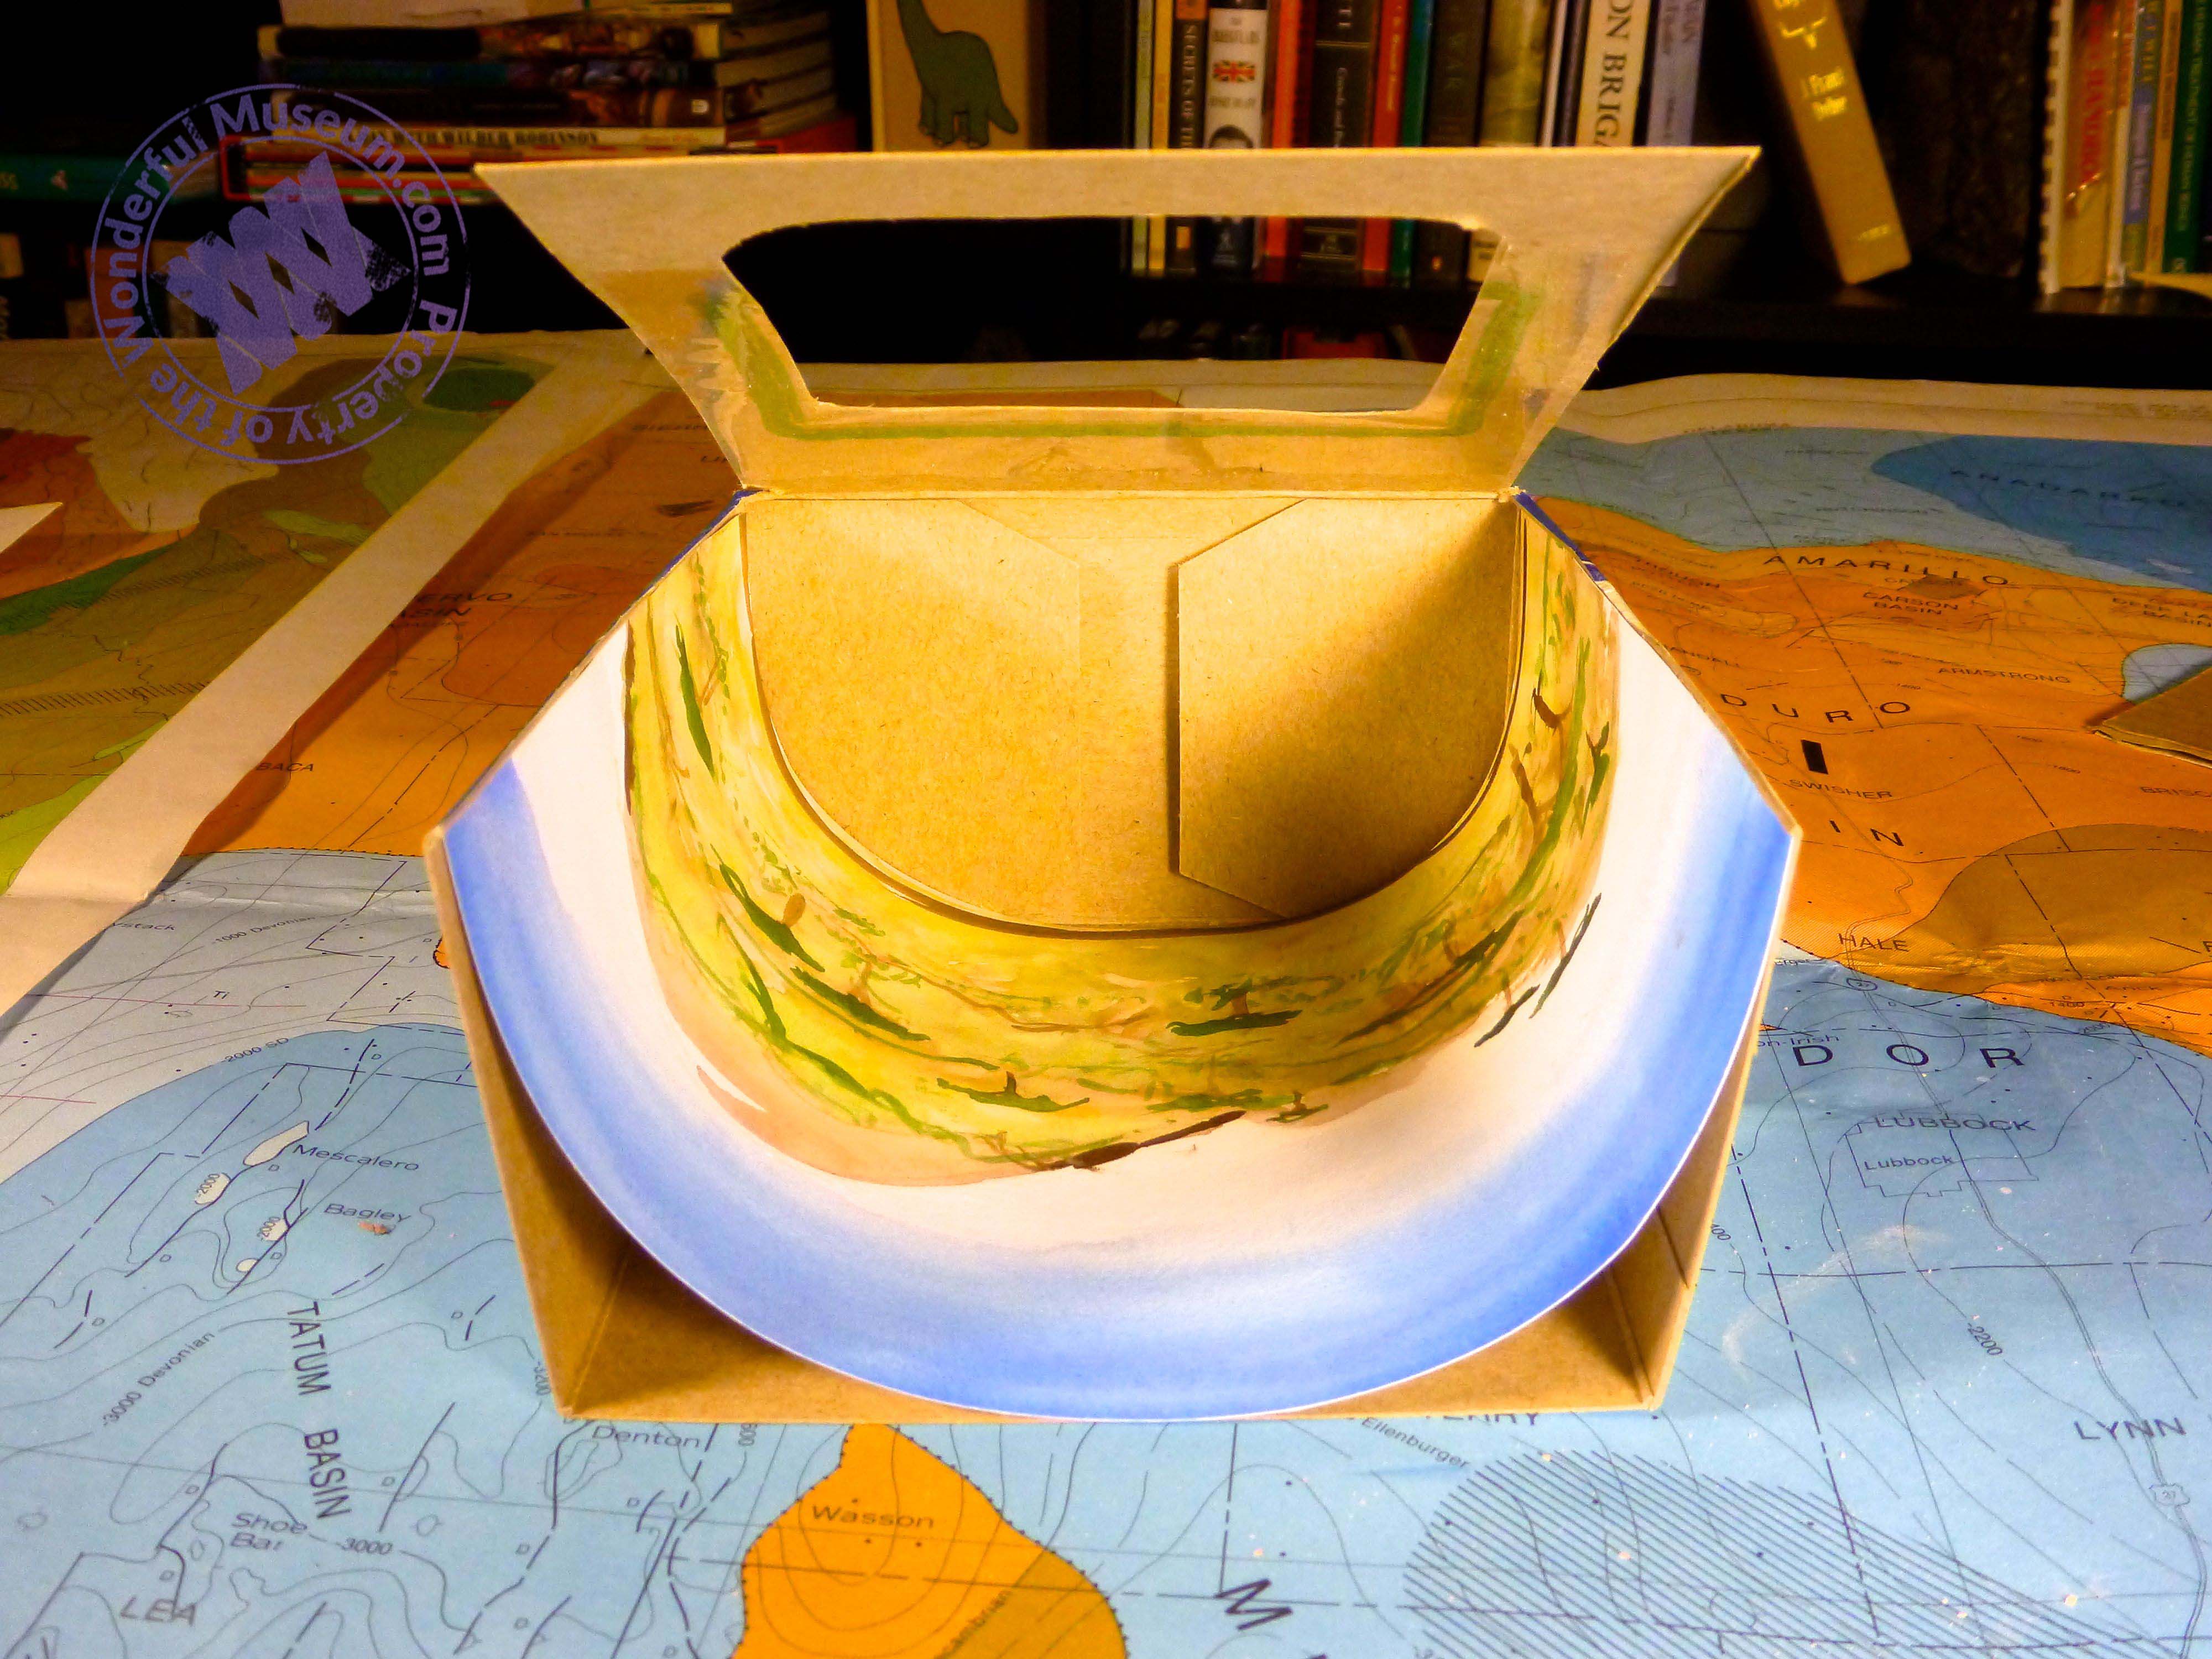
Take your box and cut it open along the edges so that one side now forms a flap. For my diorama, I am also taking off the top of the box so that light can shine down on my scene. Take a piece of paper and cut it down so that it will fit into your box and form the curved background of your diorama. Curved backgrounds trick the eye and make your diorama more realistic.
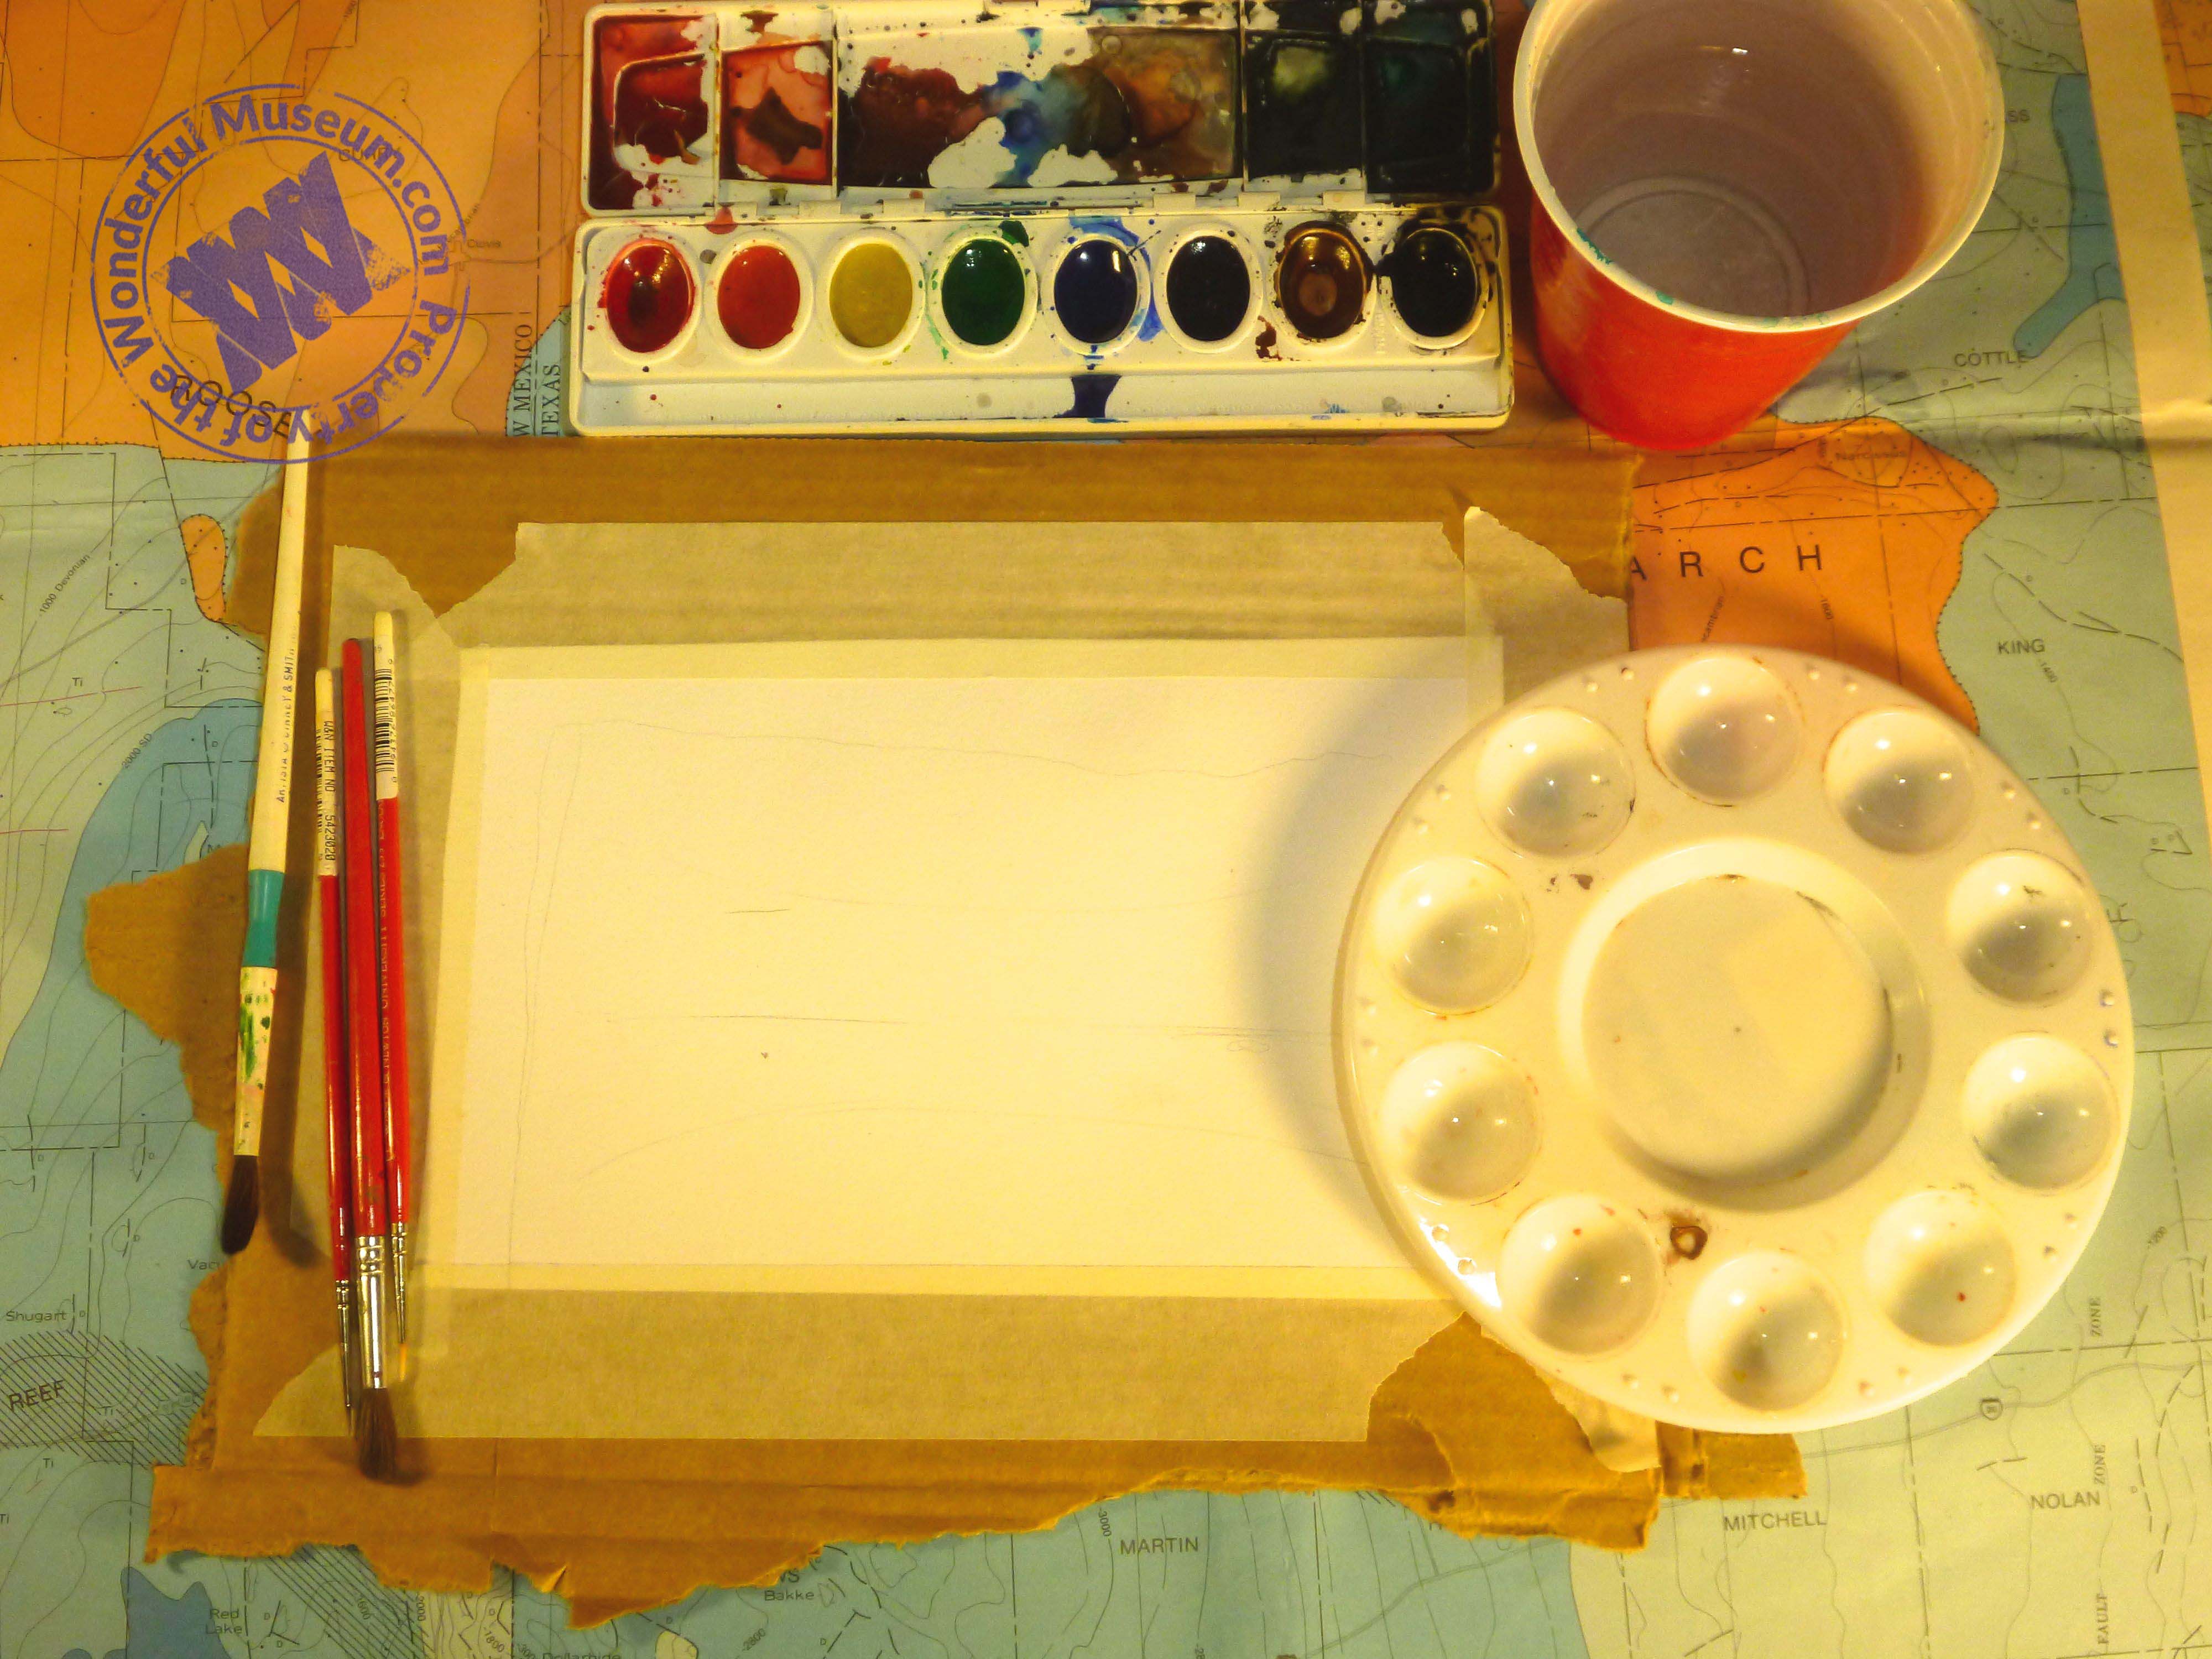
Paint or draw the background to your scene on your piece of paper. (It is easier to do this if you take it back out of the box after you have cut it to the right size) I chose to paint my background in watercolors but you could use any kind of paint, markers, or crayons. You can even print out a background from your computer or use a picture from a magazine like National Geographic.
Once you finish your background, put it back into the box and glue or tape it down.
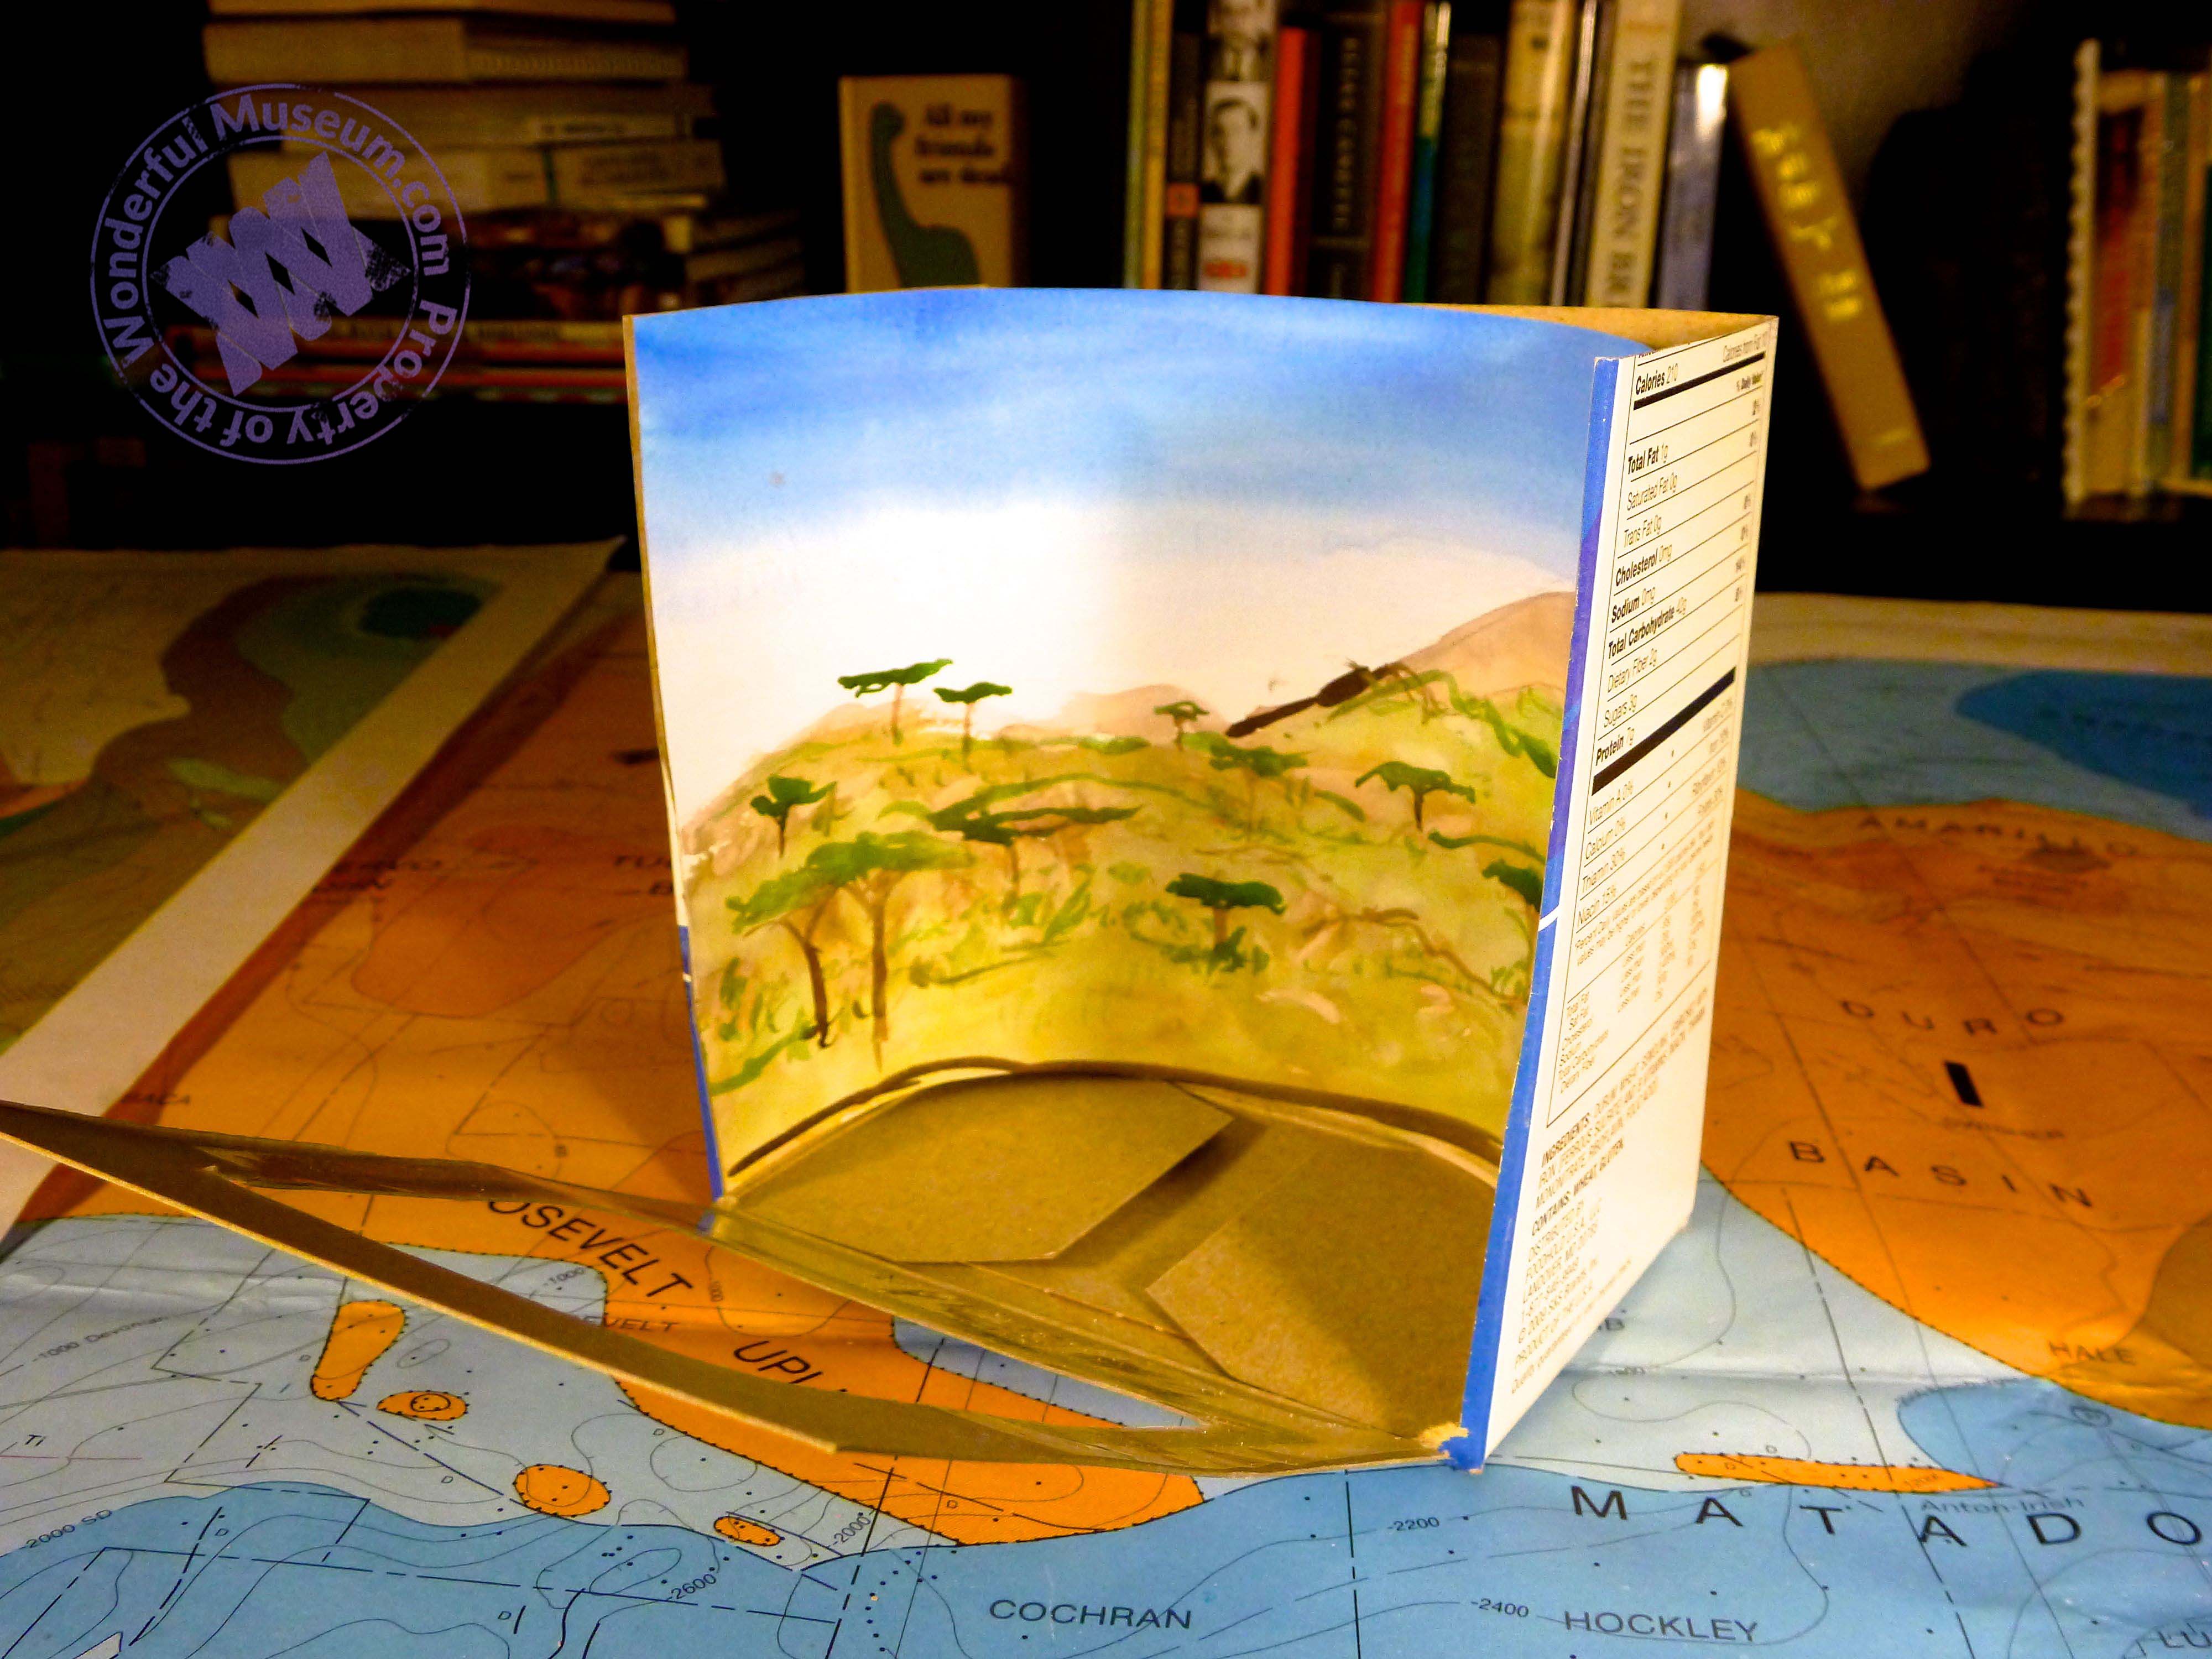
You can see in this picture from the top that the background is still curved.
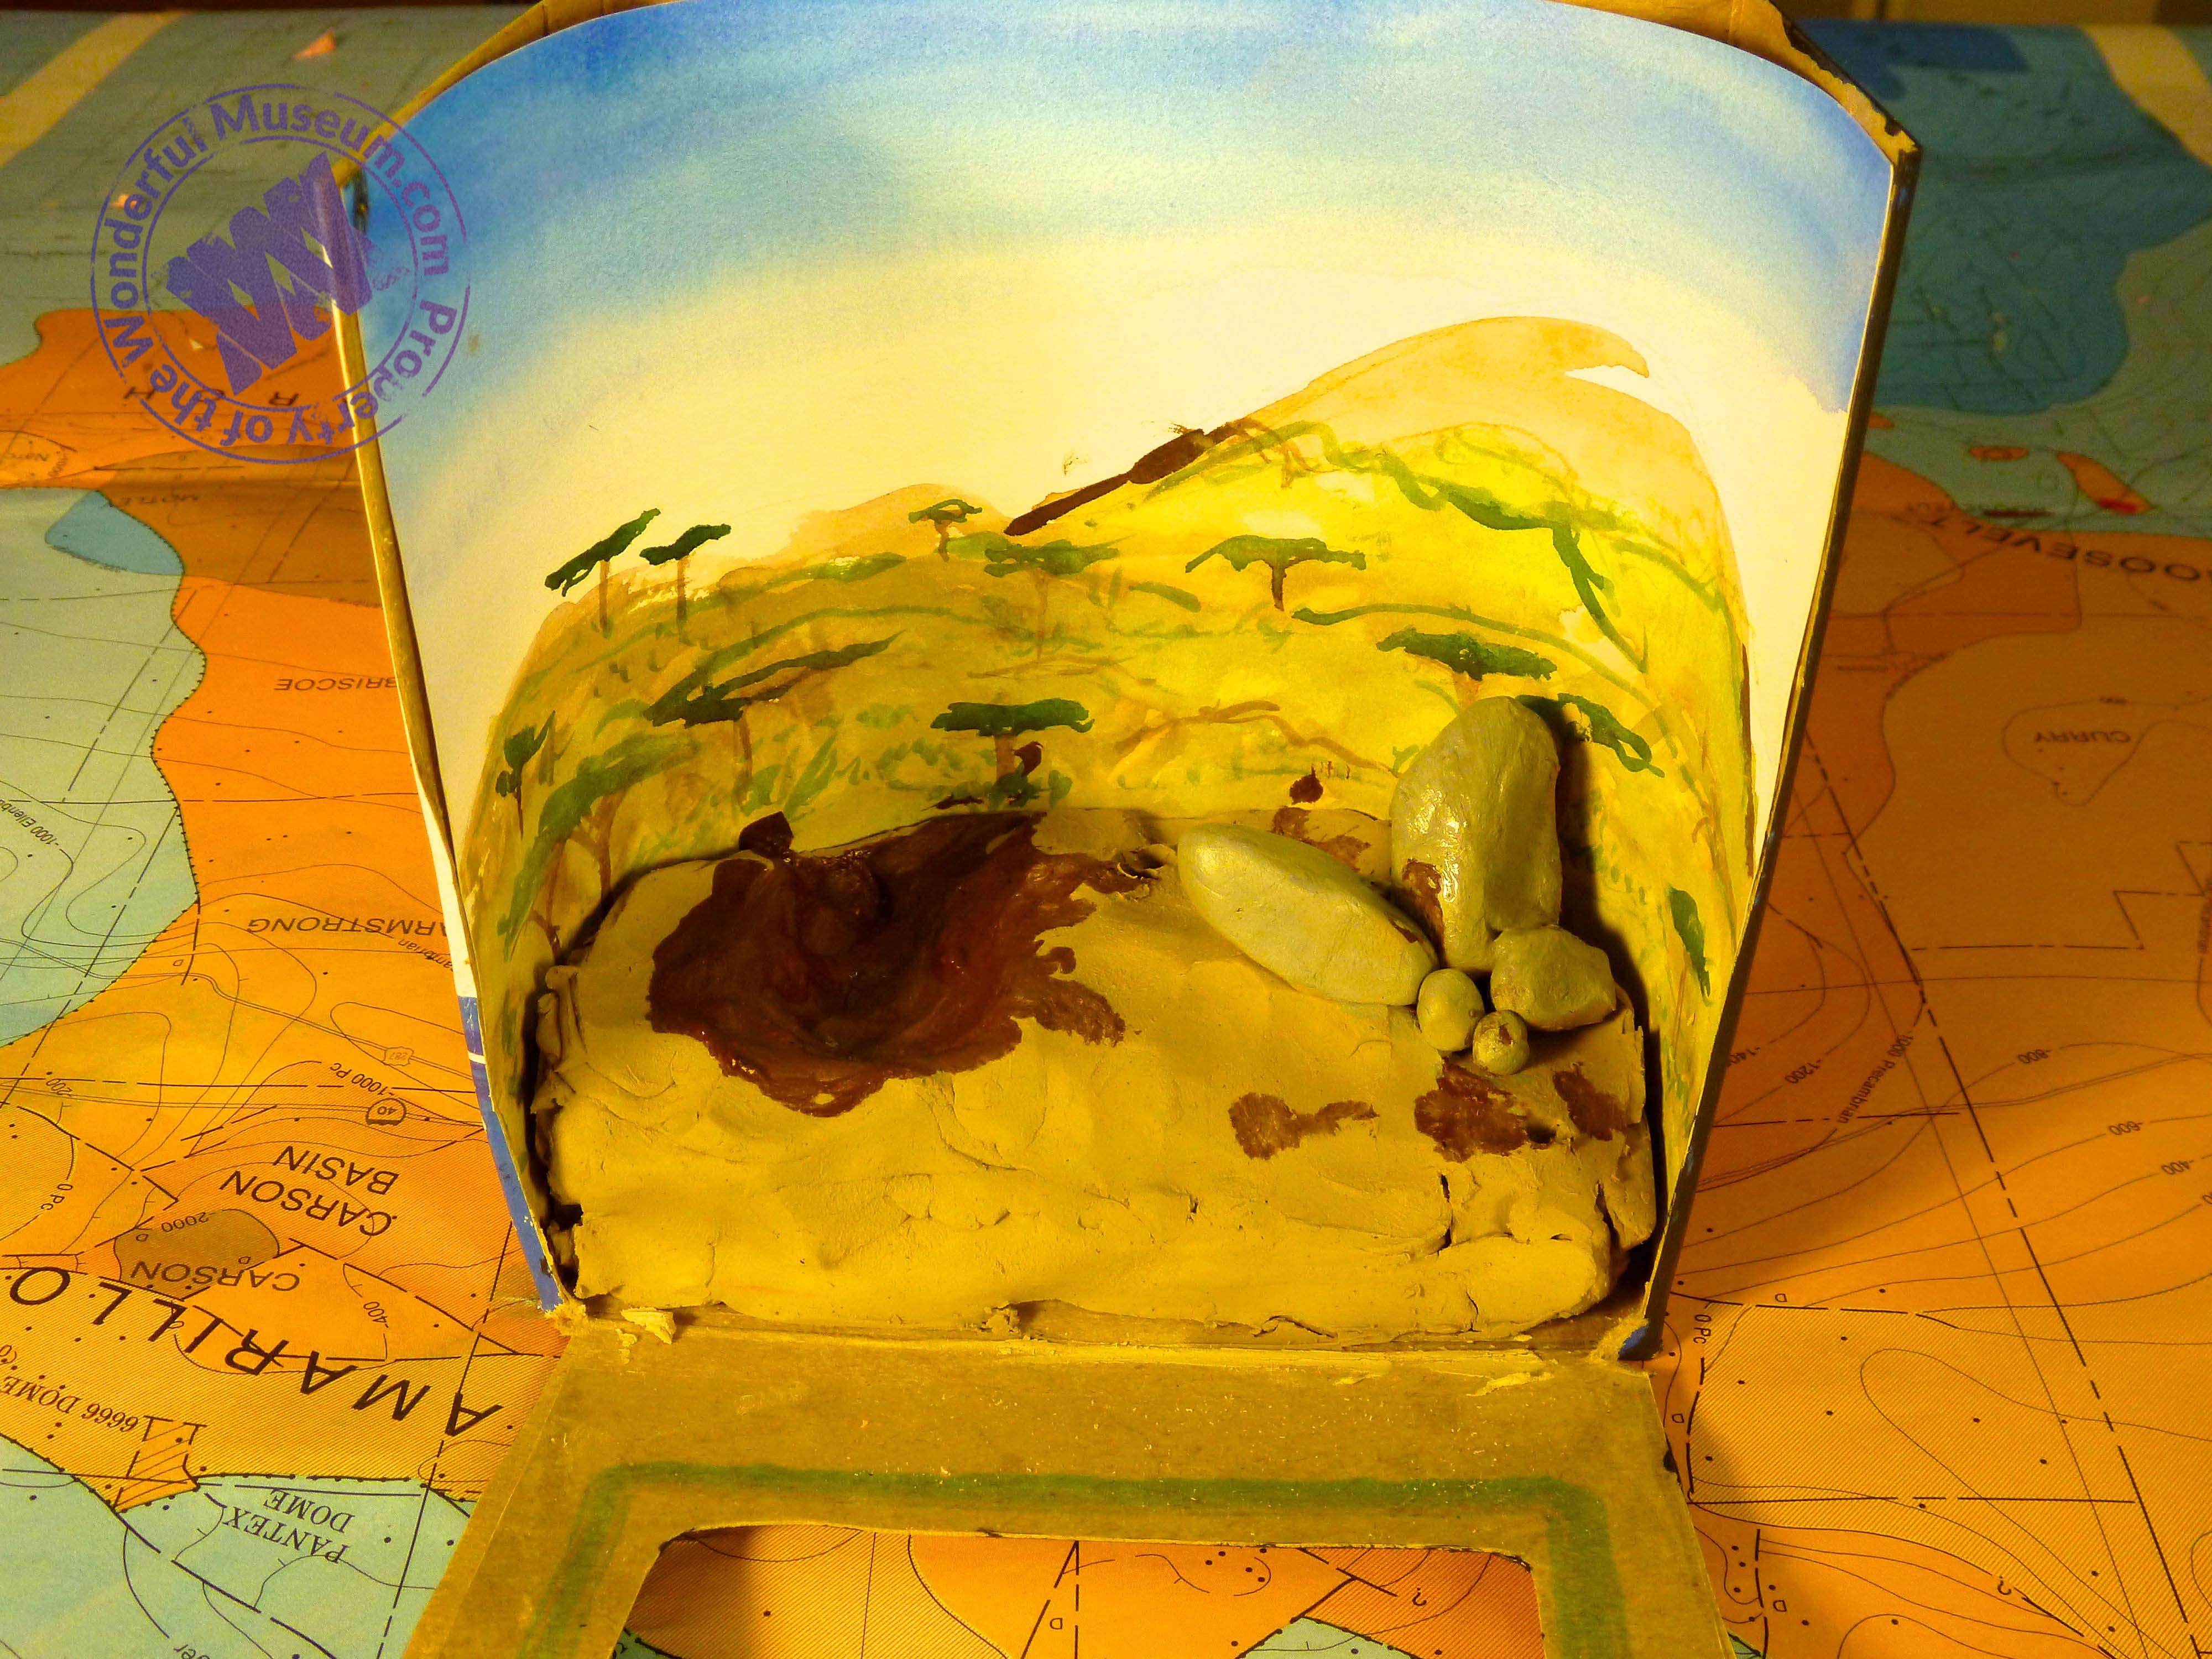
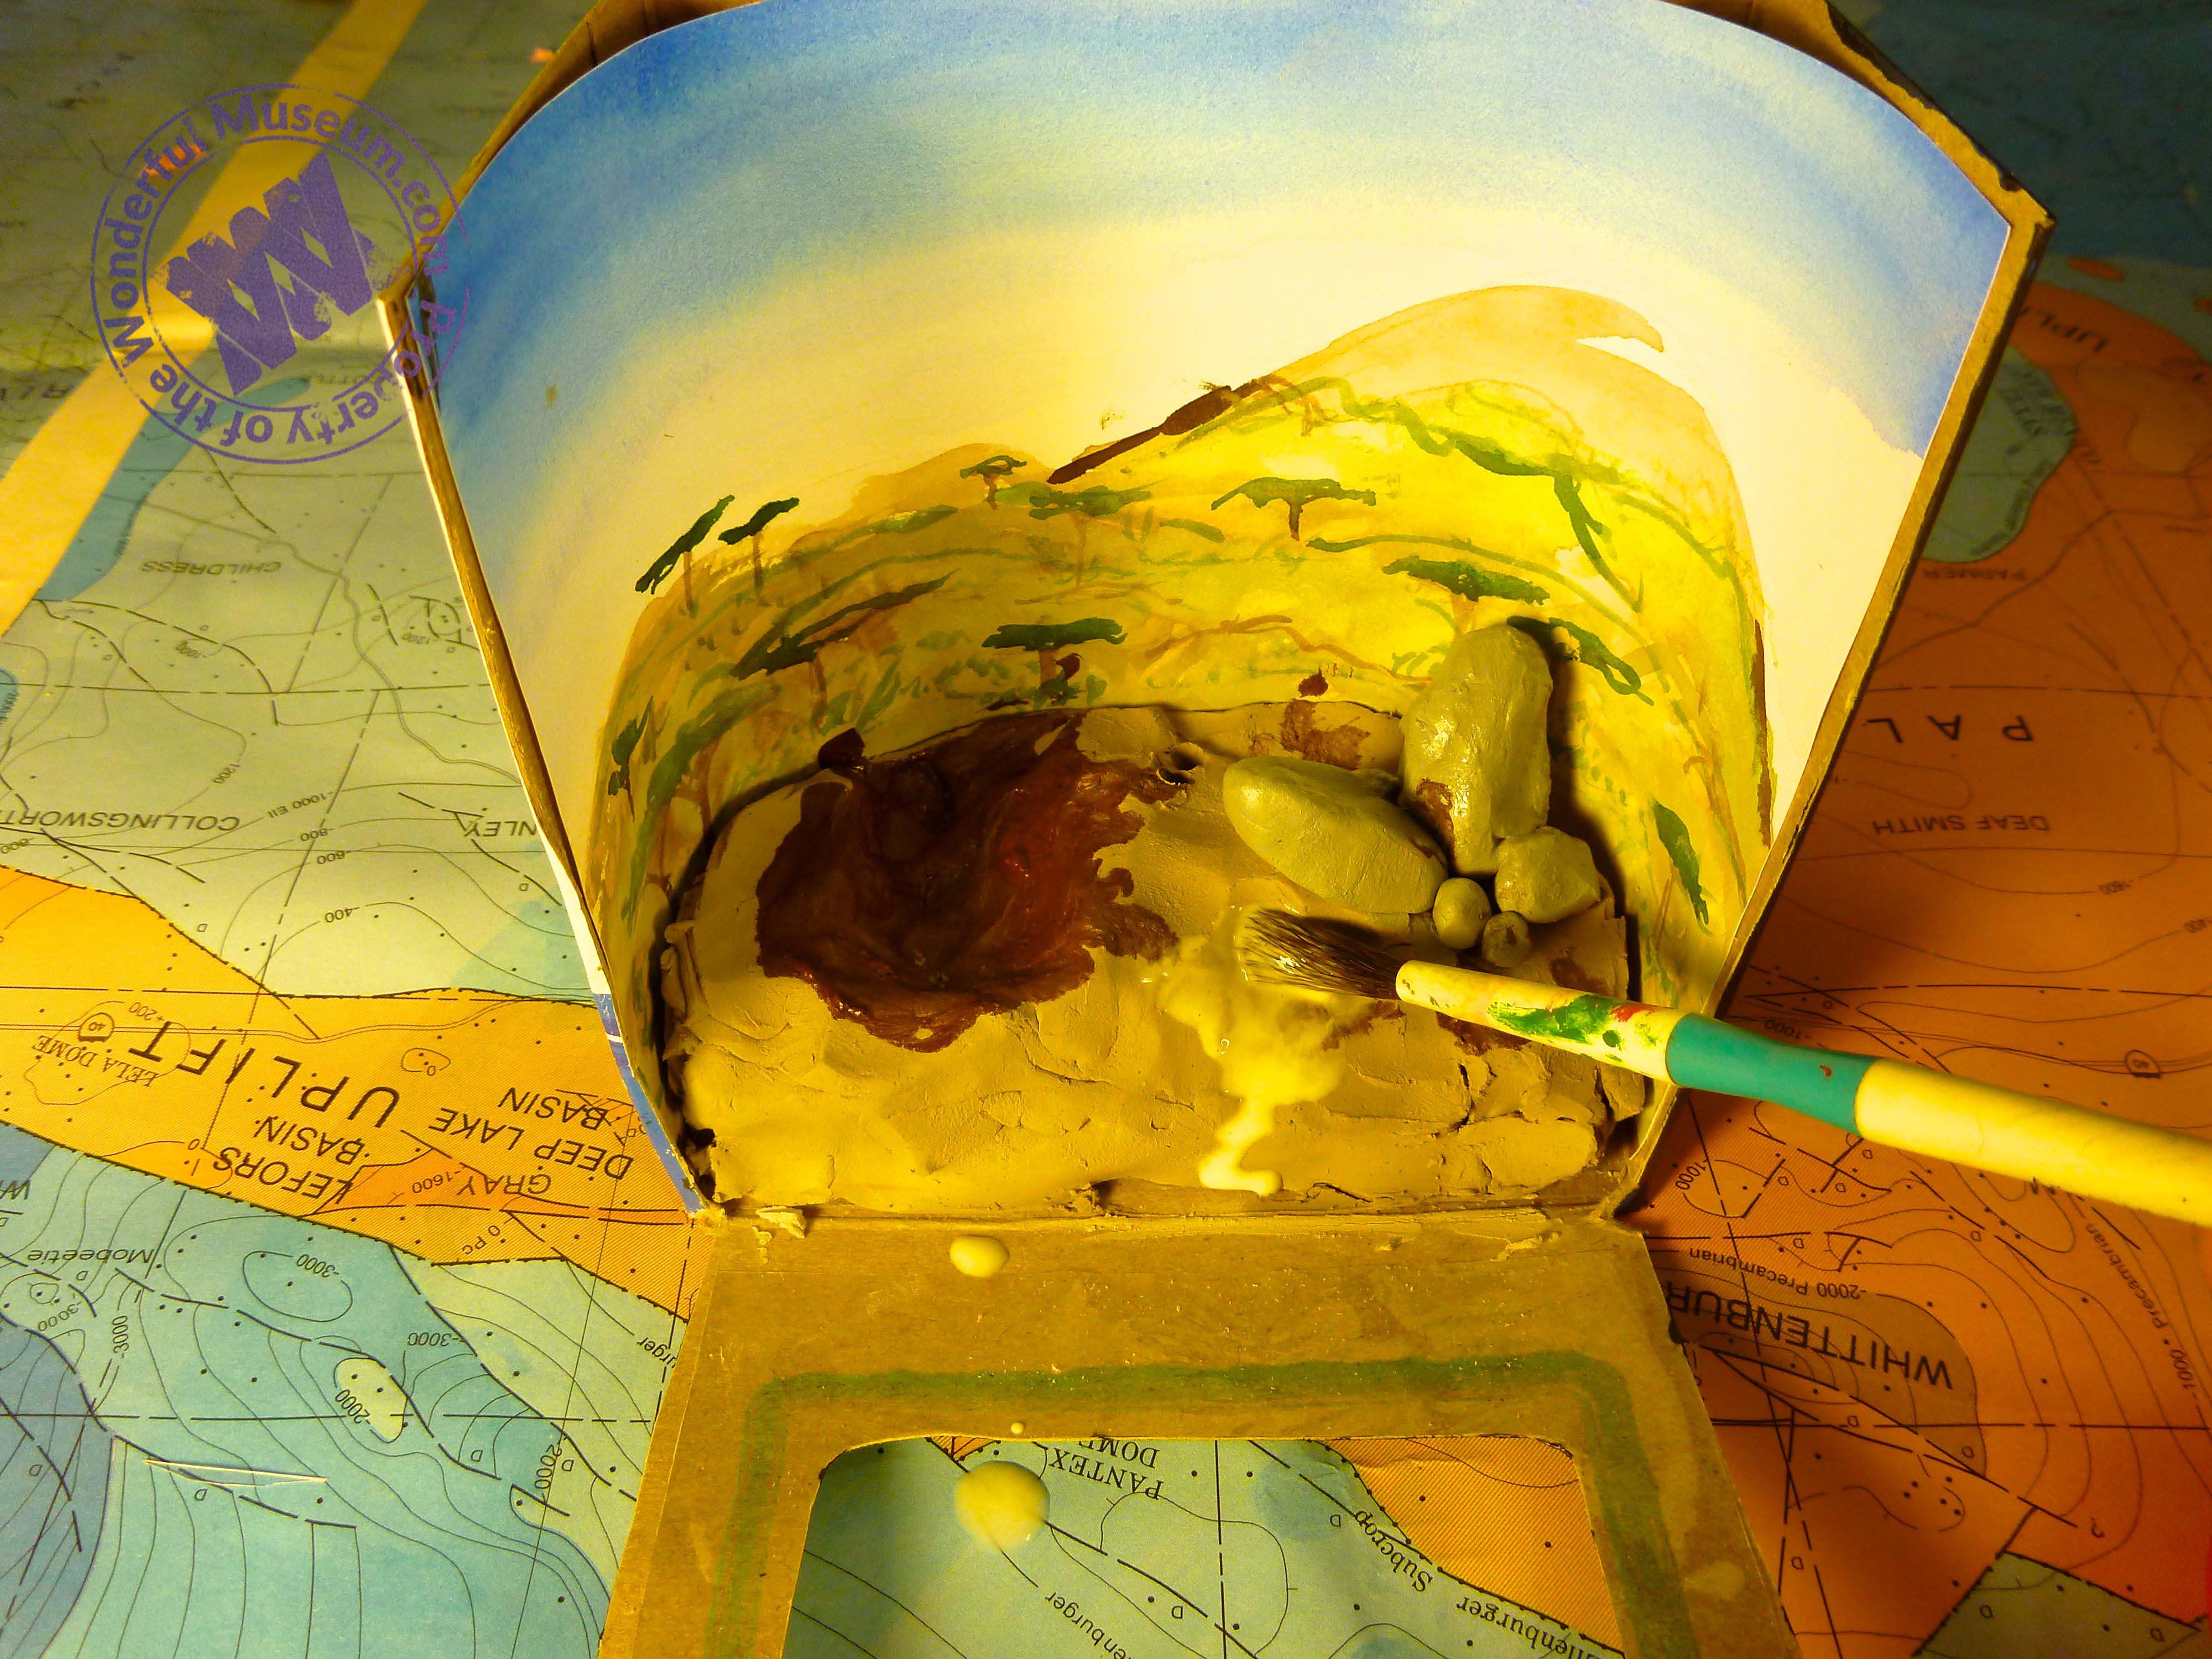
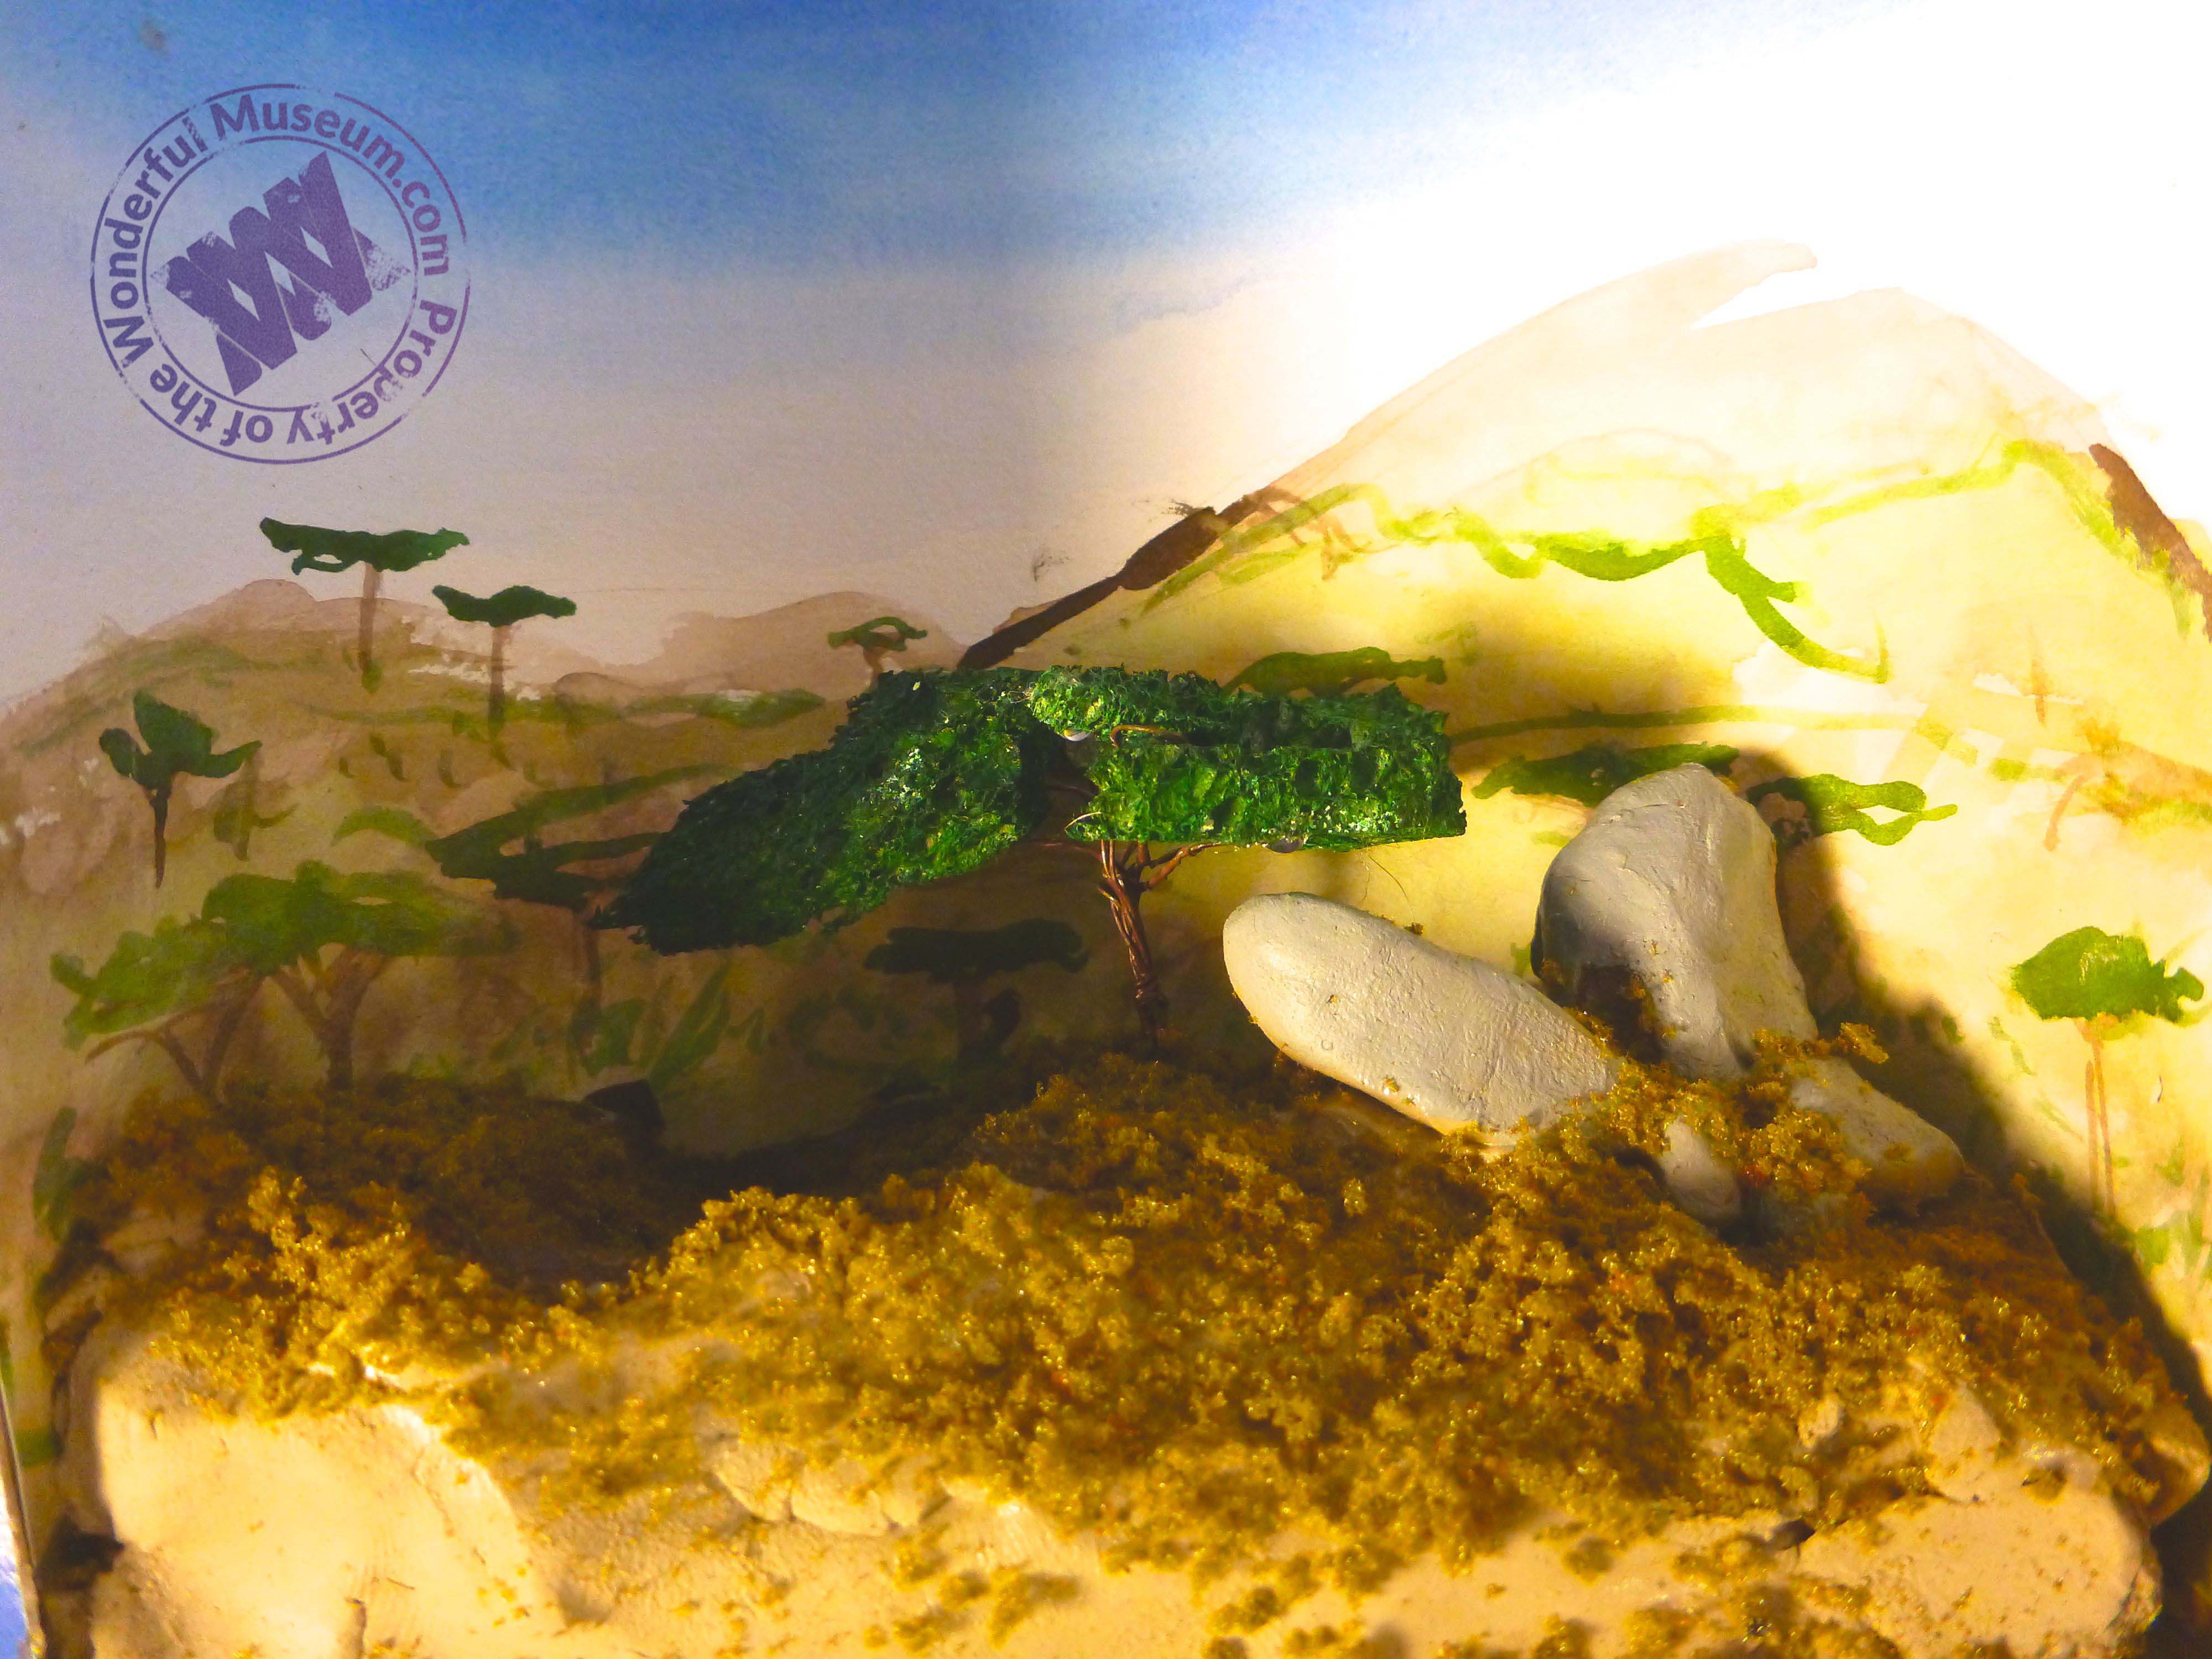
Use self drying clay to build the base of your diorama. You can add in rocks and sand to make it more realistic. Here, I’ve put a little pool where the hippos will go and a kopje (a large pile of boulders) where my lion will stand. You can paint the clay if it isn’t the right color.
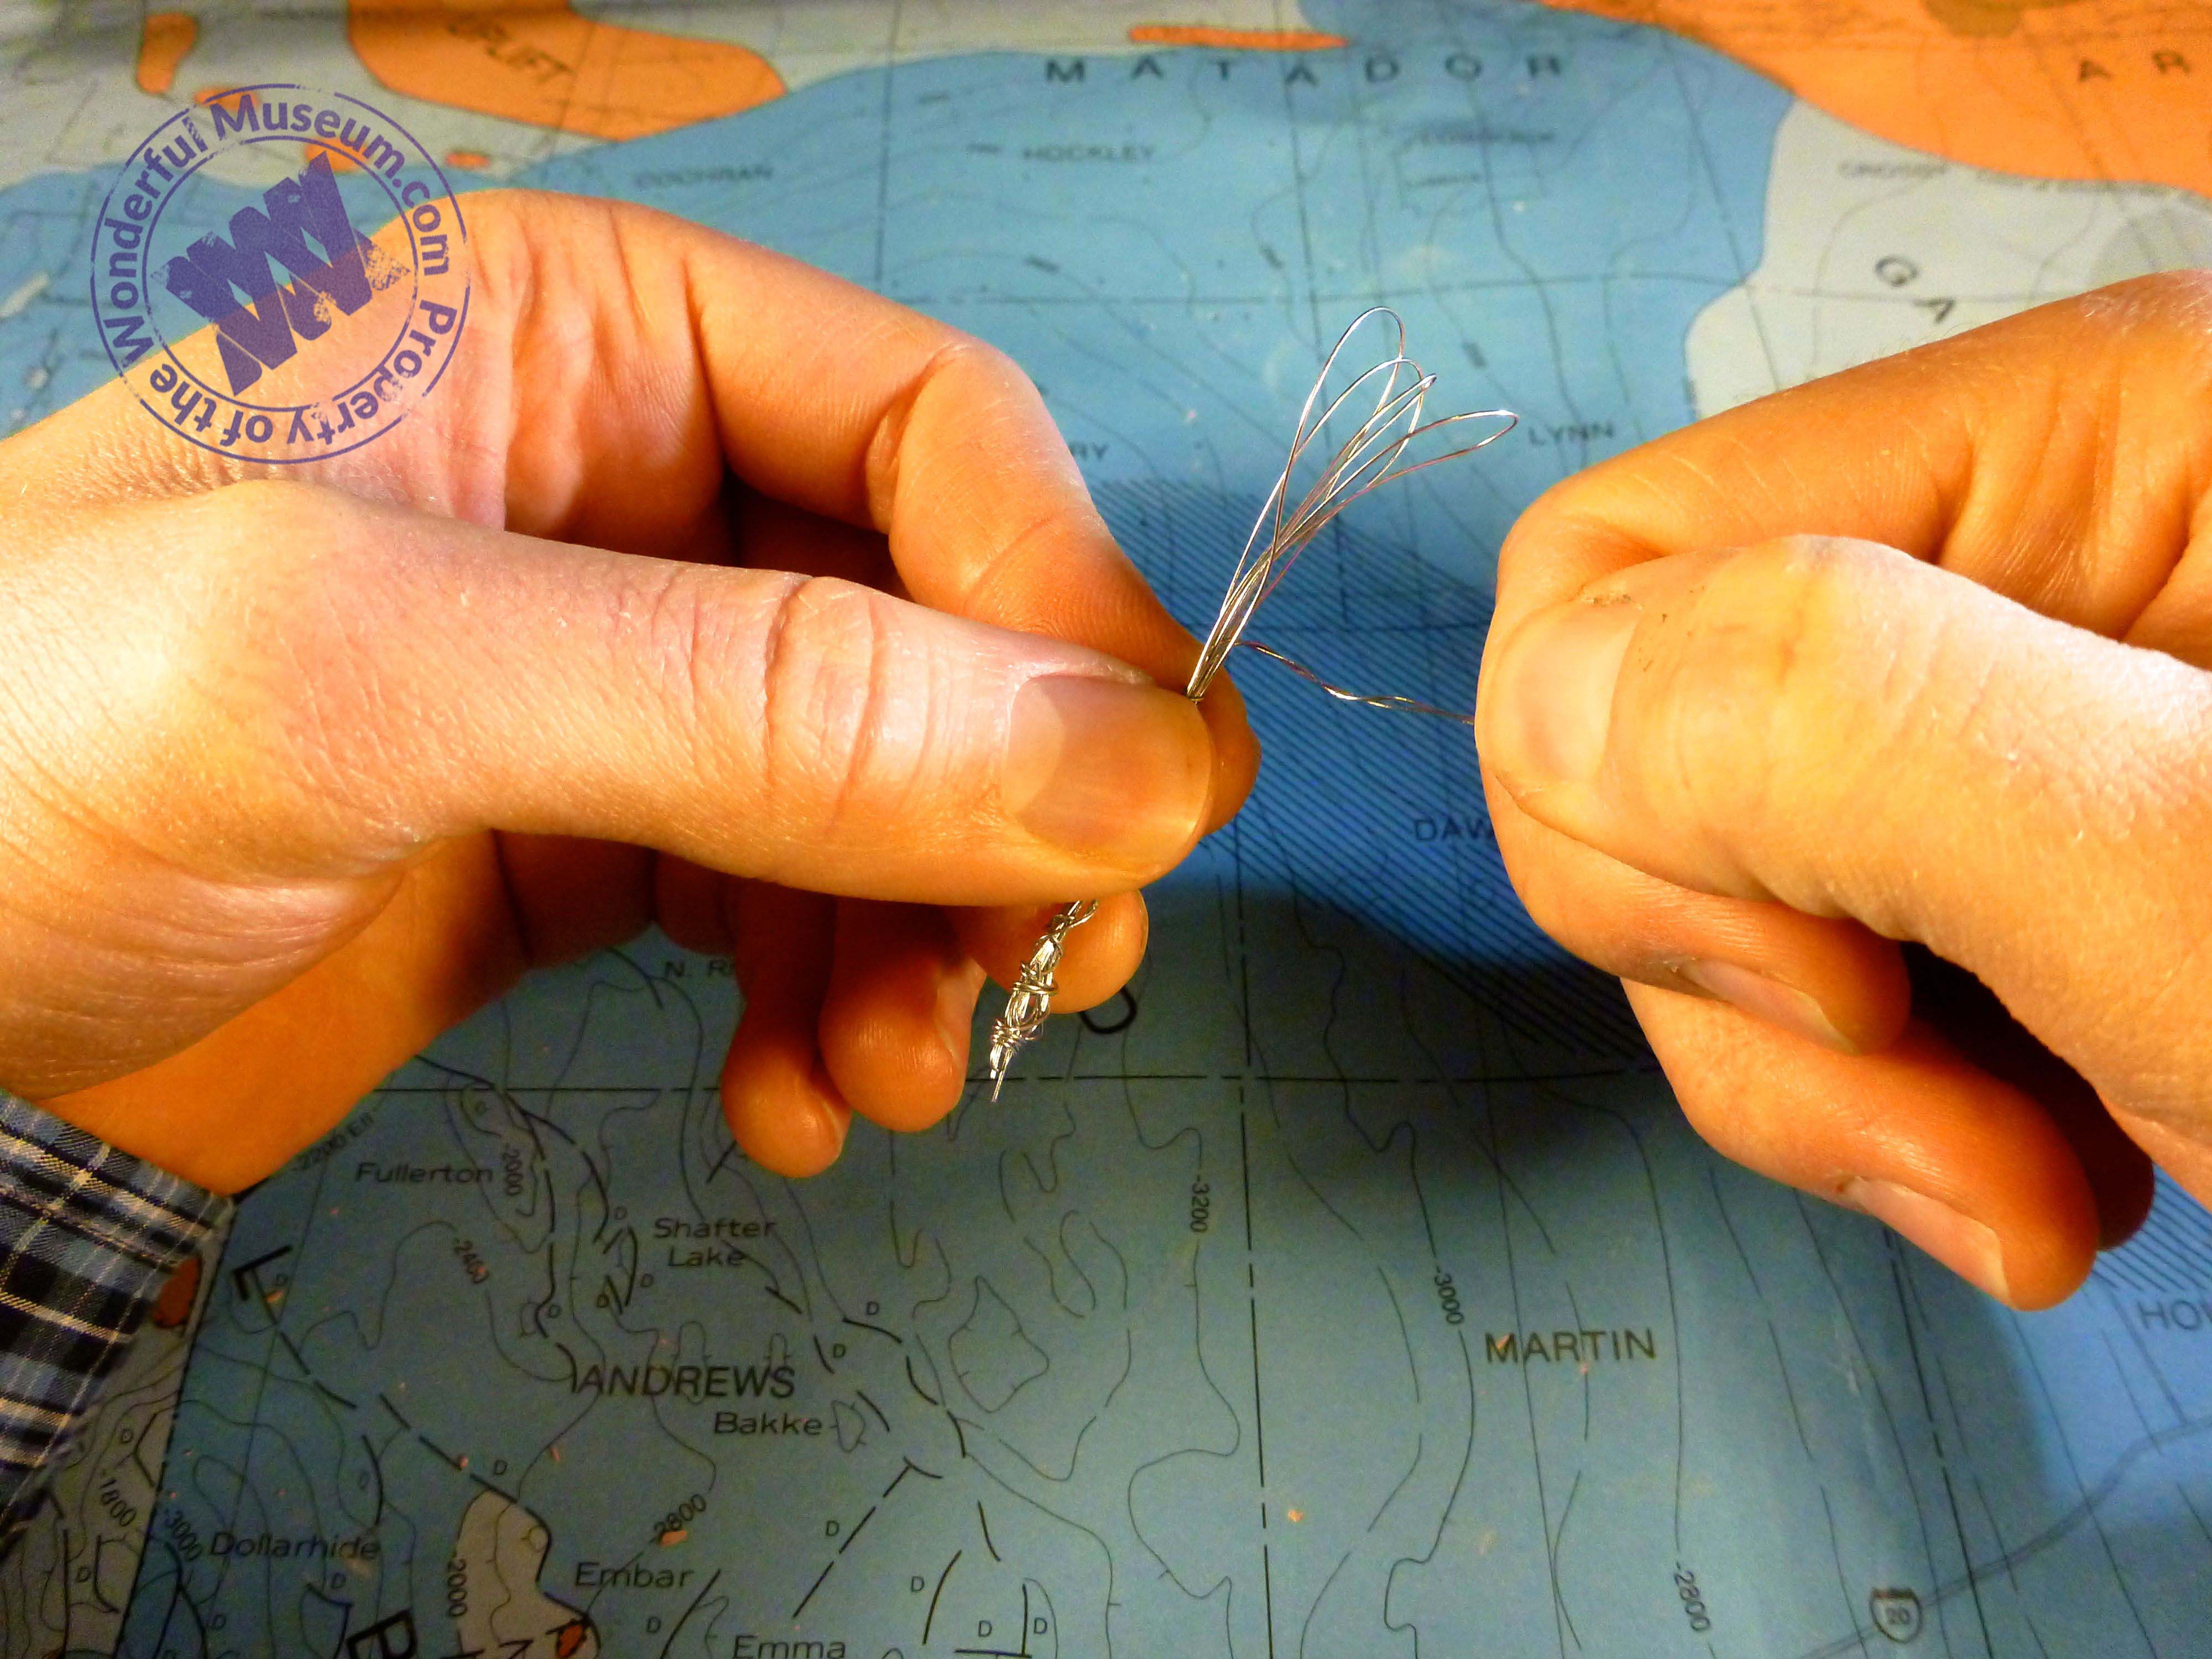
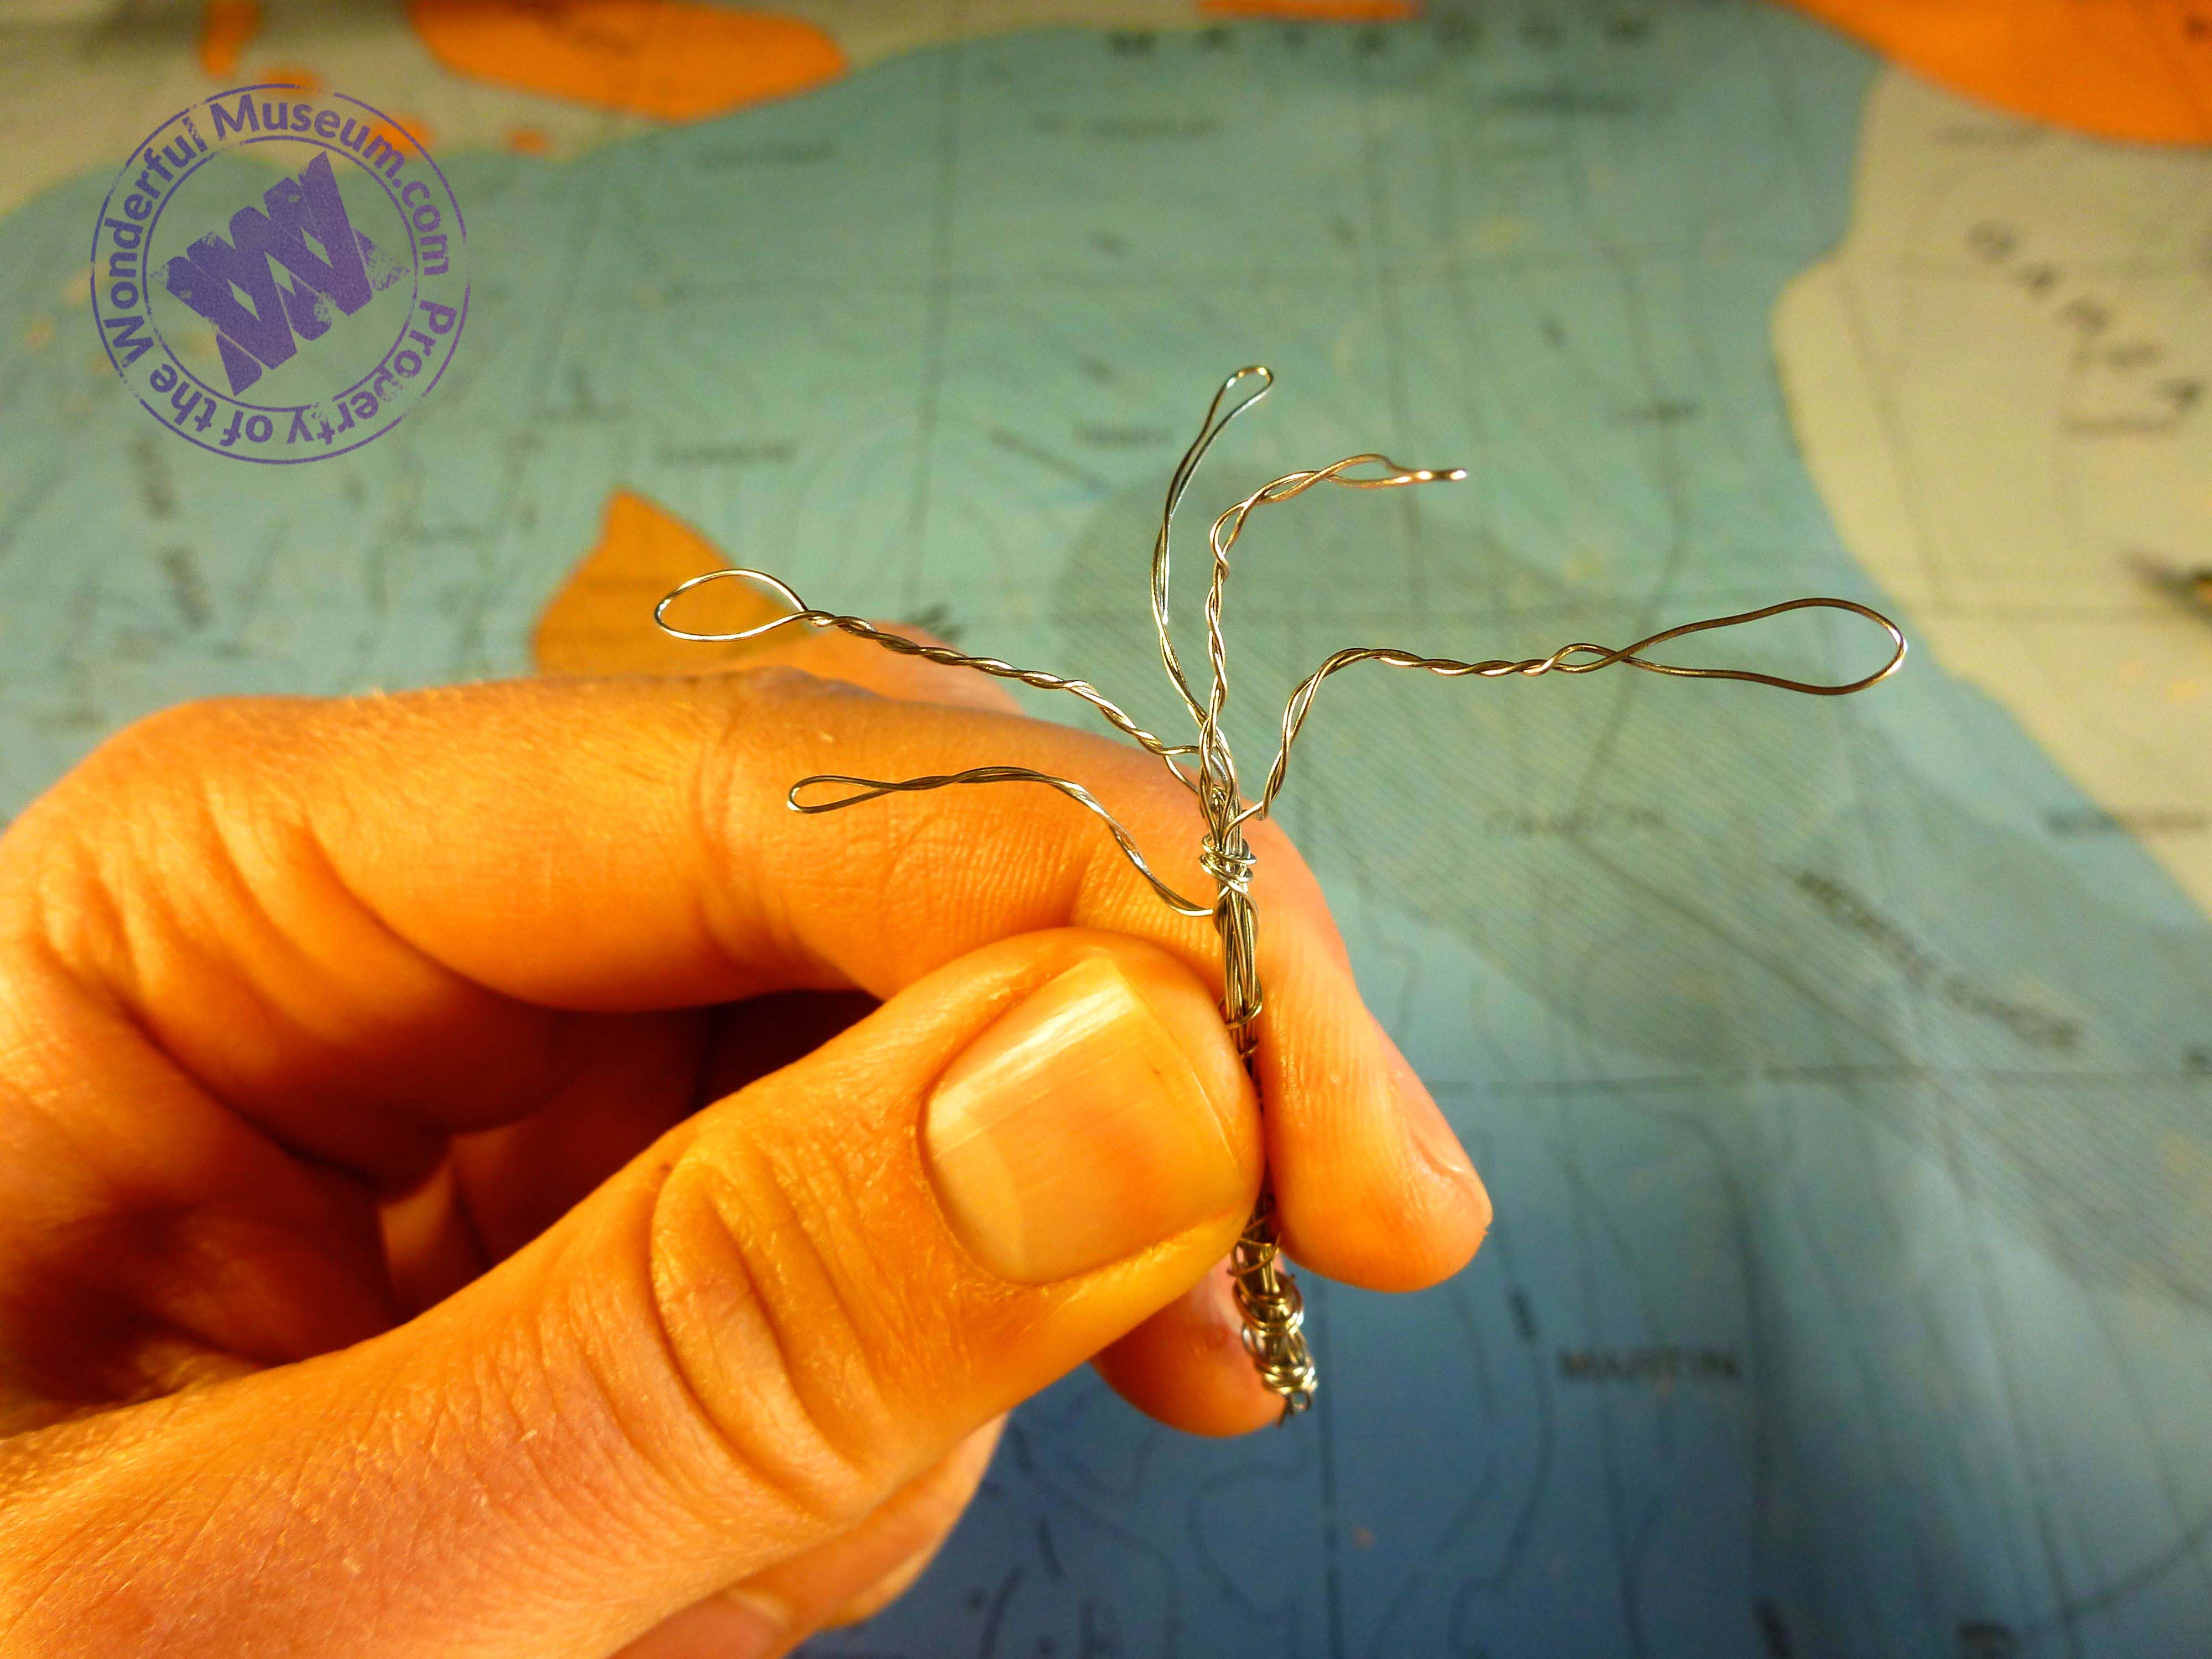
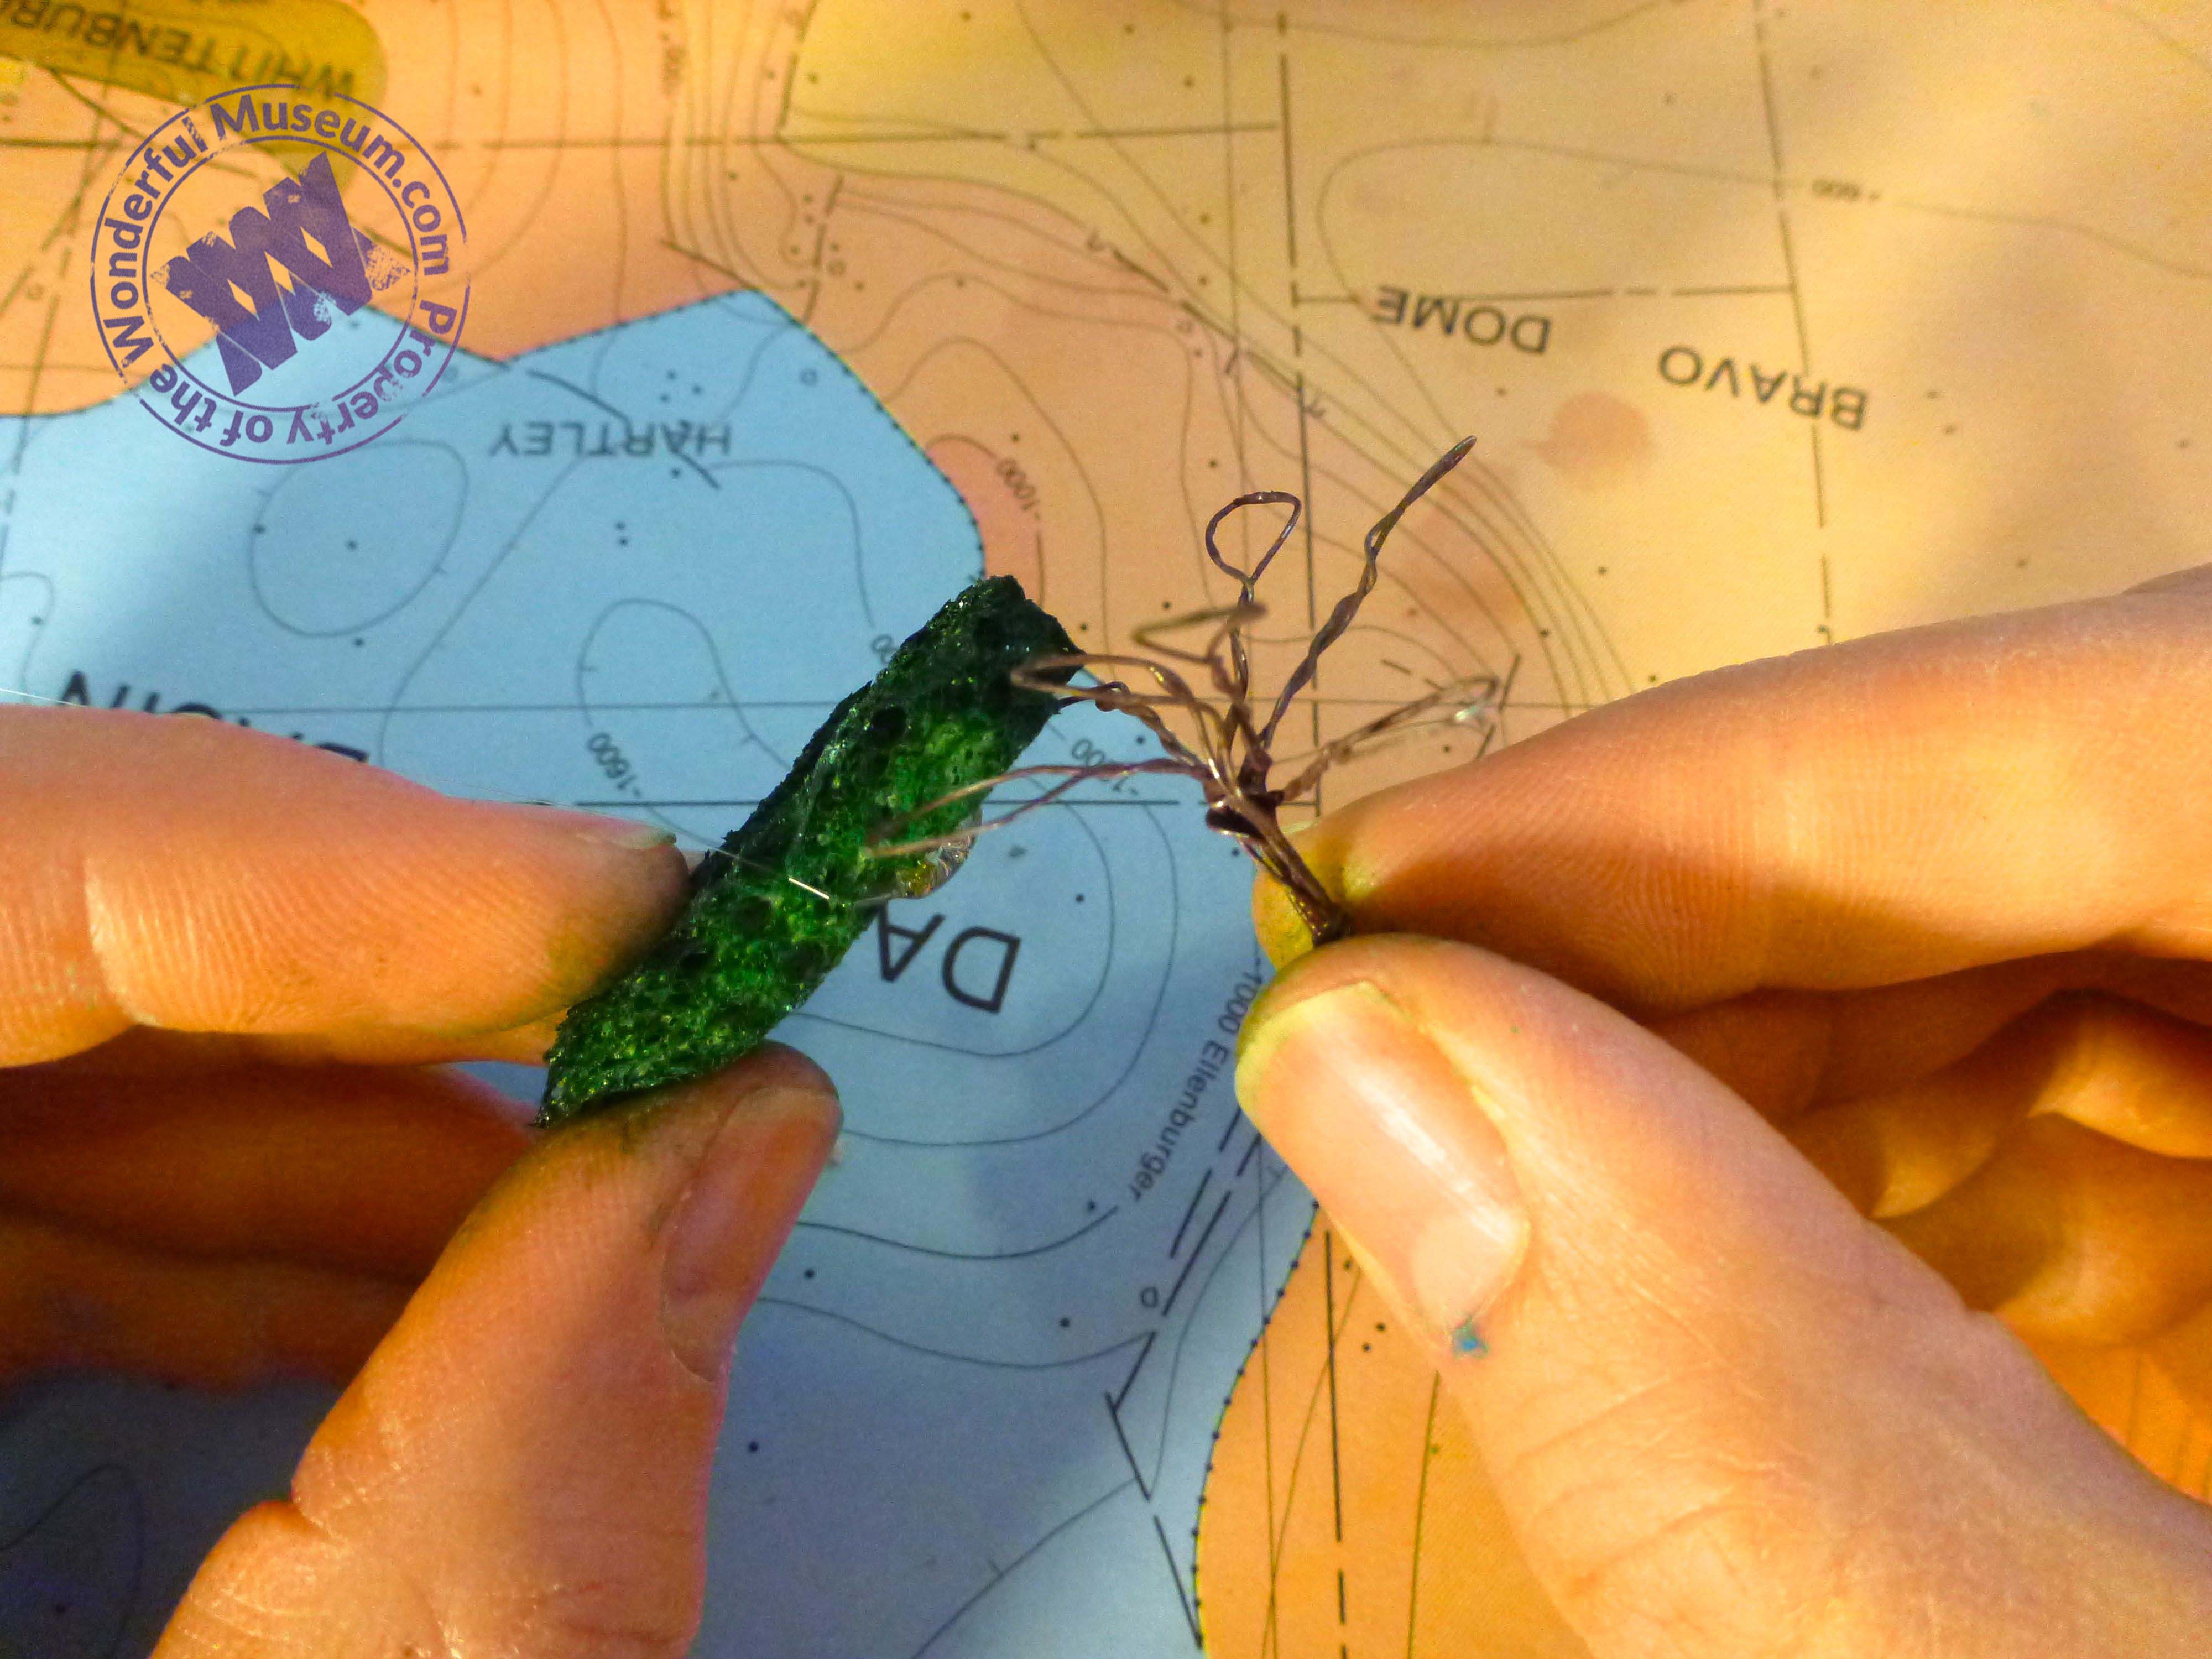
Now you need add plants to your scene. You can use wire to create some realistic looking miniature trees. Start by looping the wire back and forth. You want your loops to be much larger than your tree because they will form the trunk and the branches.

Once you have 15 or so loops, start wrapping extra wire around your loops. You’ll want to stop wrapping the wire about halfway up the tree. Clip the excess wire with some scissors.
Bend down the loops that you didn’t twist any wire around yet. These will form the branches of the tree. Twist them around and bend them back and forth until they start to look like branches.
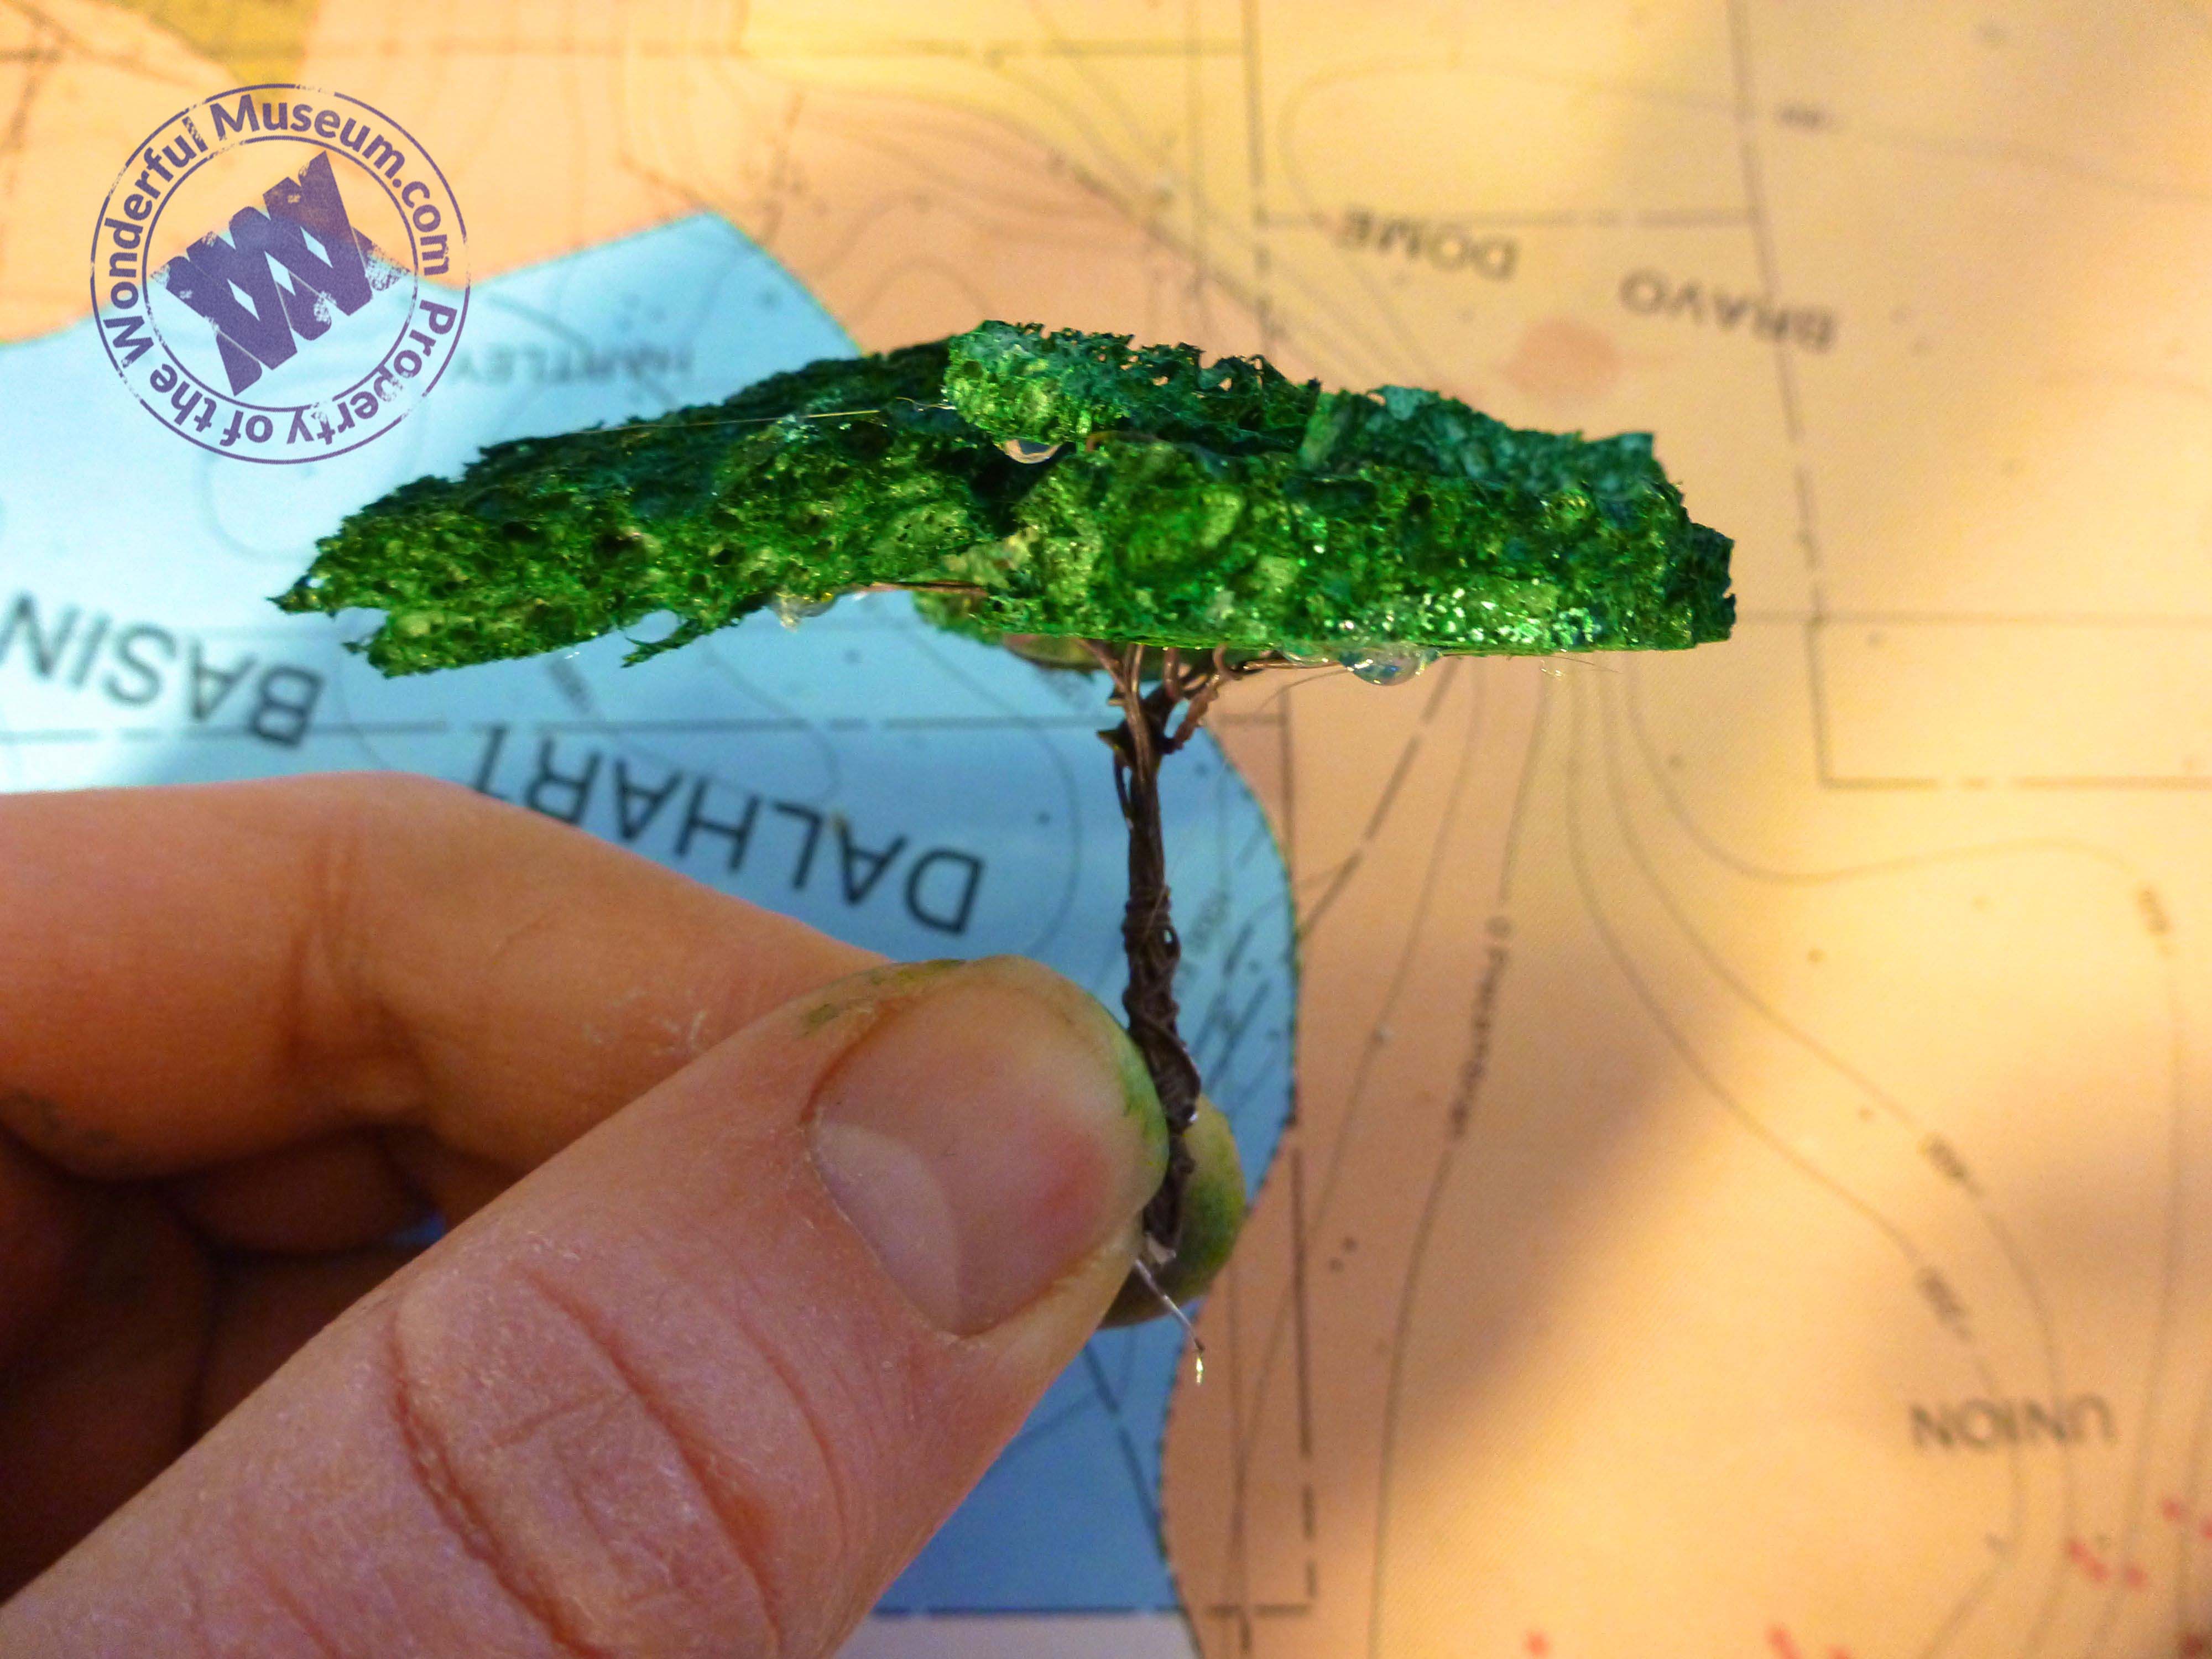
Mix some brown paint with gesso and glop the paint all over your wire tree. The gesso will help the paint stick to the smooth wire.
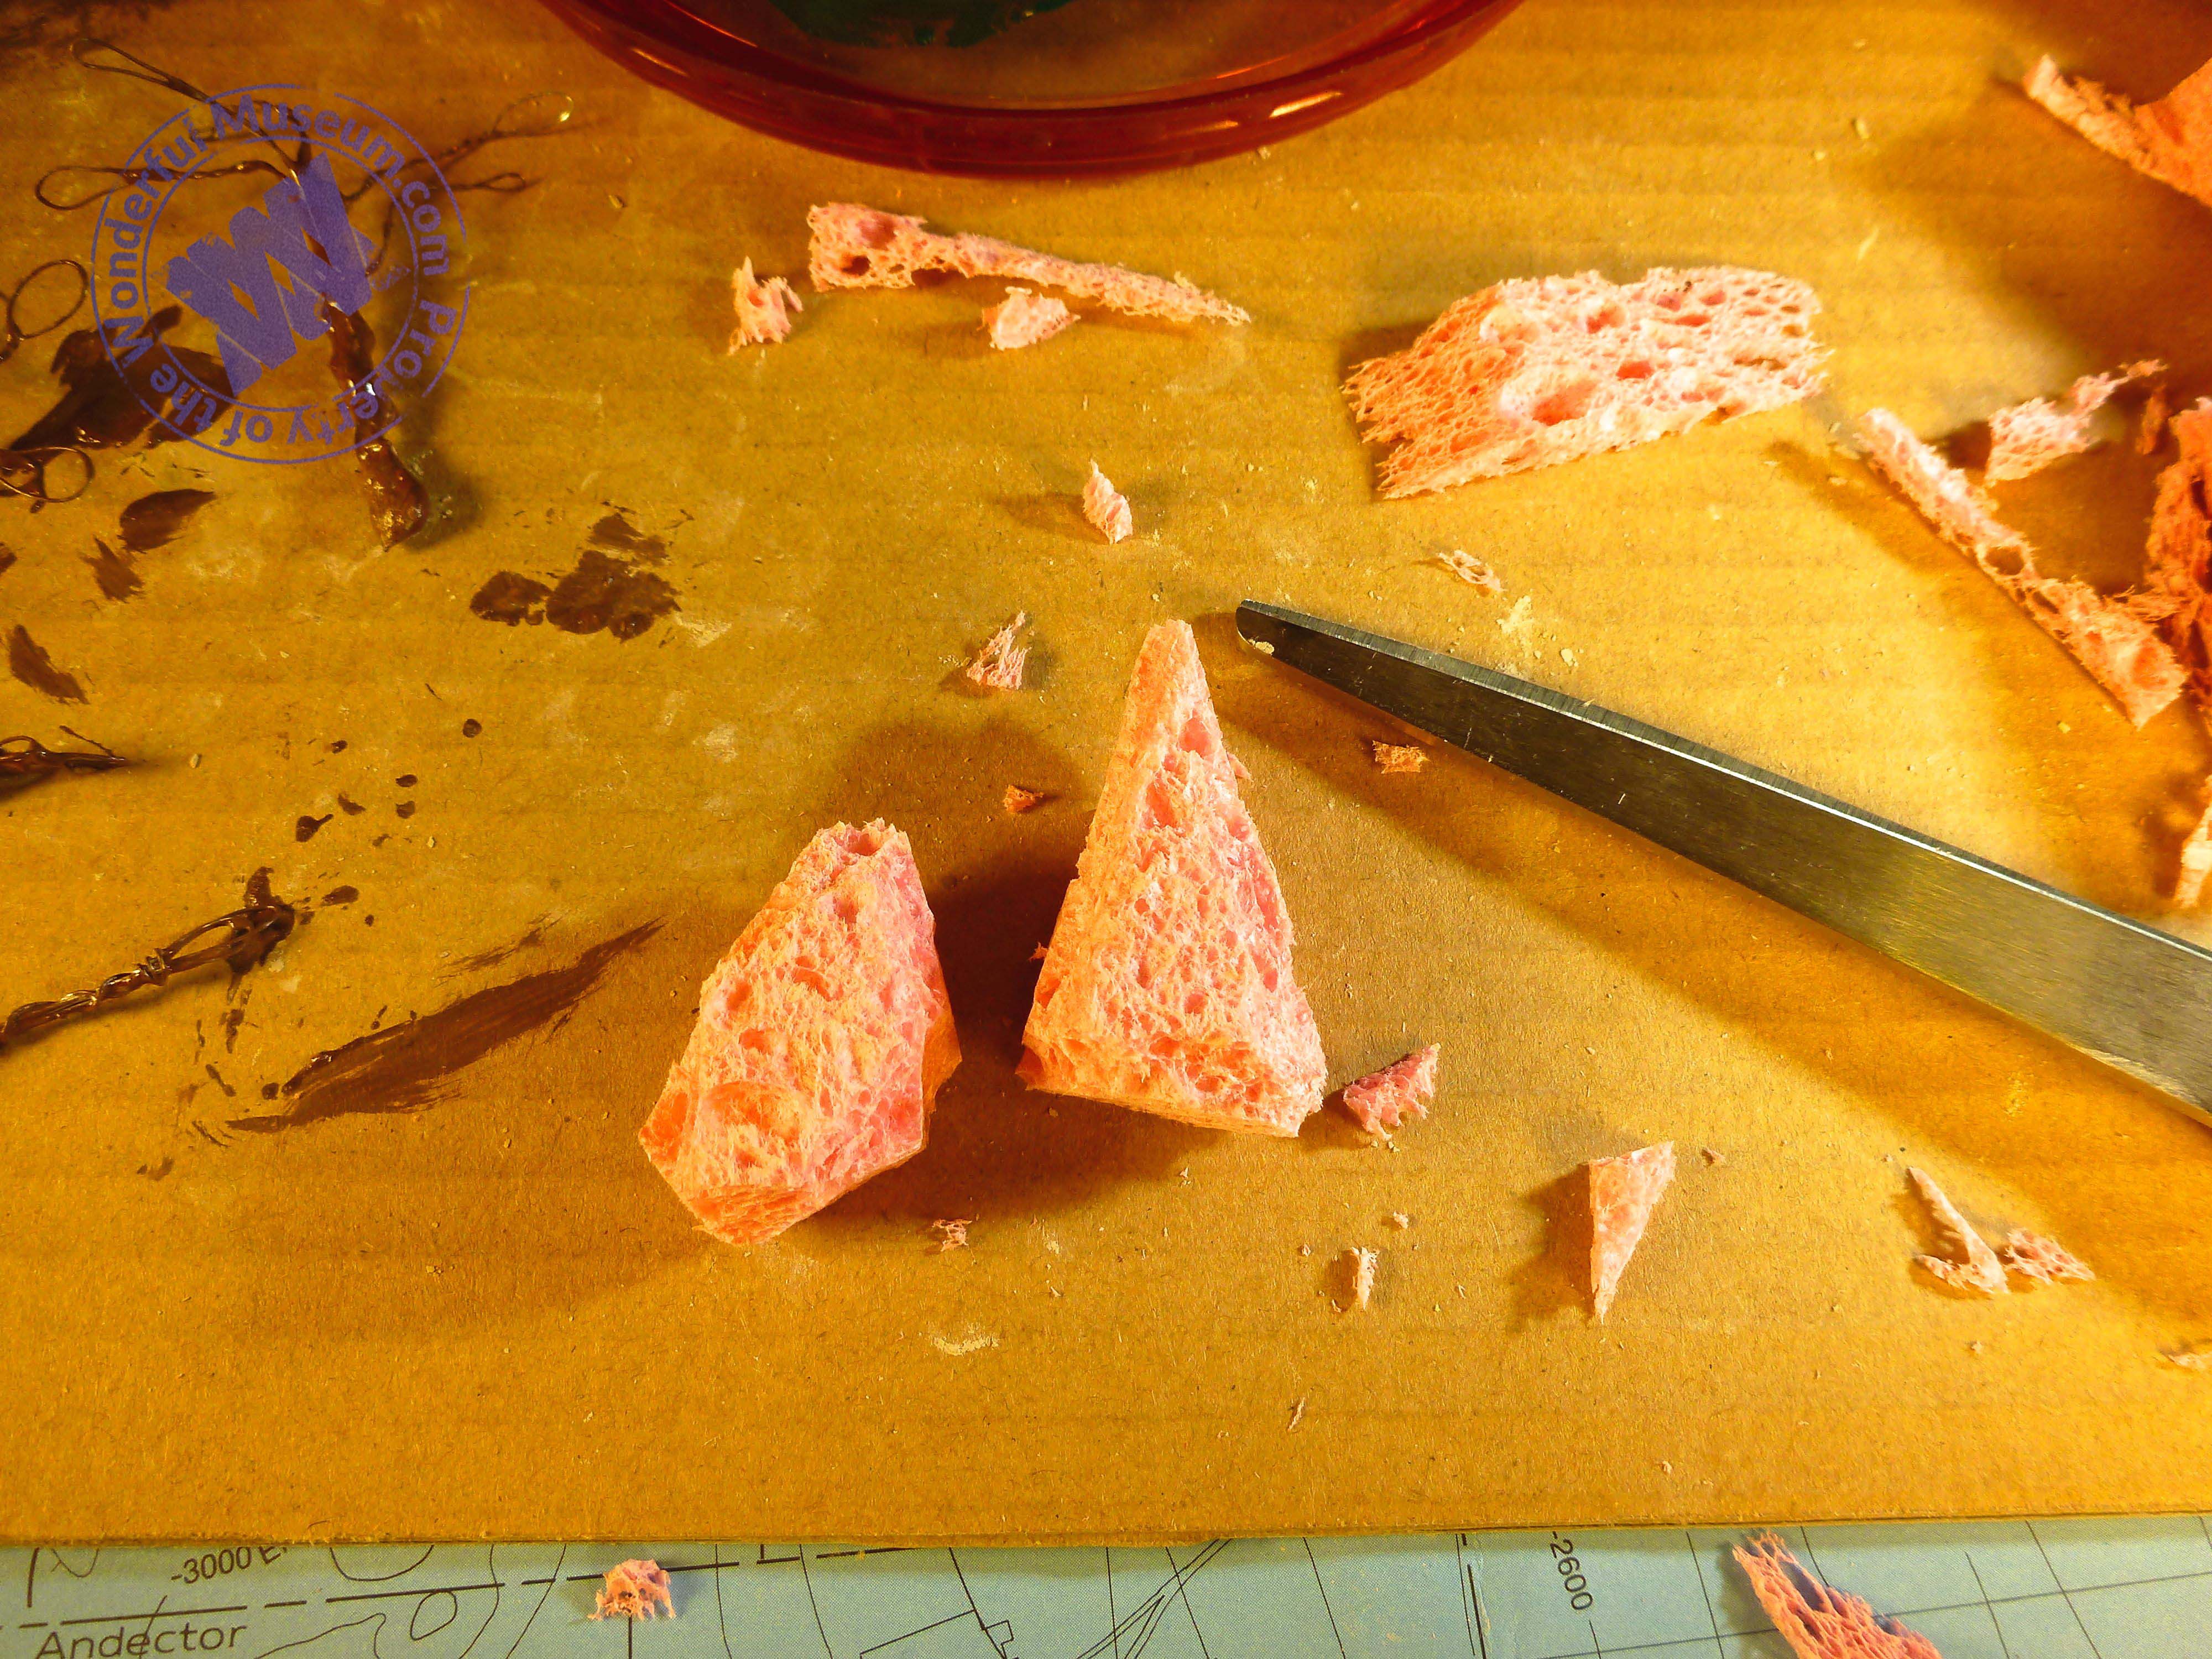
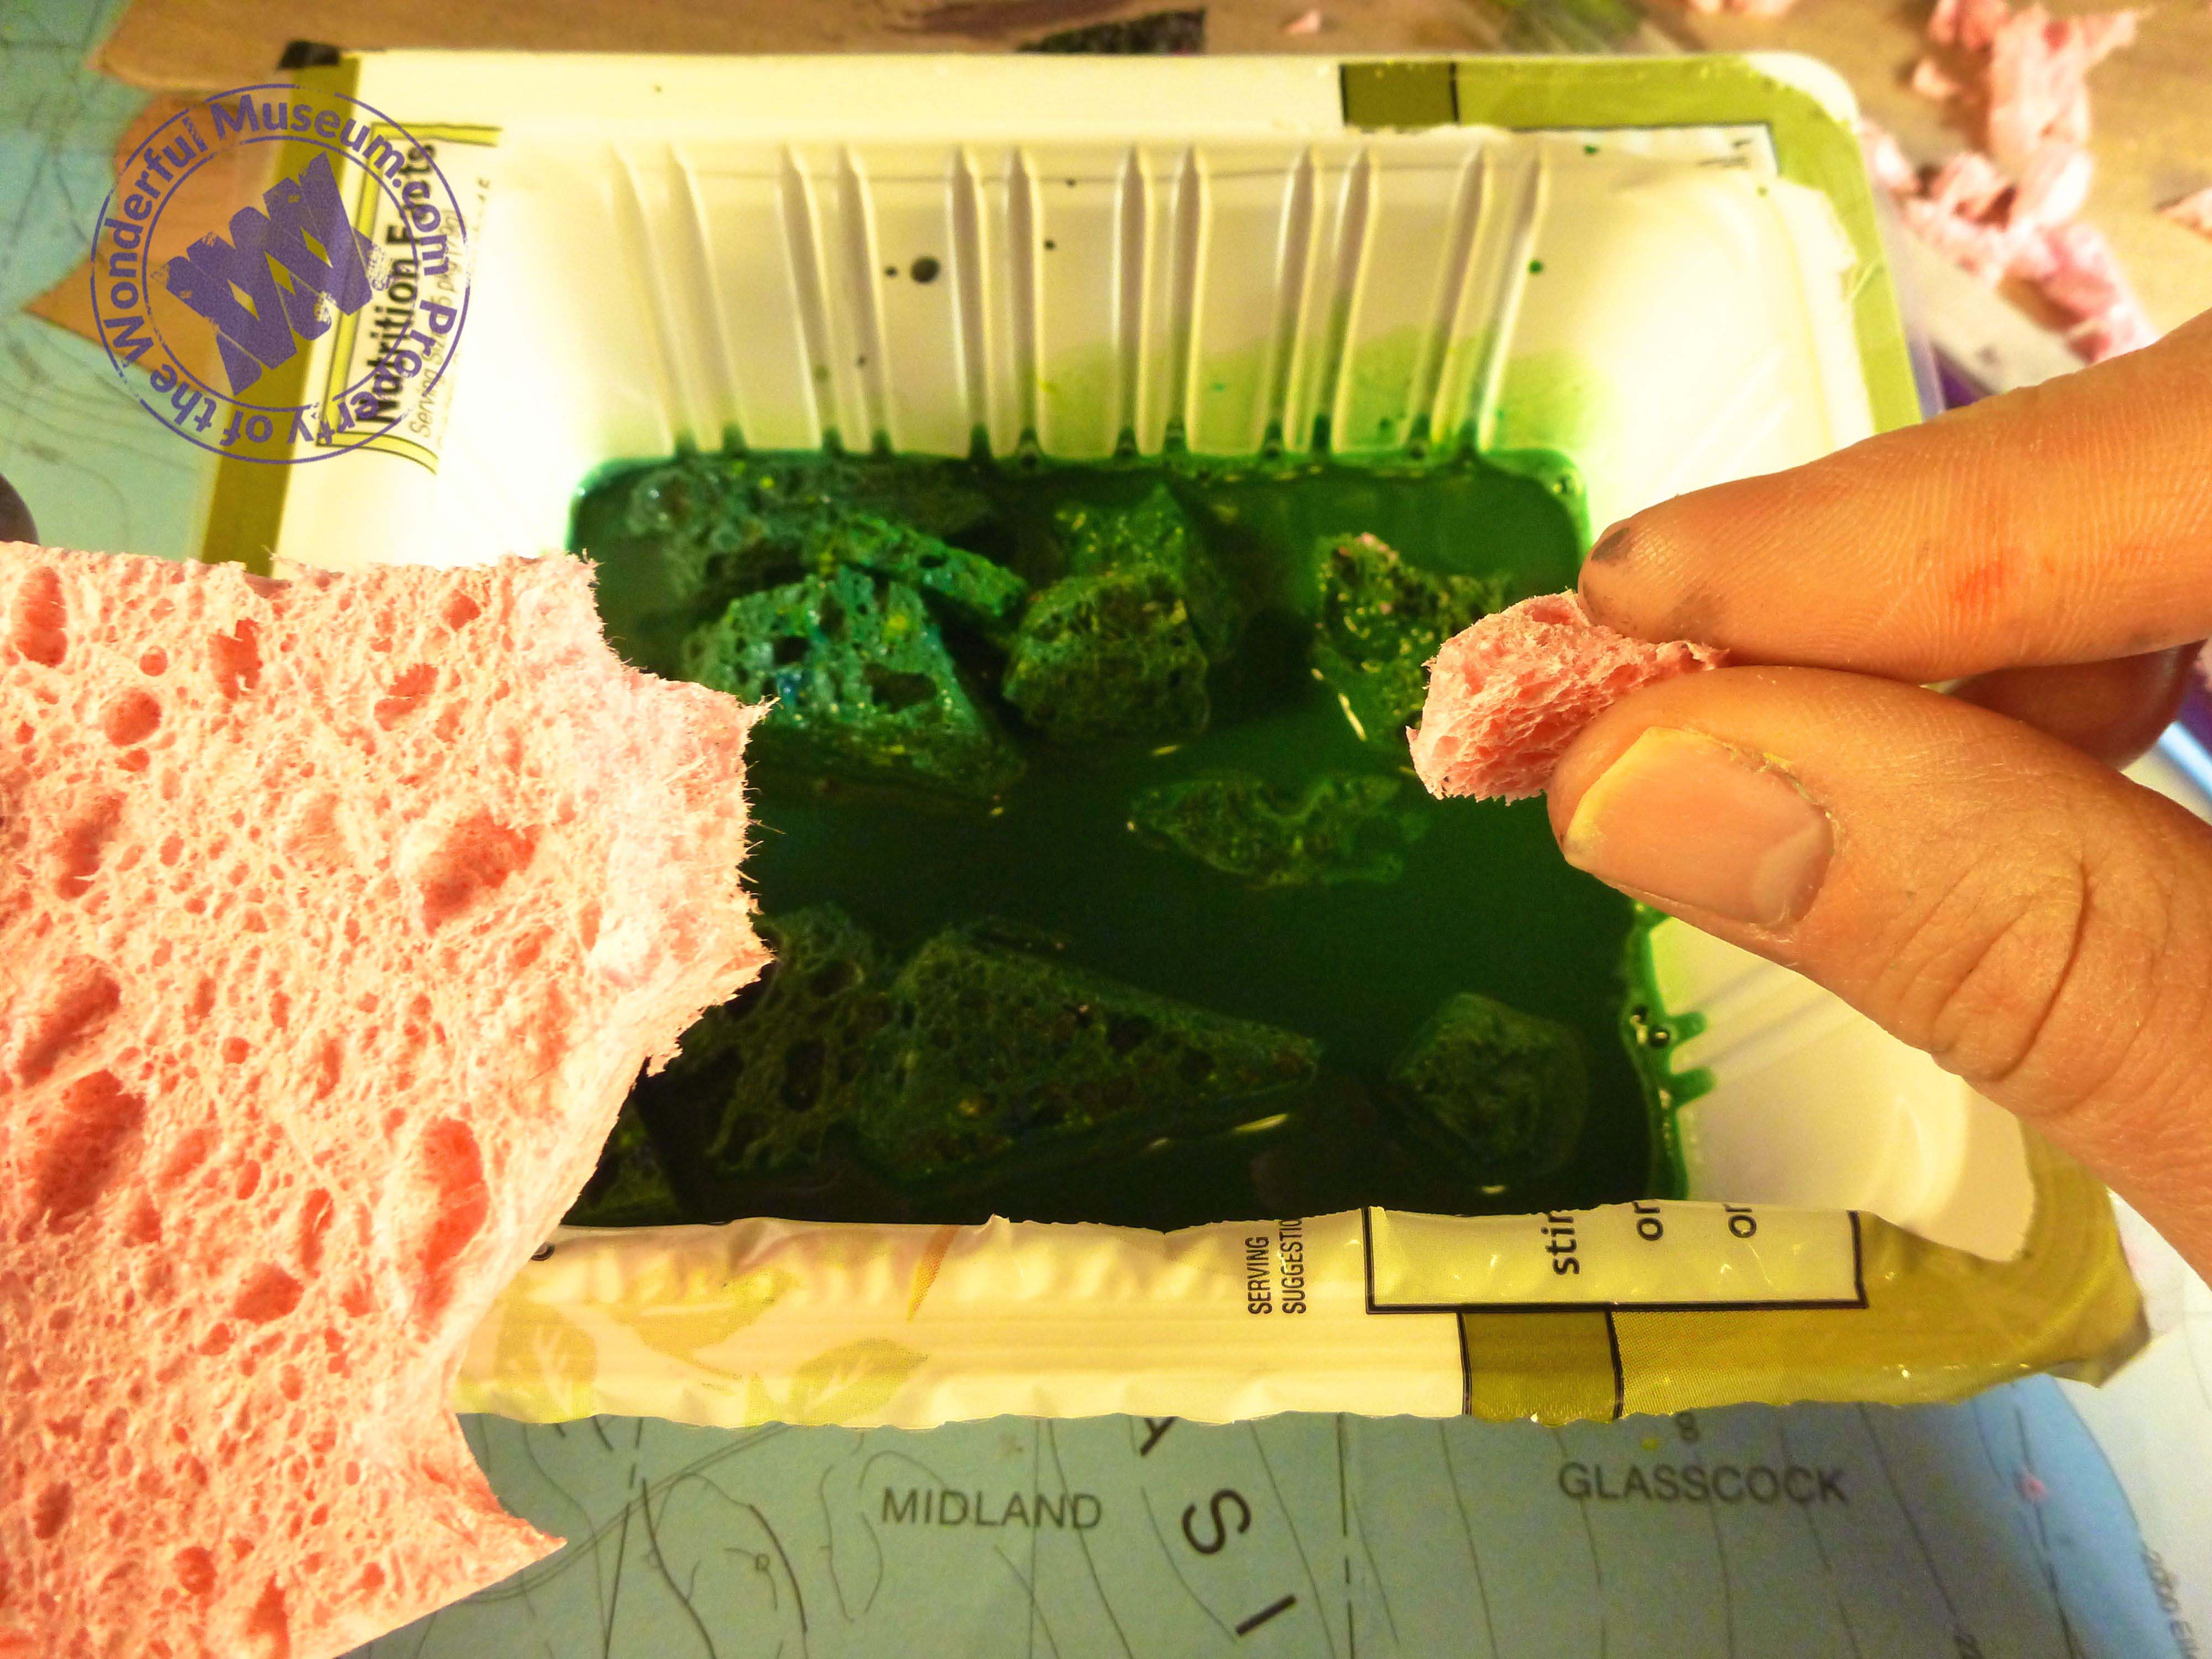
Now your bare tree needs some leaves. One easy way to make leaves is to take a normal kitchen sponge and cut it into irregular shapes. Take green paint and add a lot of water to it so that it is really soupy. Drop the bits of sponge in and let them soak up the paint before removing the pieces to let them dry.
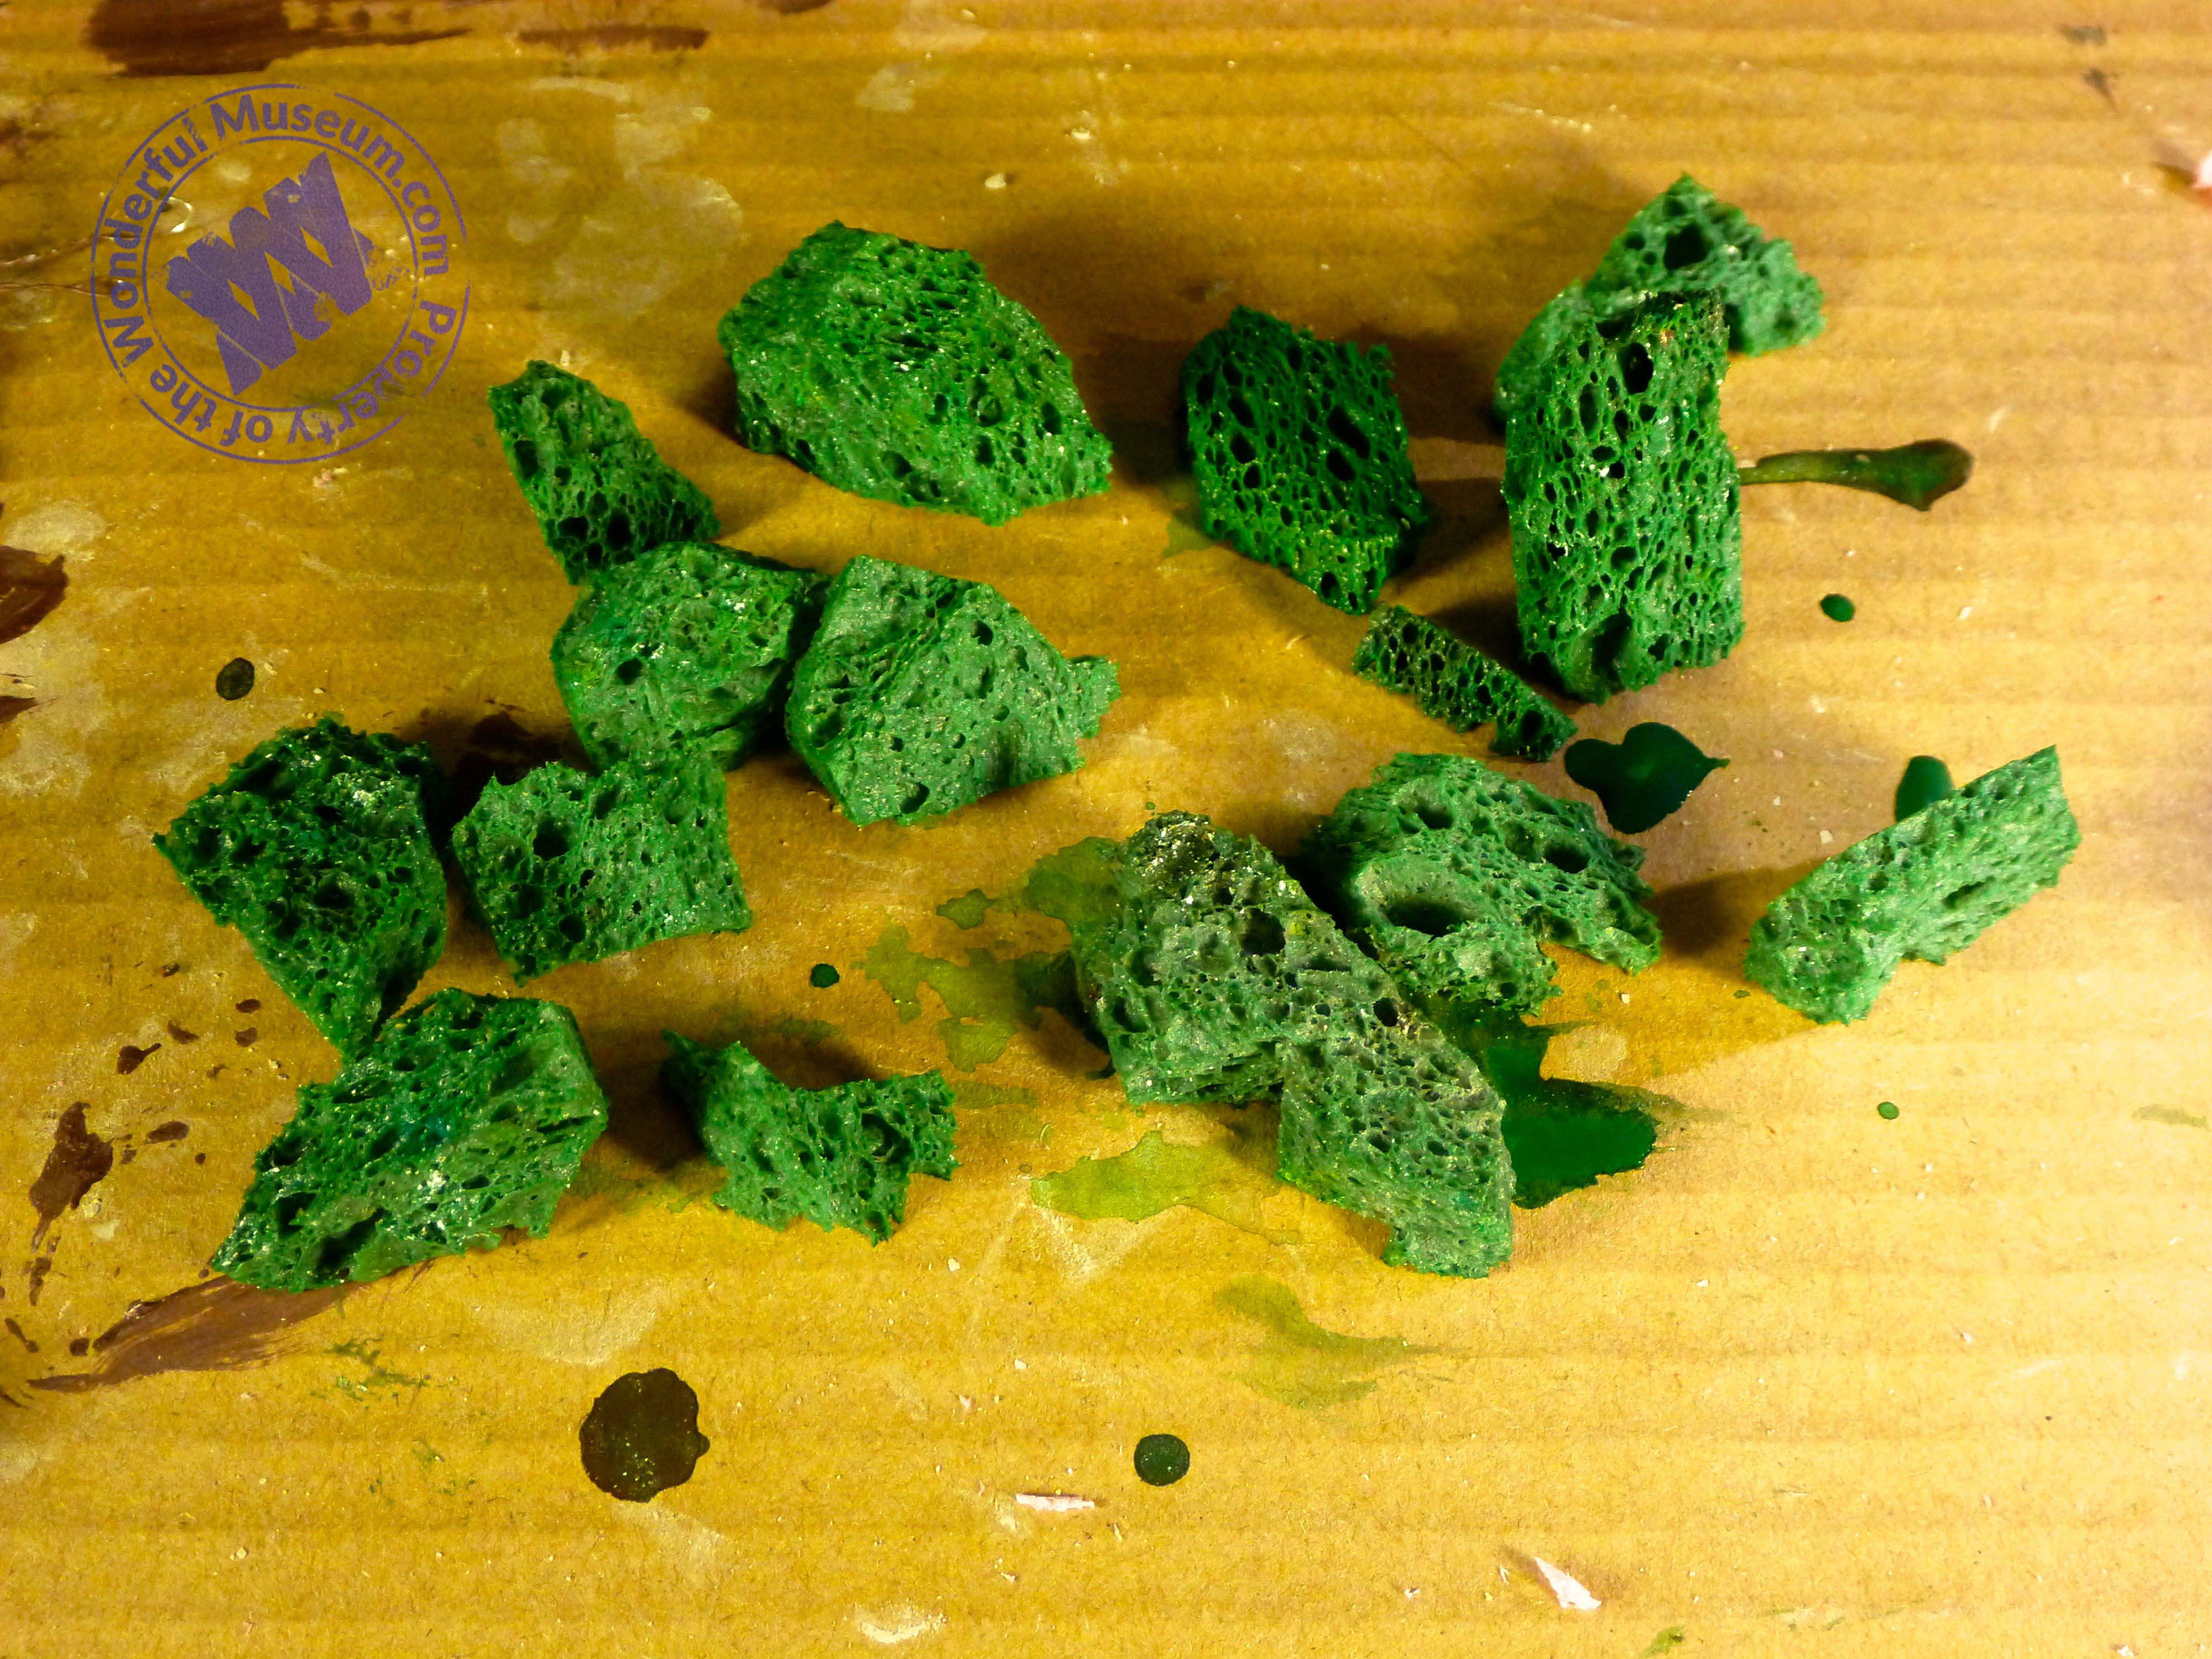
Once your trees and leaves are dry, use a hot glue gone to glue the sponge bit leaves onto the wire tree.
I made an acacia tree because they are common in the savanna but each species of tree will look a little different. Try experimenting around with how many loops of wire you do, how long the loops are, how far up the trunk you wrap the wire, etc. until you find a shape that works for the tree you want. Practice by choosing three types of trees in your neighborhood and making little models of them. Remember, the color of the leaves and the shape of the sponge bit leaves will change too depending on the tree.
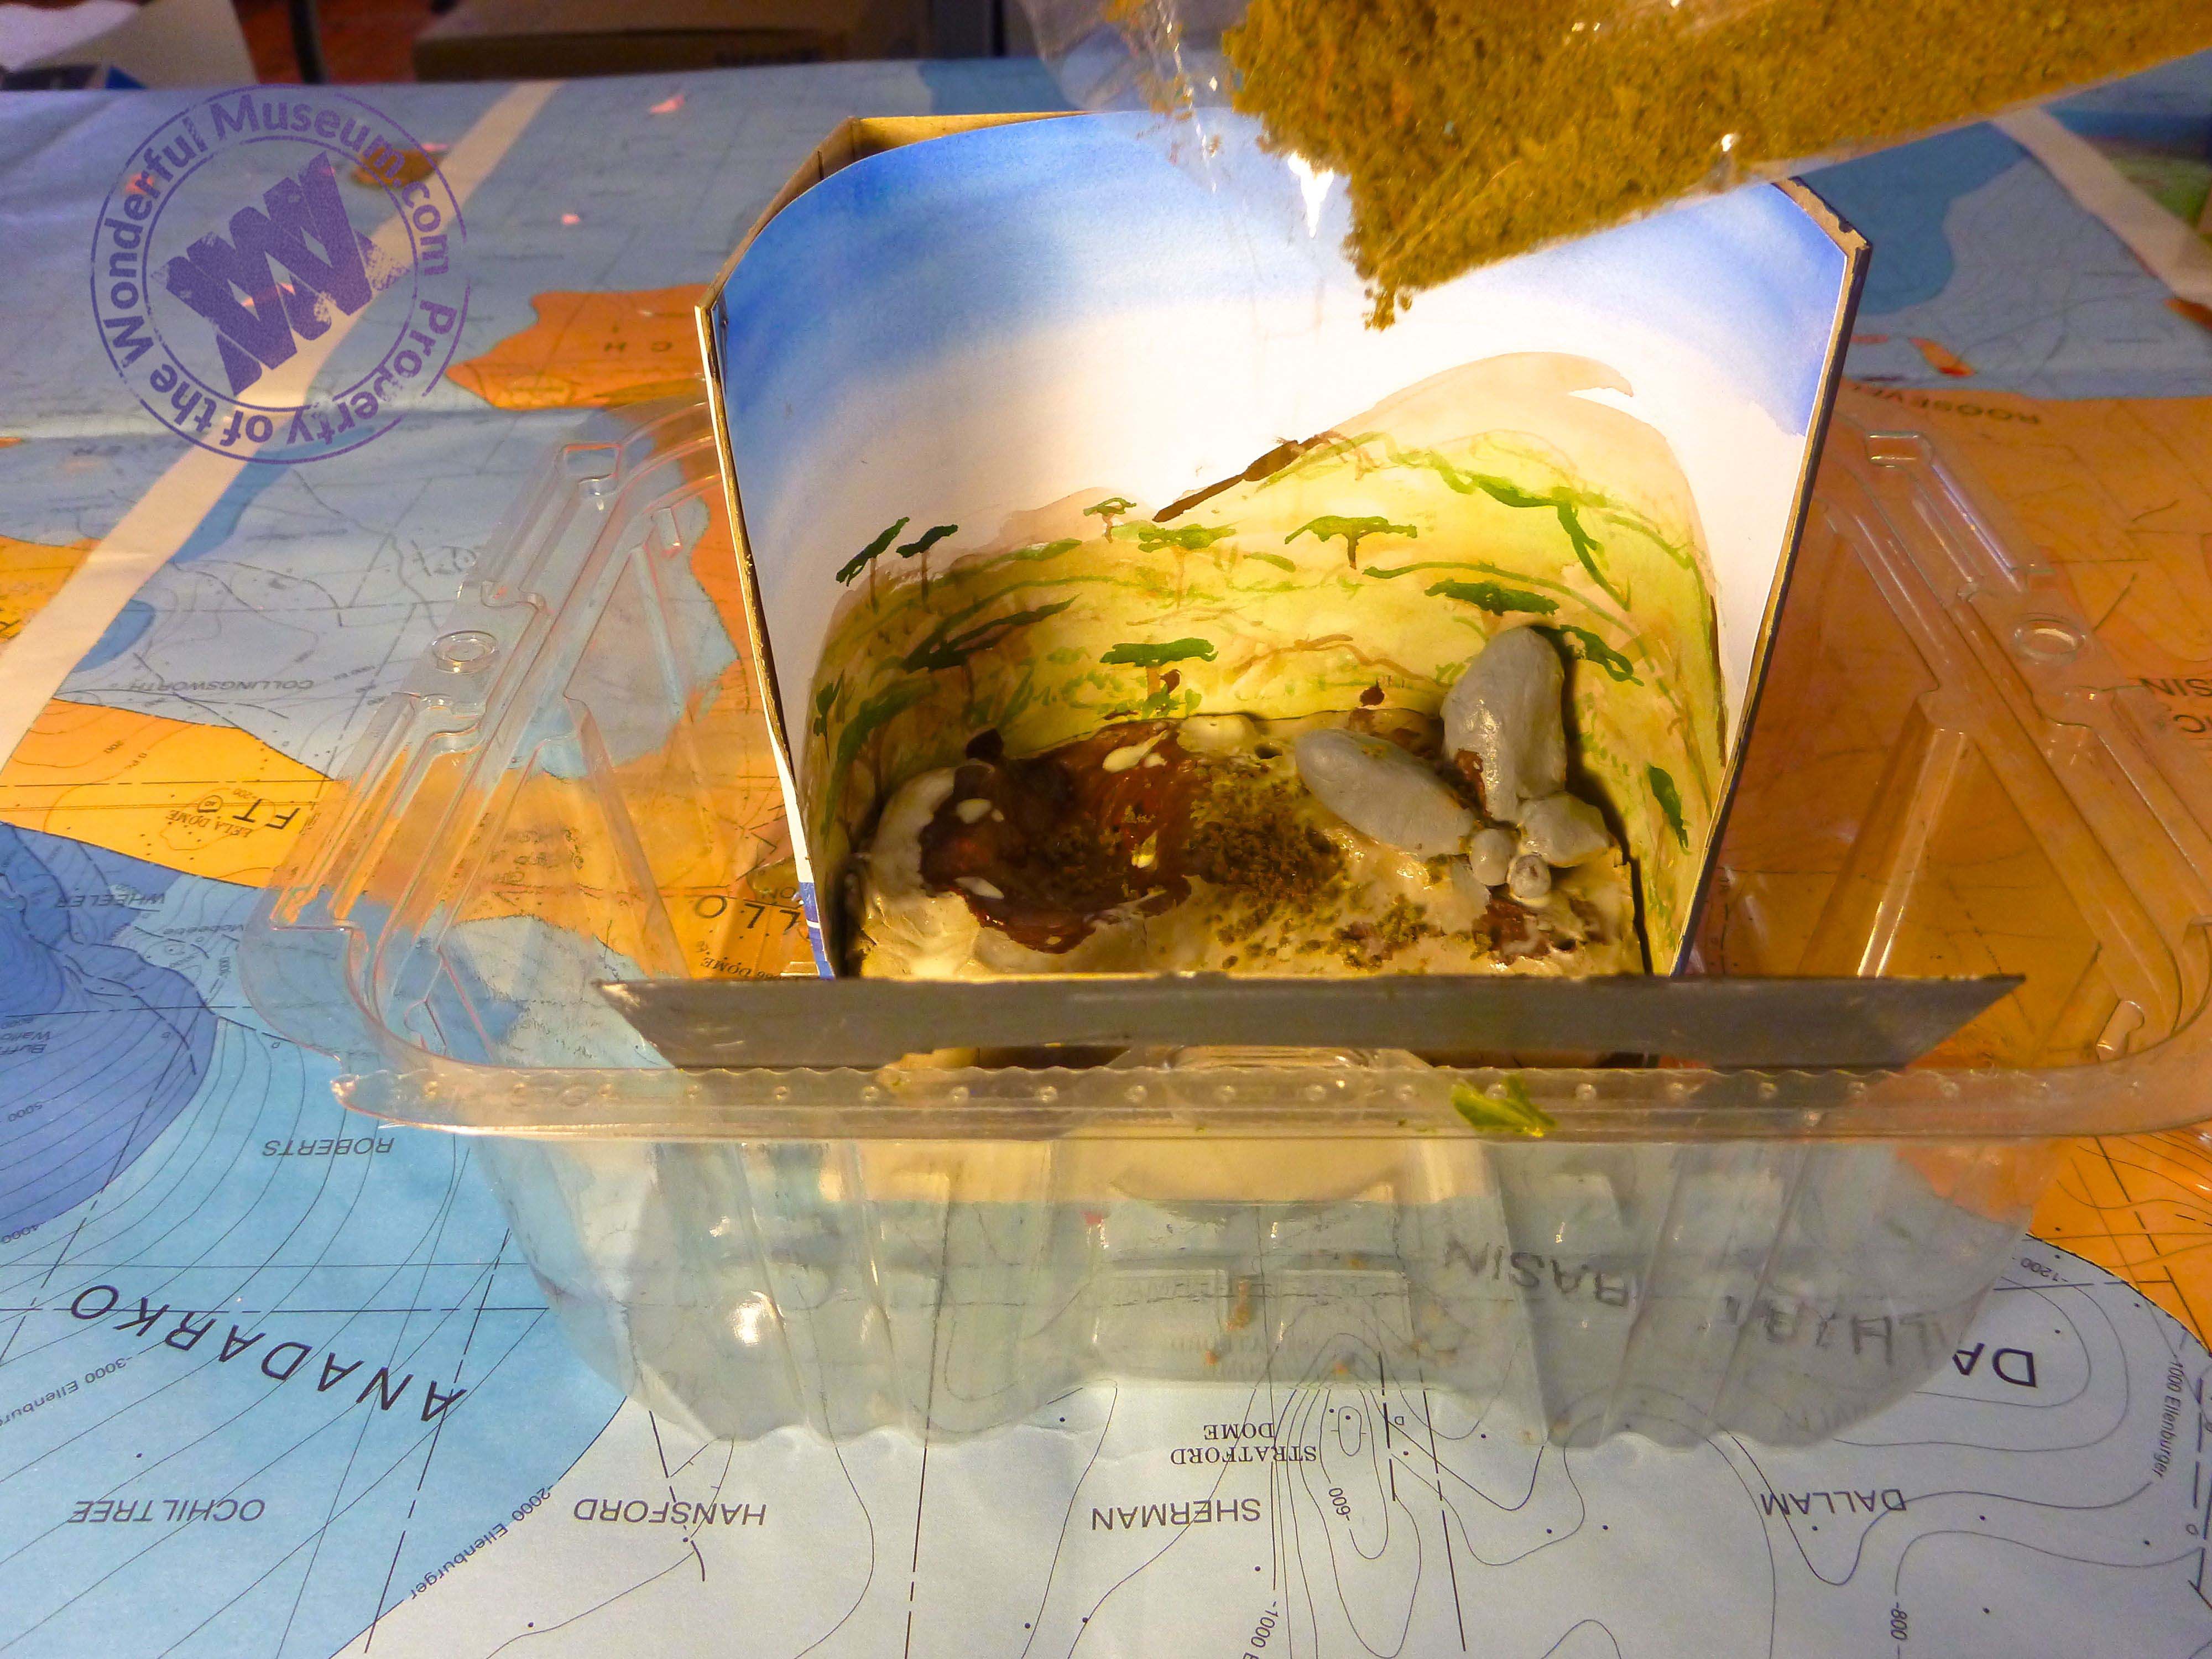
The best way to make grass is to use something called flocking. Flocking is basically grass colored sawdust and it can be purchased at art and hobby stores. To apply flocking, take some wood glue and mix it with about the same amount of water so that you have a really thin glue.
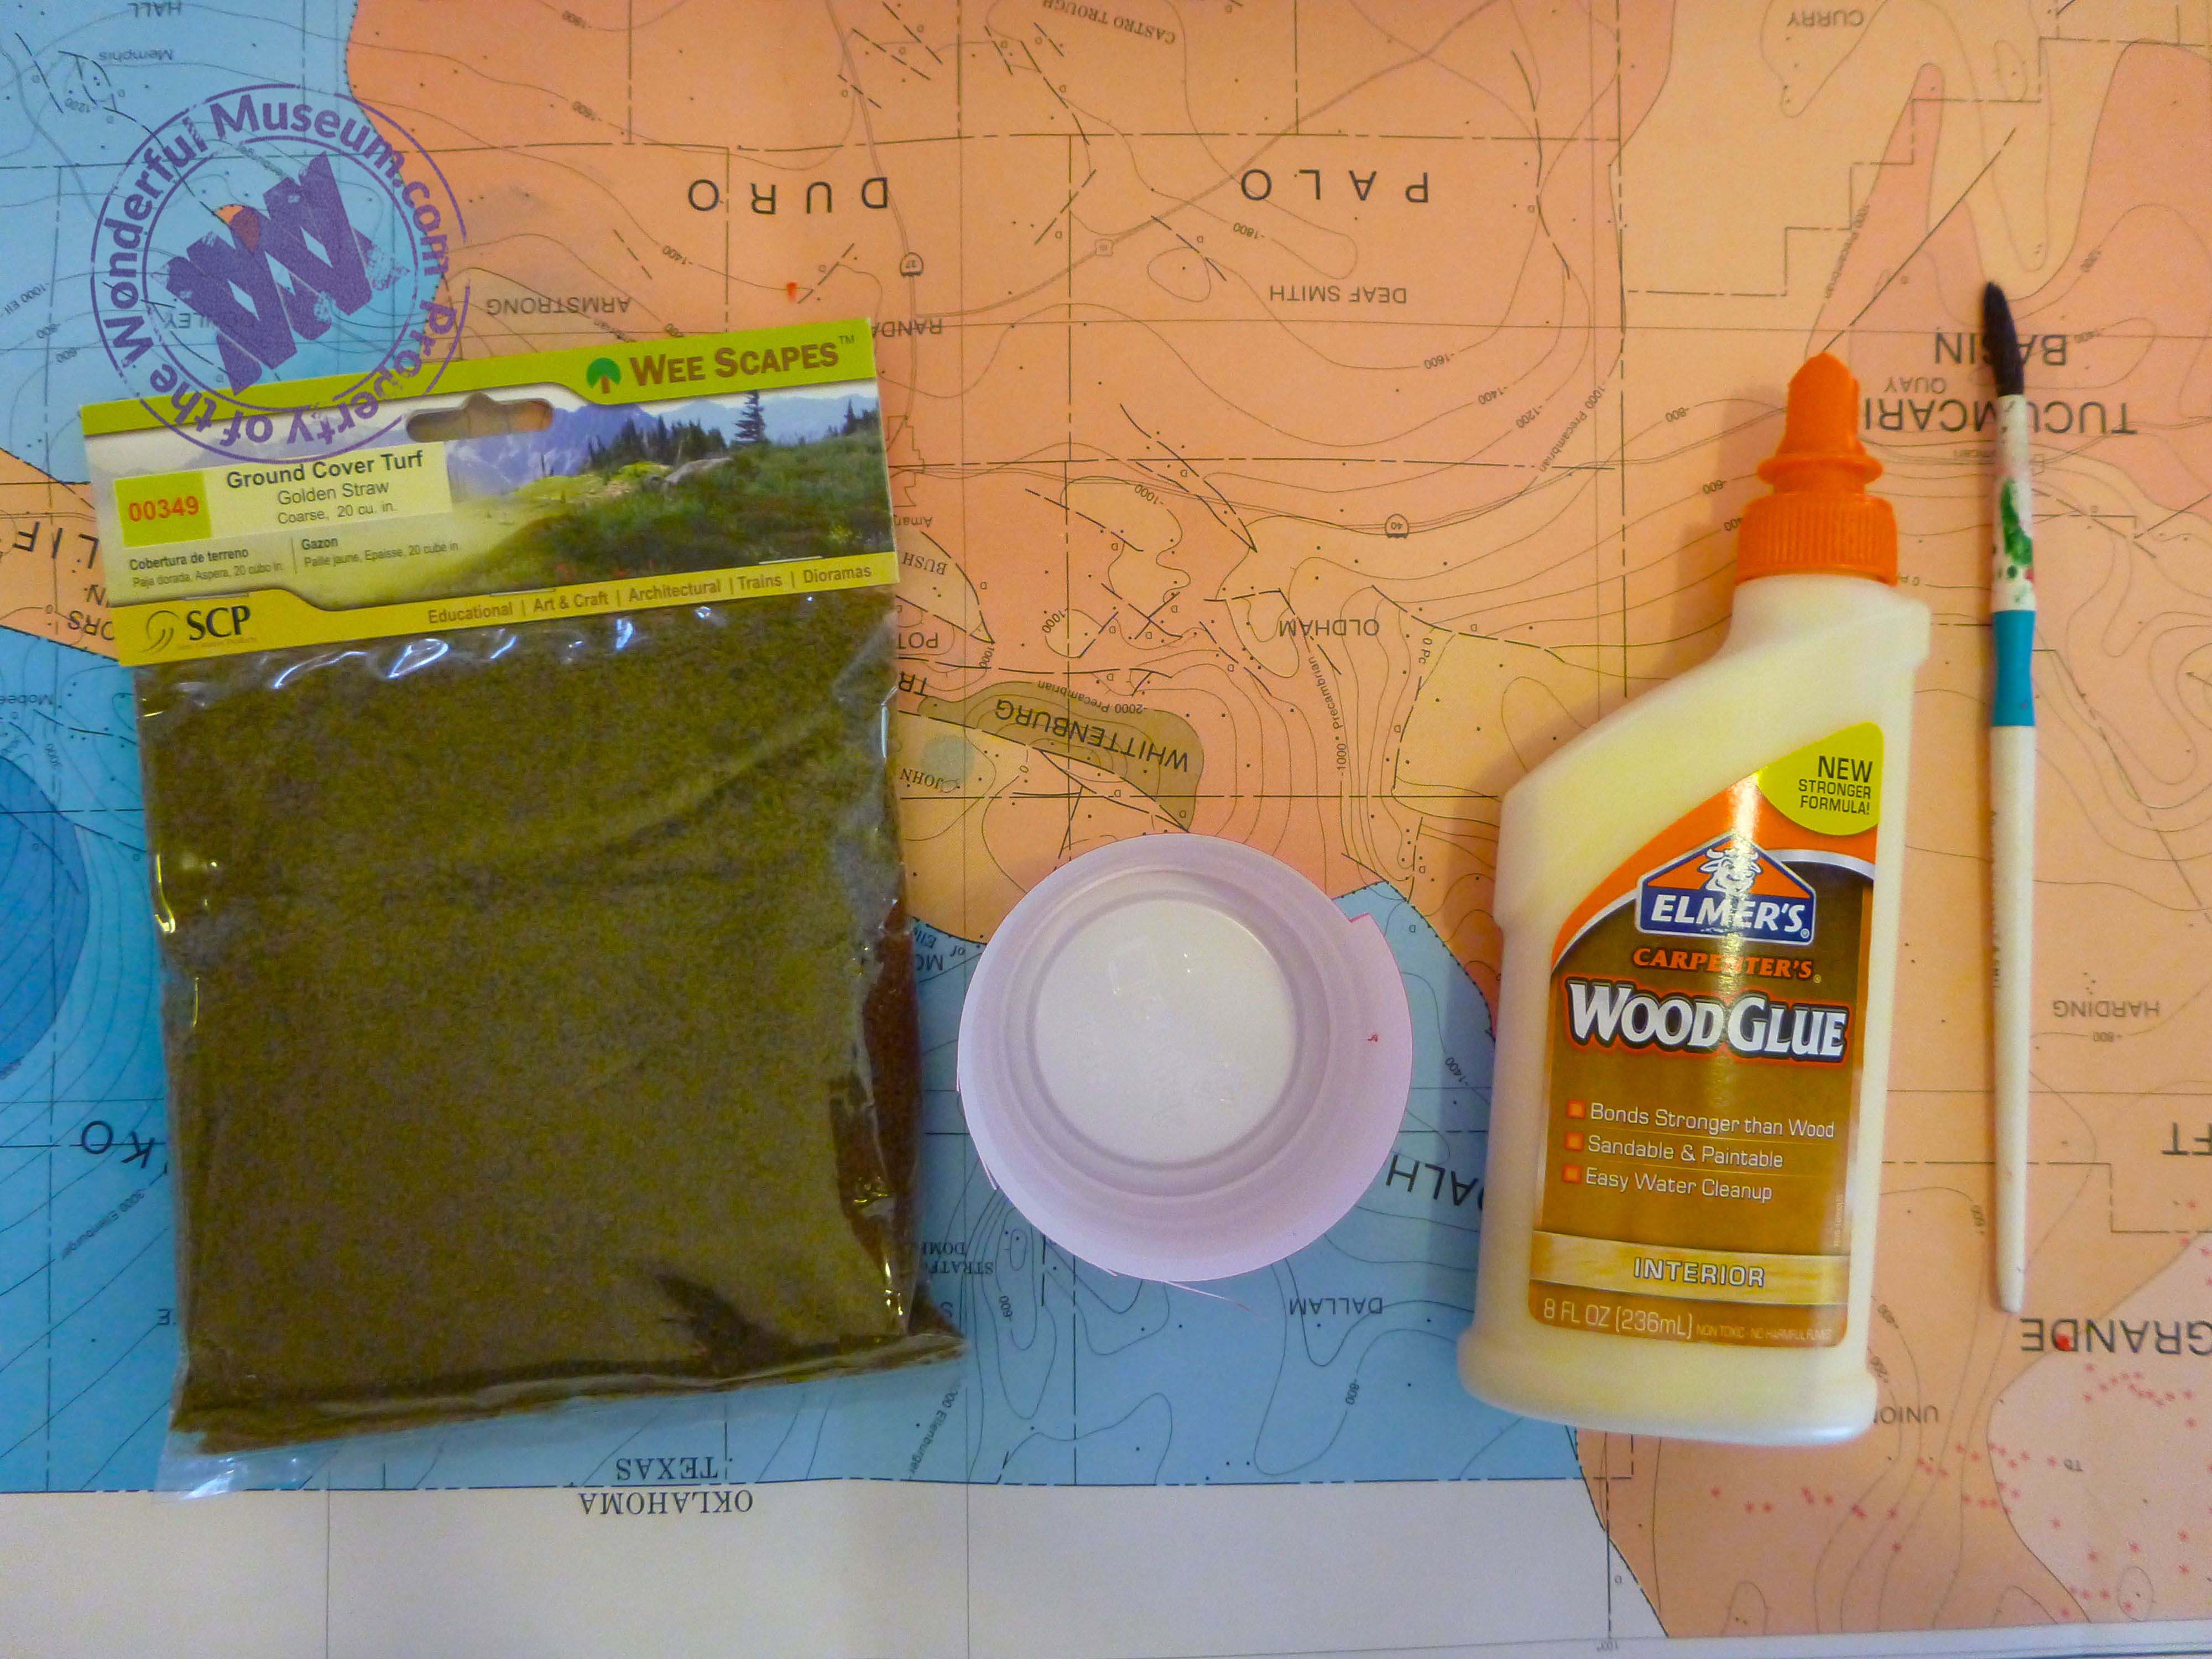
Using an old brush, paint this glue onto all the areas of your diorama where you want to add grass.
Then pour the flocking over your diorama while the glue is still wet. It is a good idea to have your diorama in a large tray or container so you can shake off extra flocking and reuse it.
Add in your trees.
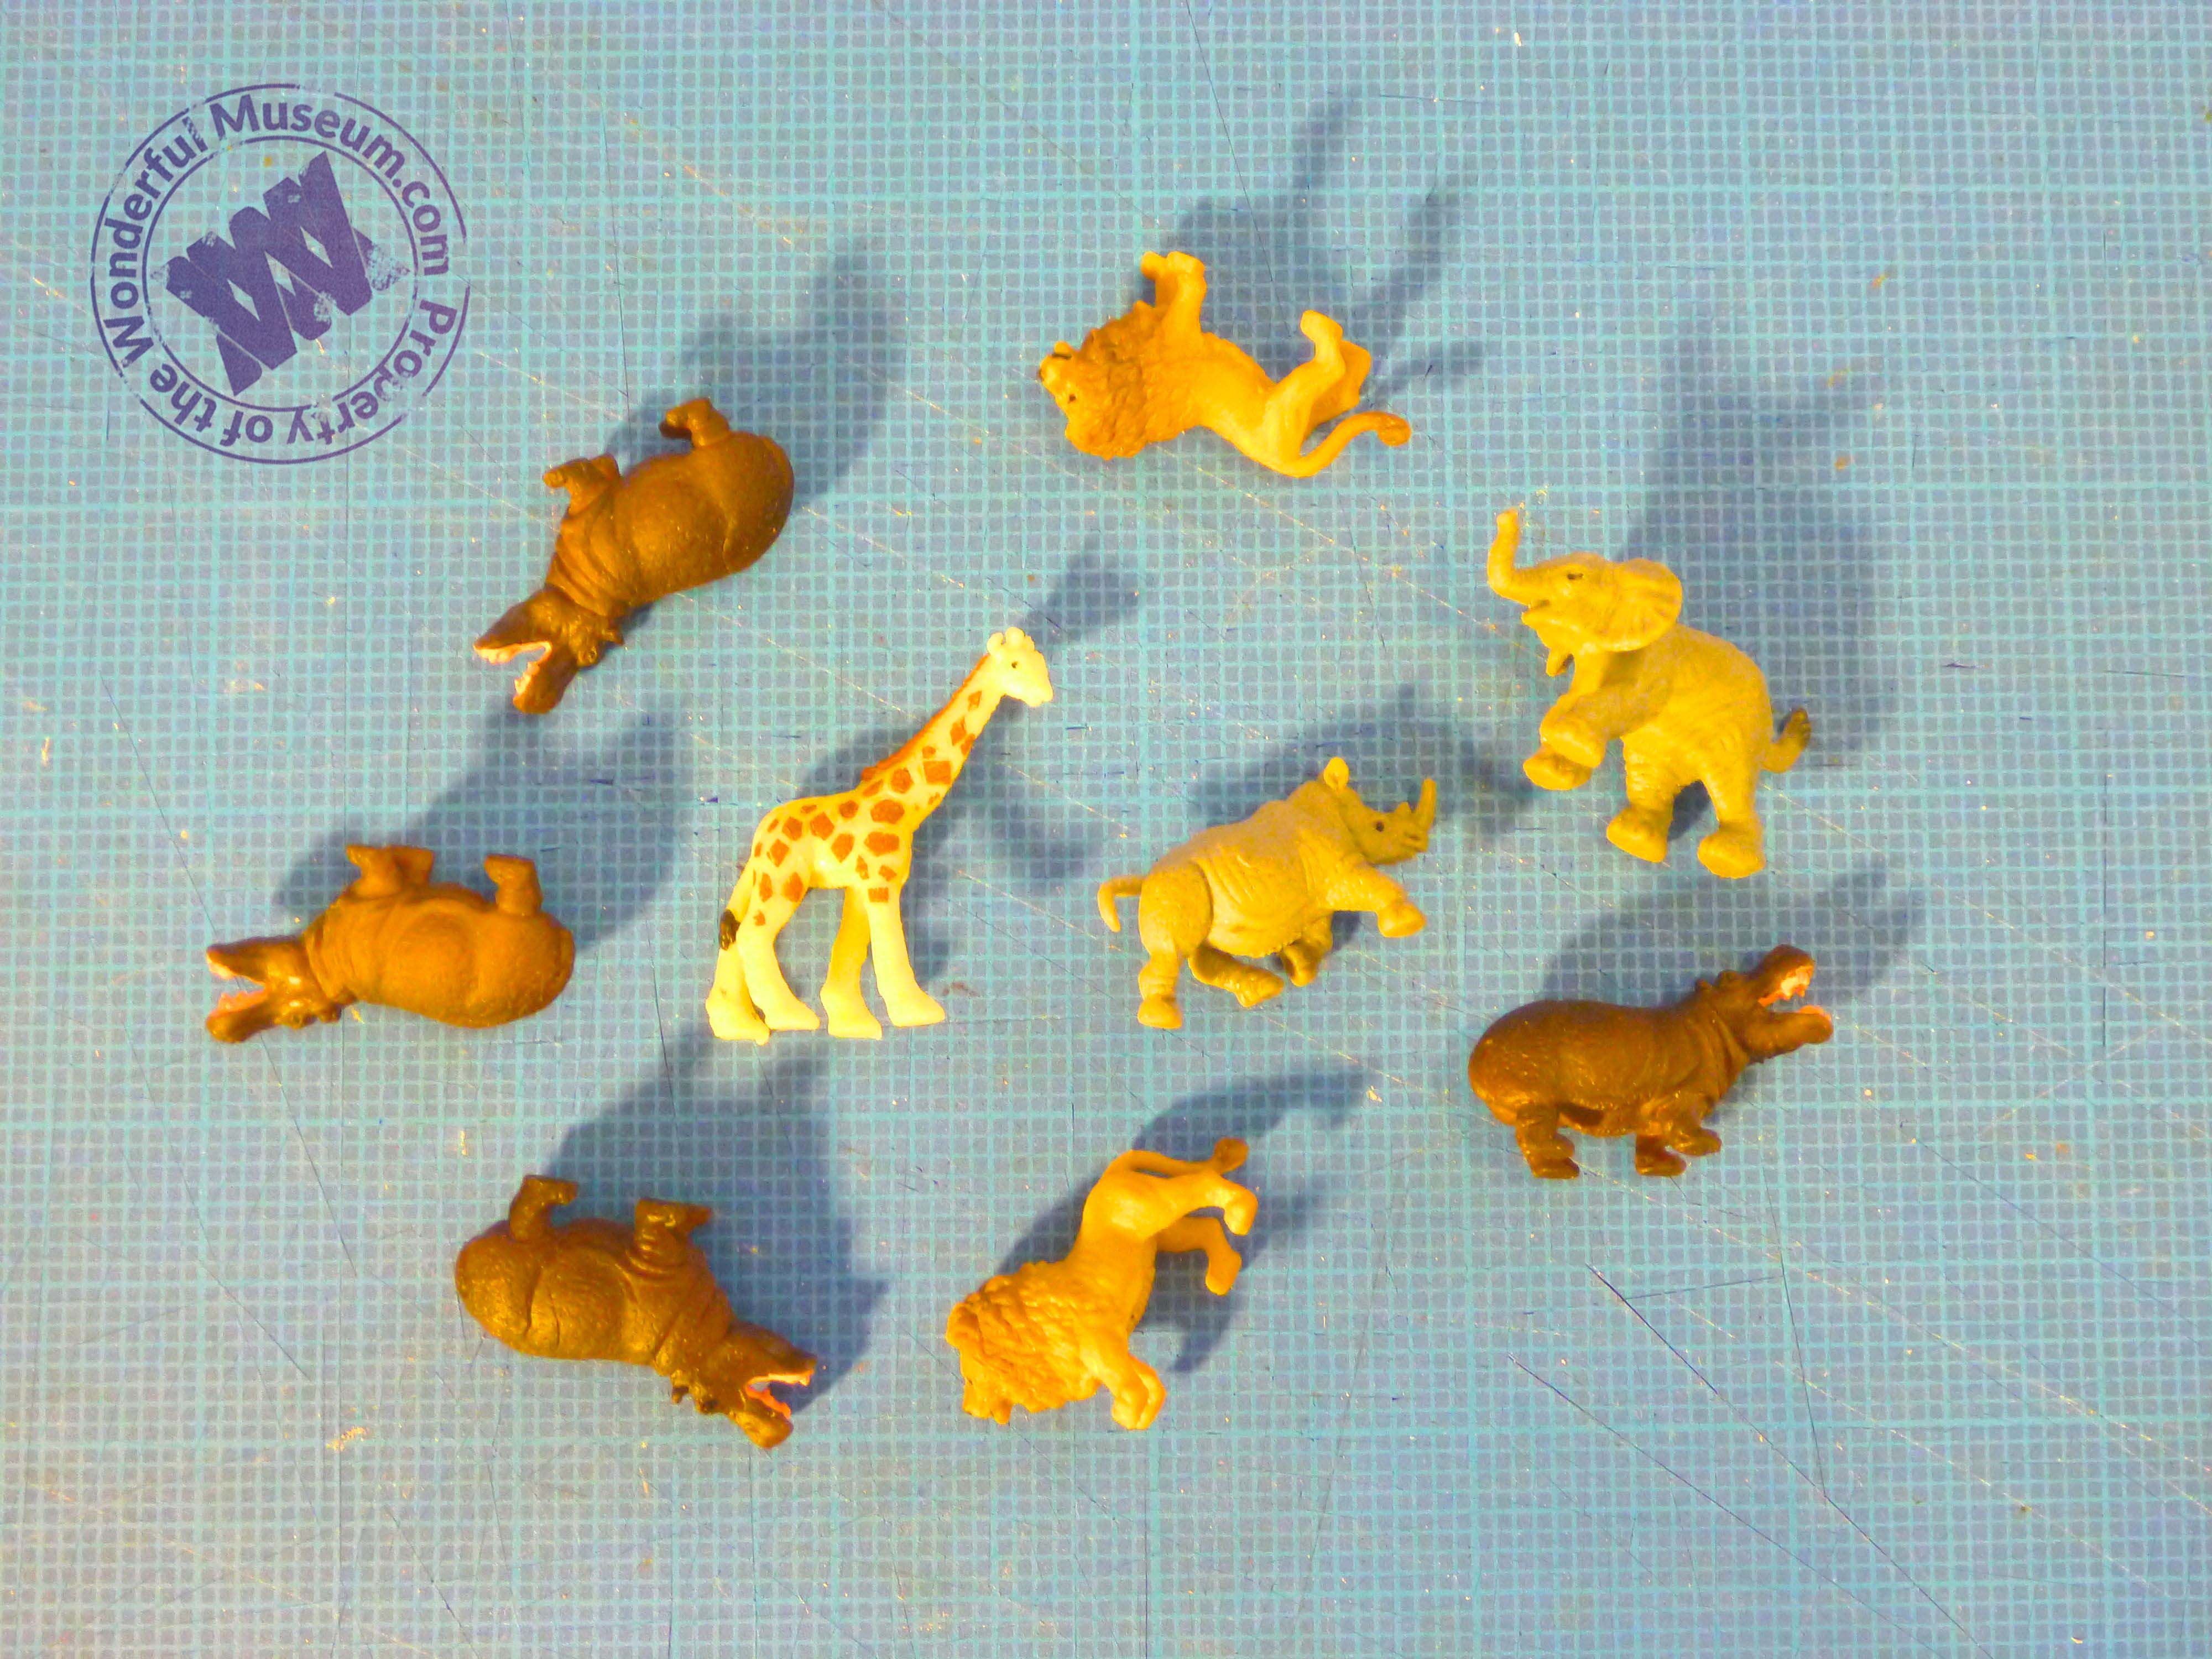
And the animals you want. Try to put your animals in lifelike positions. What would they be doing in the wild? Come up with a story for each animal and think what they are all doing together in your scene. Remember to include only animals that would actually be in your habitat. The animals I used are called Good Luck Minis and can be found in art, toy, and museum stores but you can make your own animals from clay if you want to.

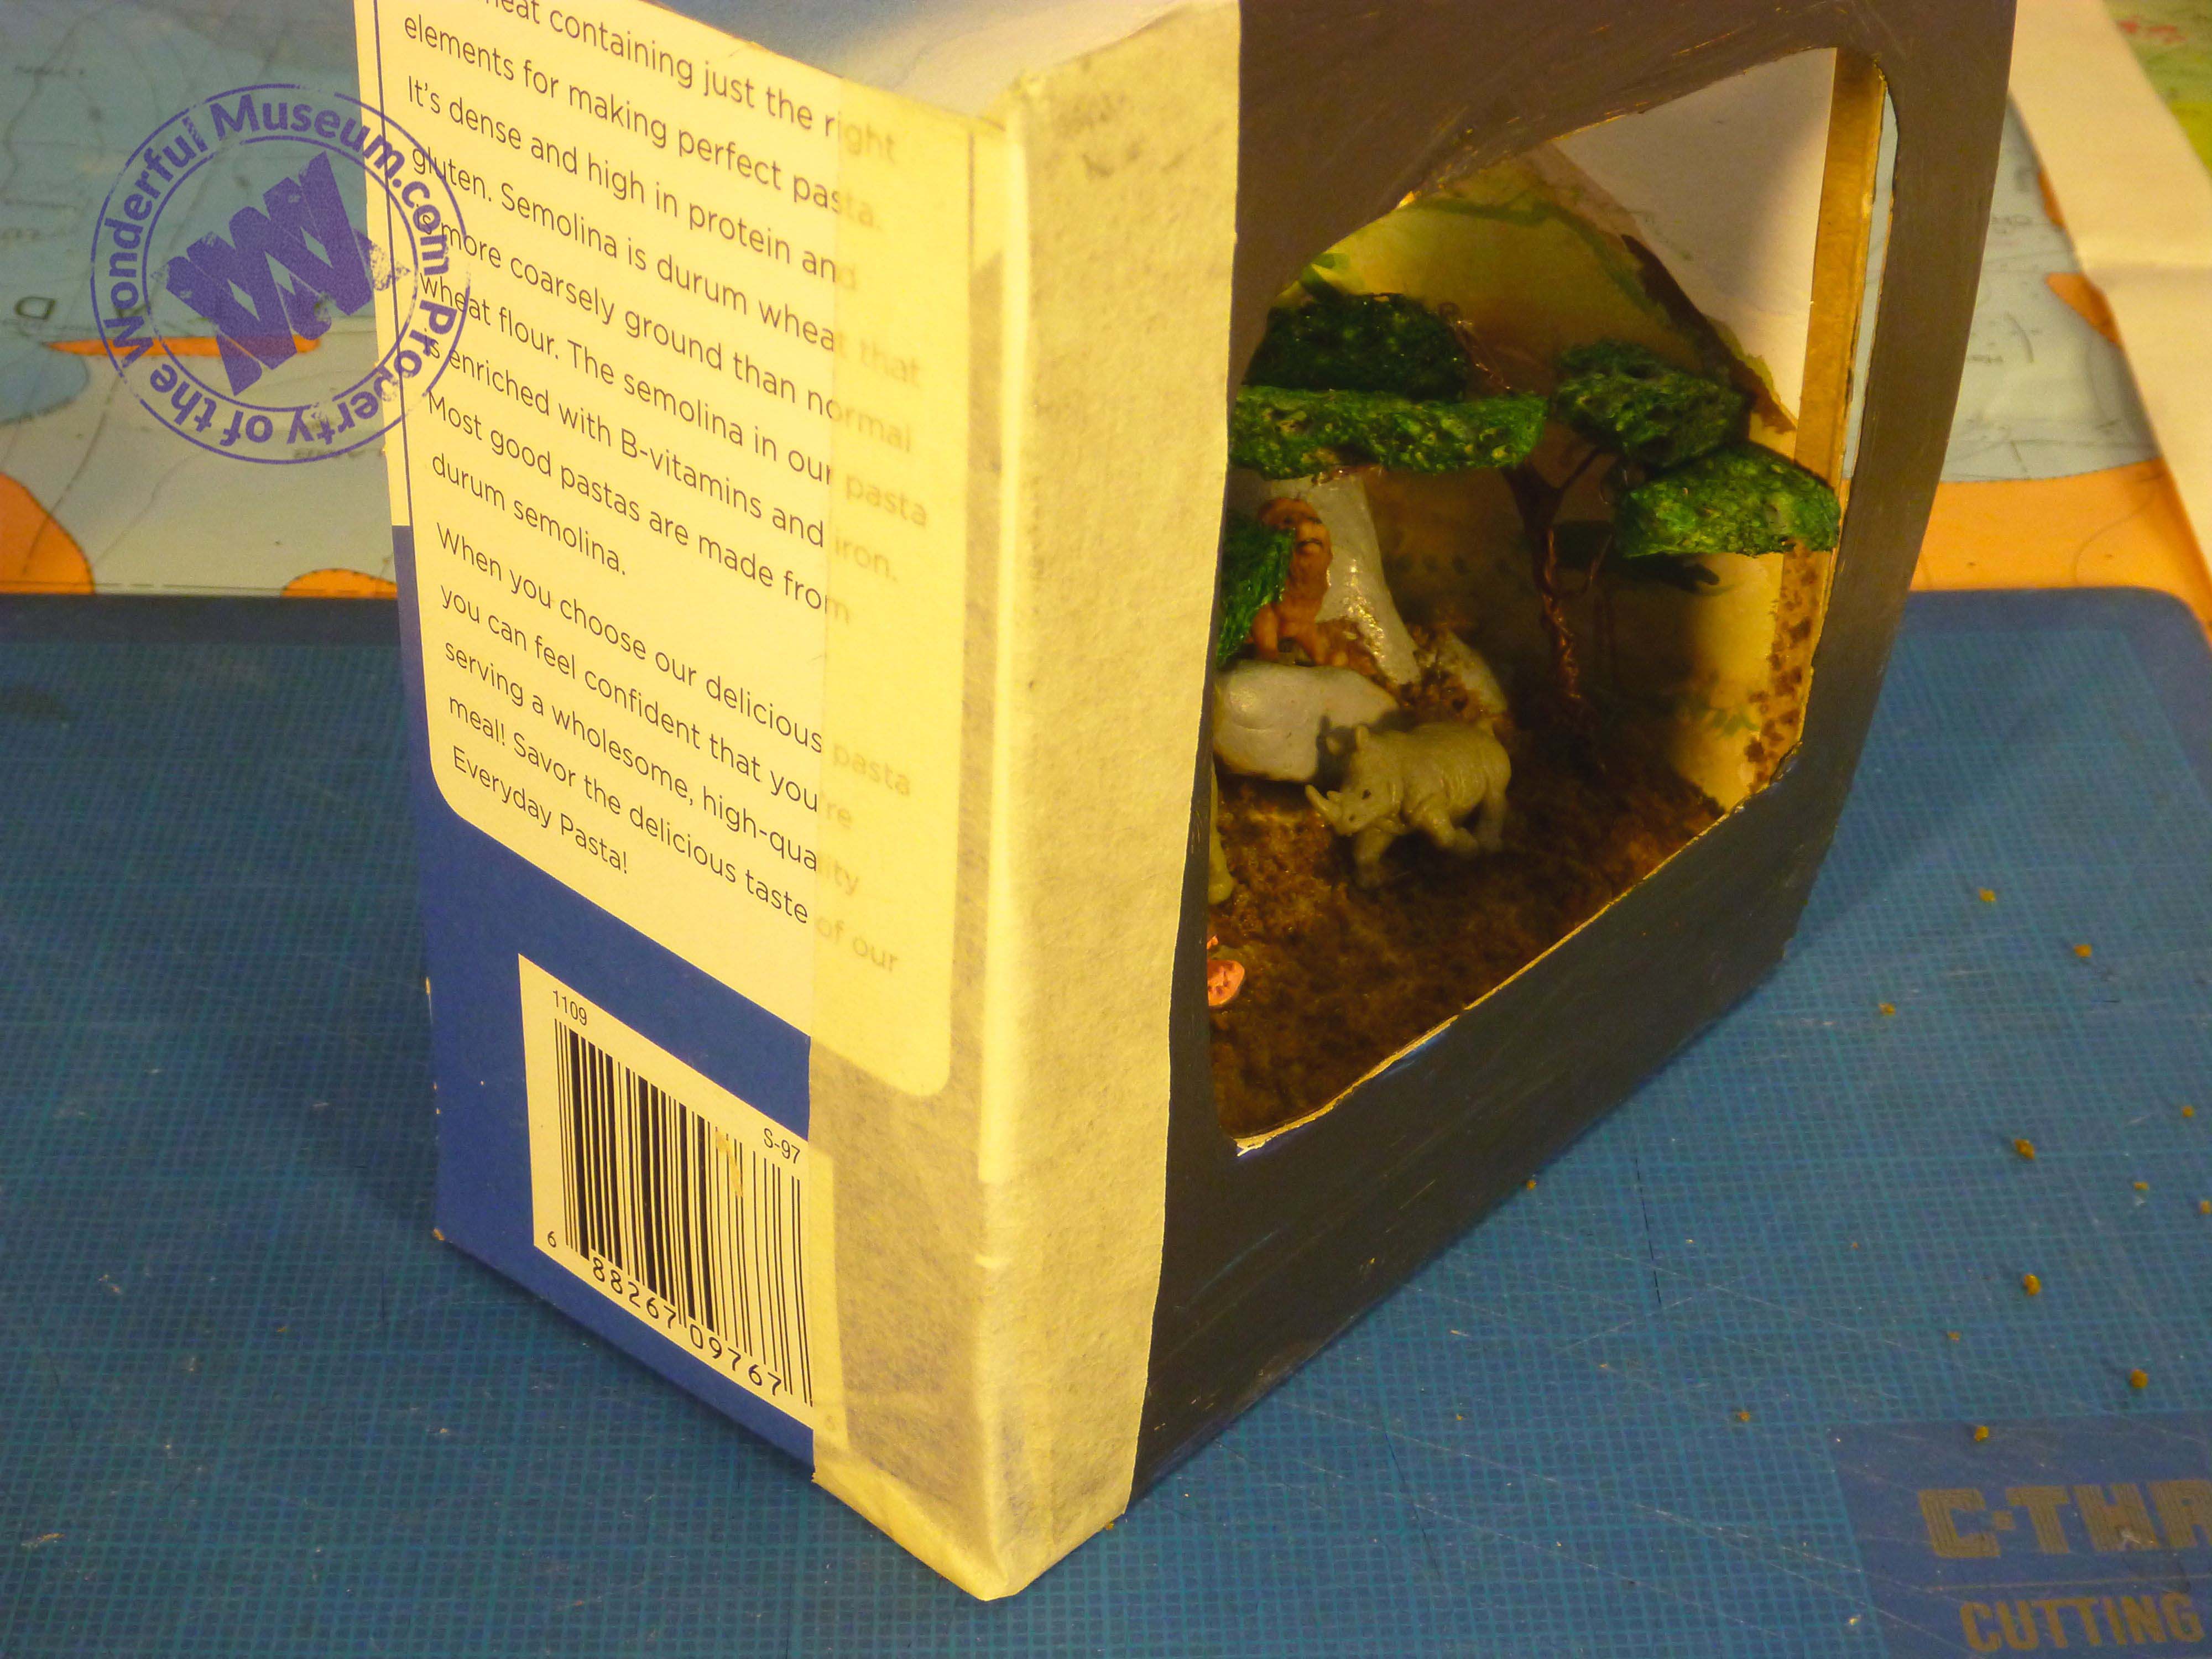
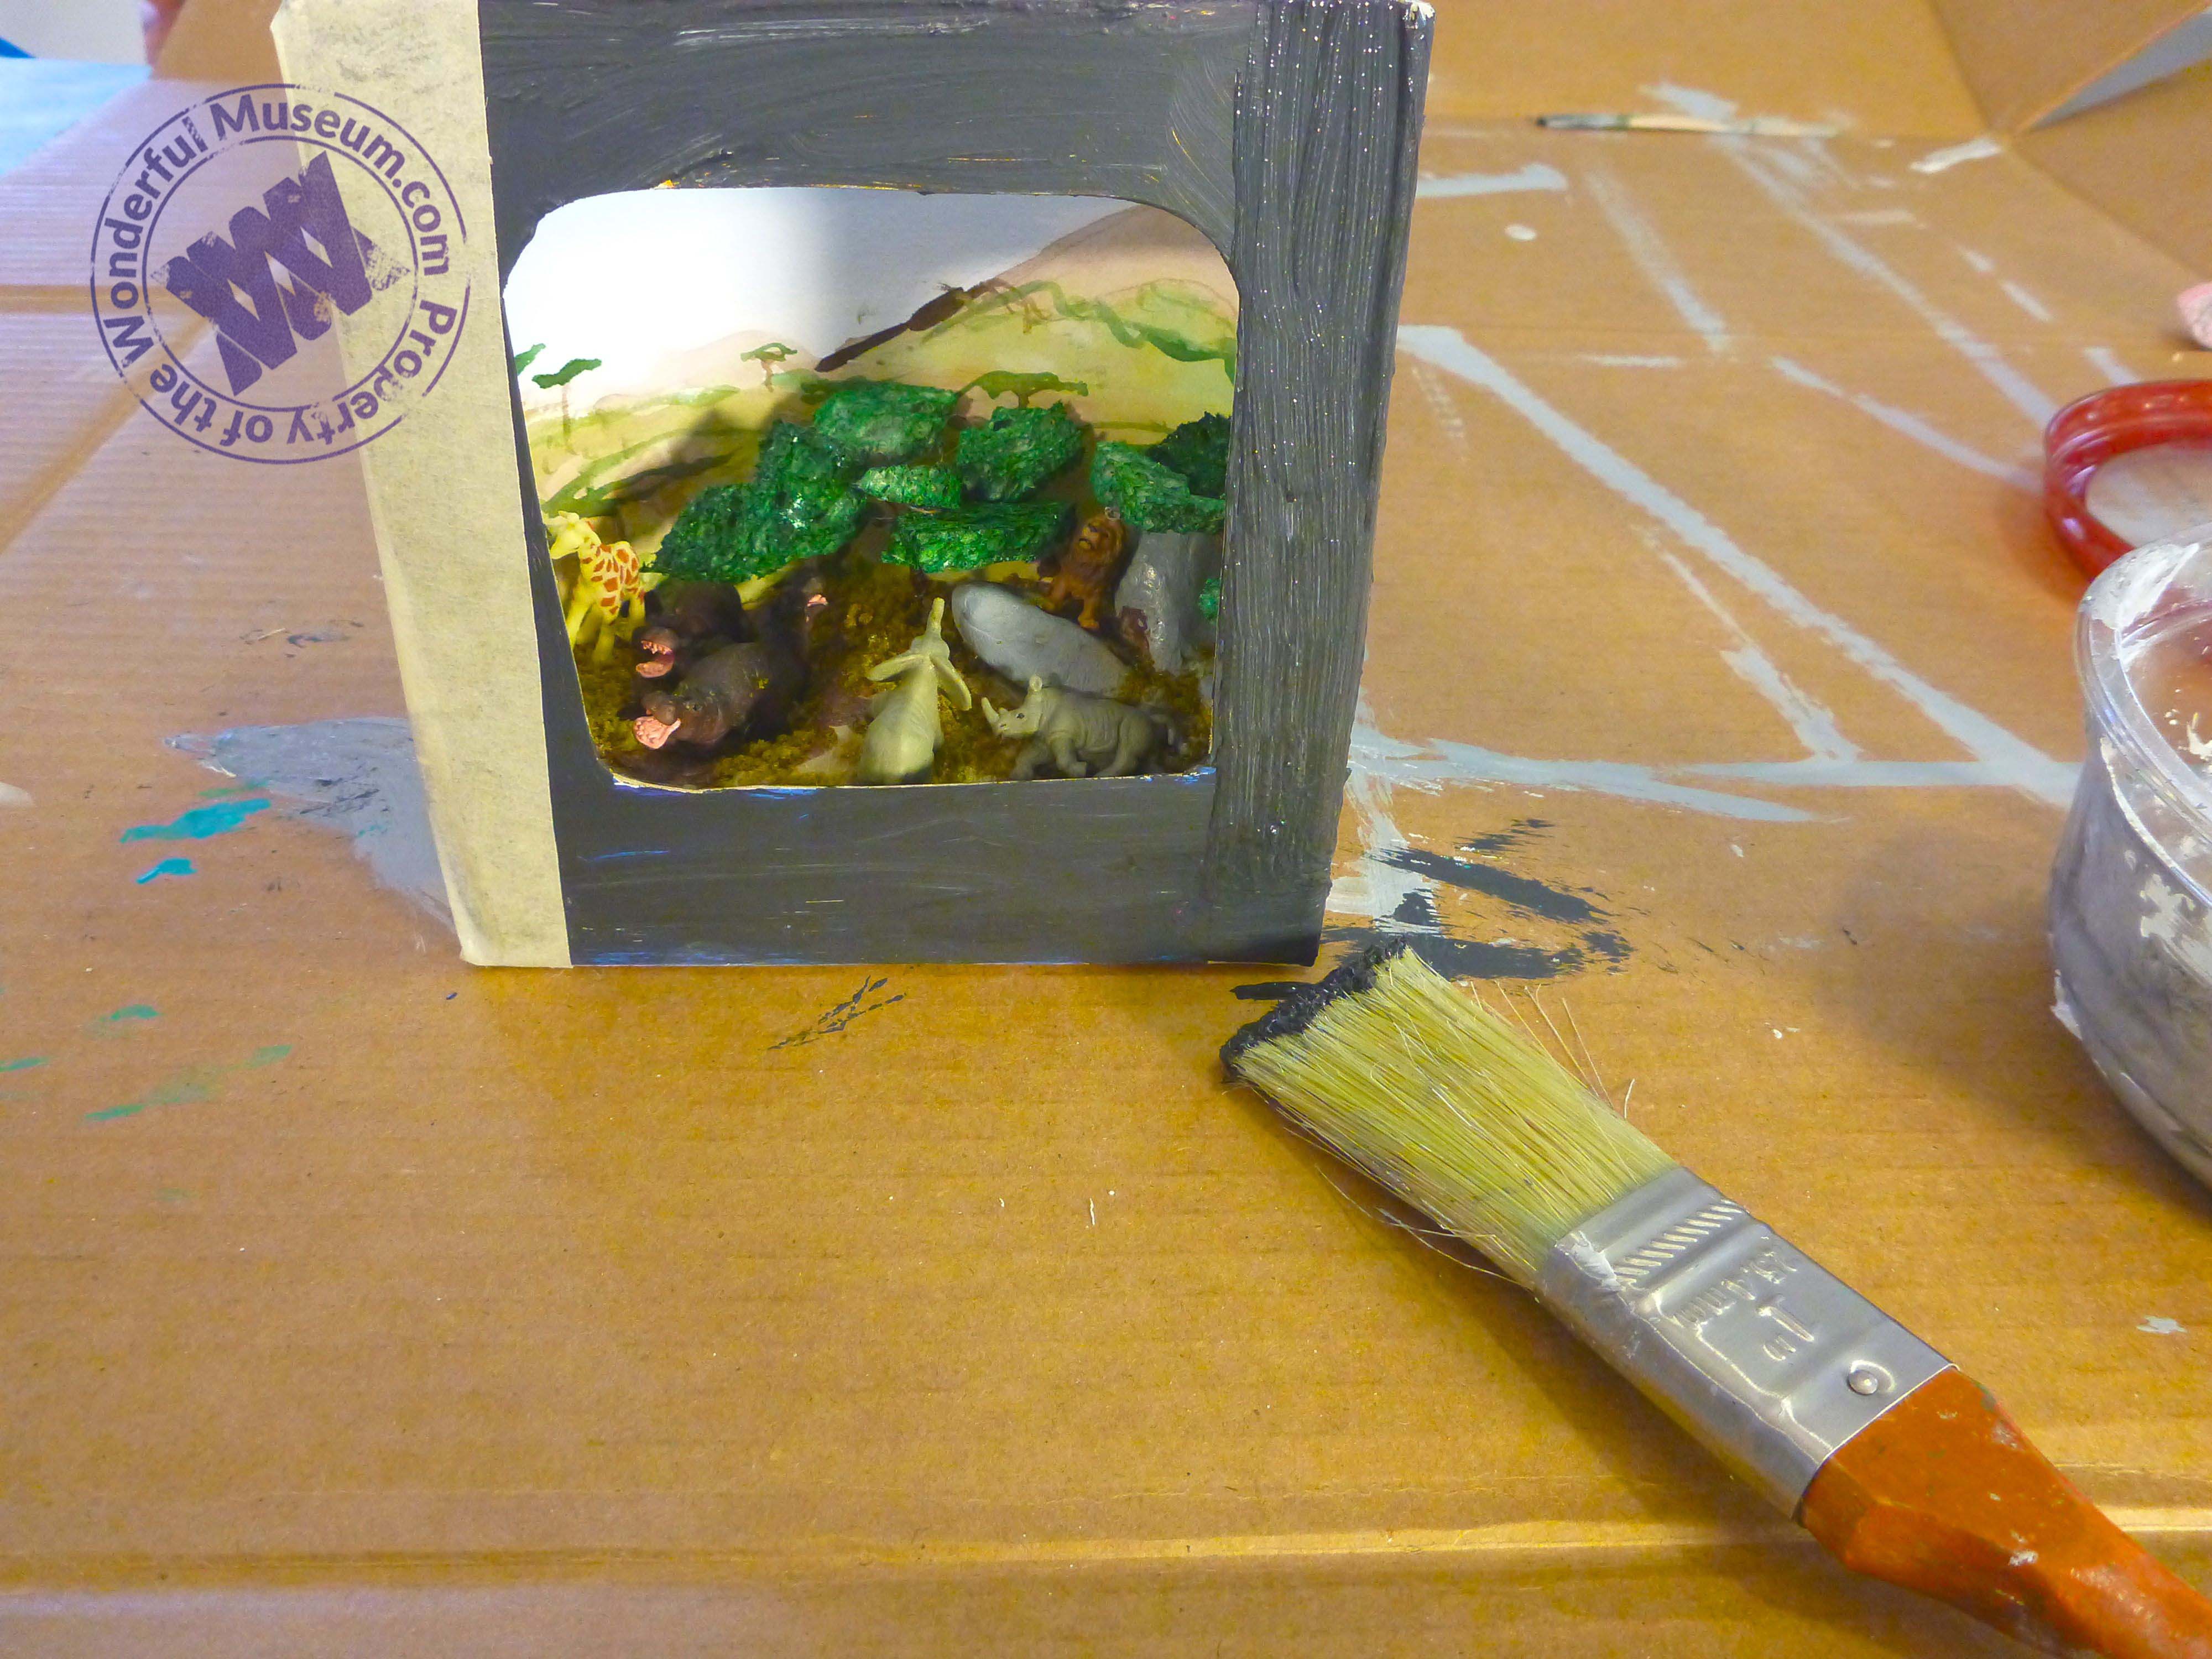
Once you have your scene in place just how you want it. Fold up the front flap of your box. Make sure you cut a little window in the flap before you fold it up and tape the box closed. Paint the front of the box and you are all done.
It is a good idea to create dioramas of several different habitats so that you can compare and contrast different biomes. I made another grassland habitat diorama from North America. How does our prairie compare to the African savanna?